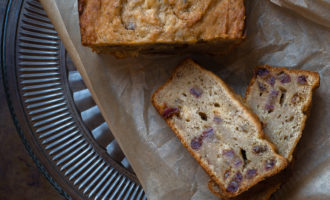
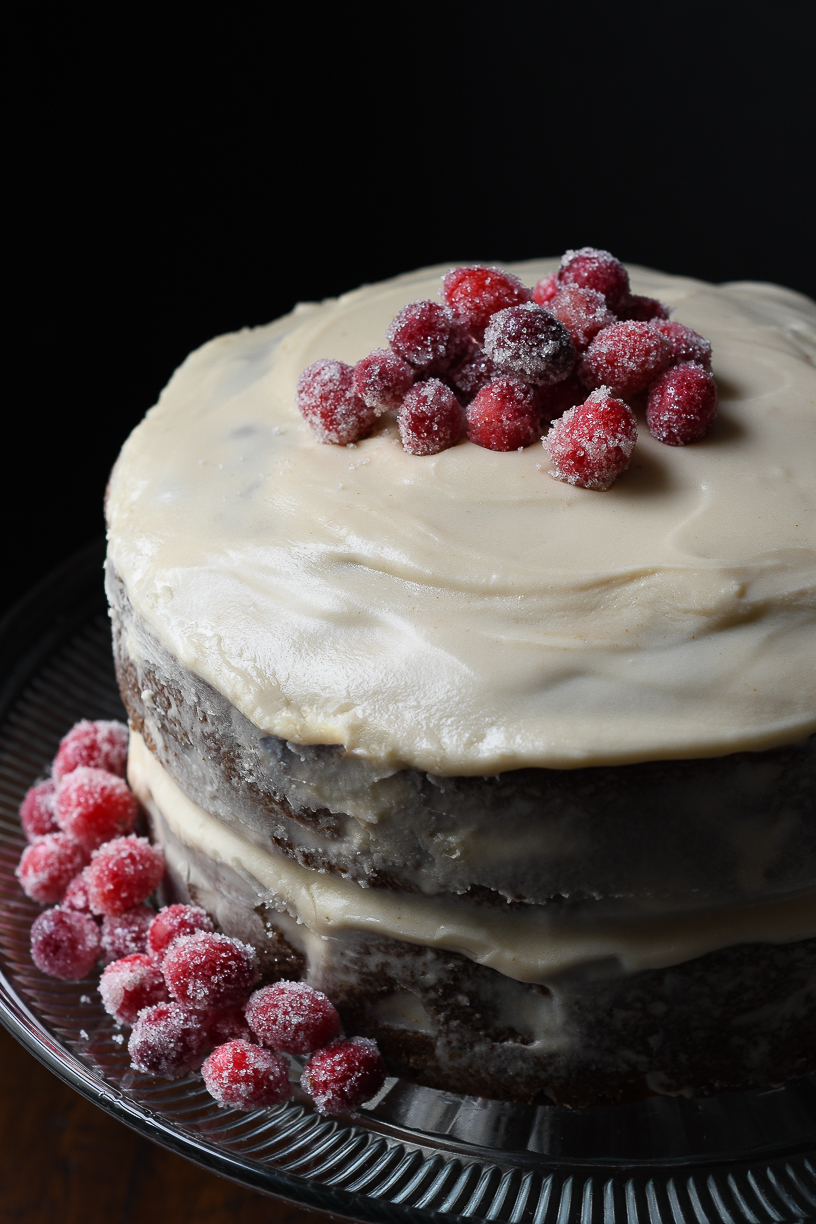
Spiced Apple Cake
You know those things you find yourself always going back to…? That dish at your favorite restaurant. That old, snuggly sweater. You go back because it’s good. You wear it because it’s comforting. It’s “tried and true.” That’s this cake. When I want a cake with “nailed it” results every time, I make this one. Well, also because it’s chock full of apple chunks, and so that’s healthy… And, if you read my Apple Slab Pie post, you know I eat desserts for breakfast. Only certain desserts, like this one! I’m not a savage…
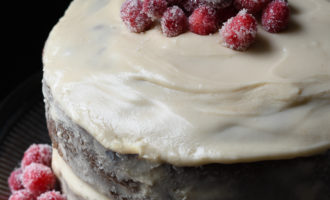
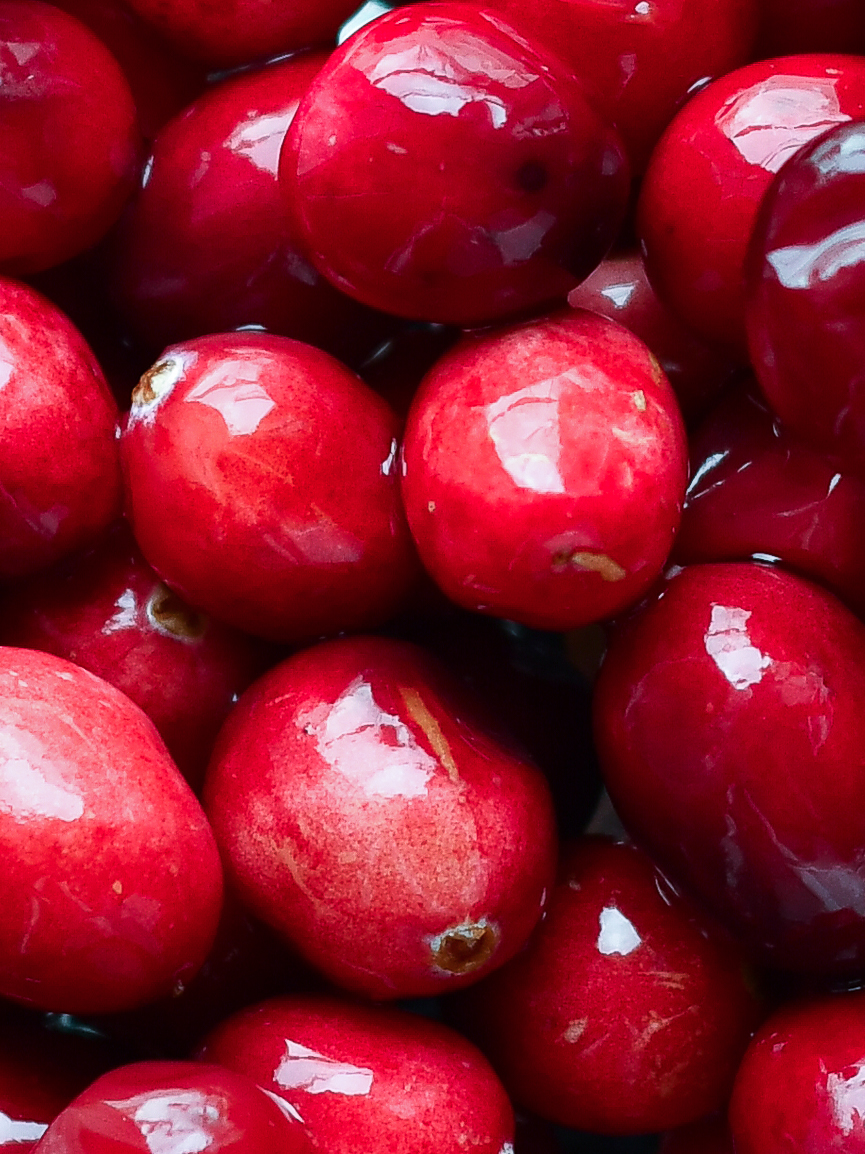
This cake comes together so simply! It’s perfectly moist. You can make this as a bundt, but a layer cake is absolutely delightful for this recipe. Slather some apple butter between the layers and top with sugared cranberries. You have just found a little slice of heaven.
Check out how easy this cake comes together in my video:
The sugared cranberries are very easy to make, but you’ll want to prepare the cranberries in the simple sugar syrup the day before you need them. Sugared cranberries pair perfectly with this spiced apple cake. They’re festive and fun for the holidays, and you’ll love the sweet-tart *pop* of the cranberry through the crunchy sugar coating when you bite into one.
I made this cake for a brunch with my dear friends before we walked to the Old Town Alexandria Scottish Christmas Parade and it was a hit! This cake is a perfect fit during the holidays, but you’ll see… it is fitting for any time of year and should be eaten at any time of day!
This cake was inspired by the Dishing Up Virginia cookbook. It’s a fantastic cookbook that focuses on regional cooking in Virginia.
Spiced Apple Cake

This spiced apple cake is a must for your holiday menu! Chunks of apples, raisins, spices...and it's the most perfectly moist cake ever!
Ingredients
- Spiced Apple Cake
- 3 cups all-purpose flour
- 2 cups sugar
- 2 teaspoons baking soda
- 2 teaspoons ground cinnamon
- 1 1/2 teaspoons allspice
- 1 teaspoon salt
- 2 eggs
- 1/2 cup applesauce
- 1/2 cup grape seed (or vegetable) oil
- 4 cups peeled, finely chopped apples (baking apples are best)
- 1/2 cup golden raisins
- 1/2 cup chopped pecans (or walnuts)
- 2 tablespoons fresh lemon juice
- Glaze
- 2 cups confectioners sugar
- 1 teaspoon vanilla extract
- 4-6 tablespoons heavy cream
- Sugared Cranberries
- 2 cups fresh cranberries
- 1/2 cup water
- 1/2 cup sugar (for the simple syrup)
- 1 cup sugar for coating cranberries (+ 1/2 cup of superfine sugar for final coating, optional)
Instructions
Sugared Cranberries (make the day before you need them)
In a small pot, heat the water and 1/2 cup of sugar until the mixture comes to a simmer and the sugar is dissolved.
Let the water / sugar mixture cool just a bit and then add the cranberries.
Note: if the simple syrup is too hot, the cranberries will pop. You don't want this. You can test out the heat by putting a few cranberries in the syrup to ensure they don't pop. When it has cooled just enough, add the cranberries to the simple syrup.
Allow the cranberries to soak in the simple syrup overnight (you can soak them for at least 1 hour, but overnight is best).
After the cranberries have soaked, strain them (keep the liquid...you now have a cranberry simple syrup!) and place the cranberries on a wire rack covered with parchment paper. Let the cranberries dry out for at least 1 hour.
Place 1 cup of sugar on a plate and roll the cranberries in the sugar to coat them. You can also place superfine sugar on another plate and roll the sugar-coated cranberries in the superfine sugar. It gives the cranberries that extra 'snowy' look!
Use that same day for garnish or as a fun addition to your appetizer spread. They will keep for a couple days in the refrigerator, but they get 'weepy' pretty quick-- so plan to use them the same day you roll them in sugar.
Spiced Apple Cake
Preheat the oven to 350 degrees and coat two 8-inch cake pans or a bundt cake pan in butter or cooking spray.
Whisk the flour, sugar, baking soda, cinnamon, allspice, and salt together in a large mixing bowl. Make a well in the center and add the eggs, applesauce, and oil. Stir to combine the wet and dry ingredients.
Fold in the chopped apples, raisins, nuts, and lemon juice. The batter will be stiff. Scrape the batter into the prepared pan(s) and bake 1 hour or until golden brown and a toothpick comes out clean (from the center of the cake).
Cool the cake in the pan for 10 minutes and then invert onto a wire rack to cool completely.
Glaze
While the cake is cooling, make the glaze by mixing the confectioners sugar, vanilla, and 4 tablespoons of the cream in a medium bowl. Add an additional tablespoon of cream until the glaze is smooth. You don't want it to be stiff and you also don't want it to be runny.
If you've made a layer cake, place the bottom layer on your cake plate and spread a filling of your choice on the bottom layer. I've used the glaze (you'll need to make a double batch if you use the glaze), salted caramel, and apple butter as the filling between the cake layers. My personal favorite is the apple butter! Place the top cake layer on top of the filling coated bottom layer. Pour or spoon the glaze over the top of the cooled cake and let it run down so you can lightly glaze the sides of the cake. Top with sugared cranberries. Ta da!
https://www.travelynneats.com/2018/12/16/spiced-apple-cake/
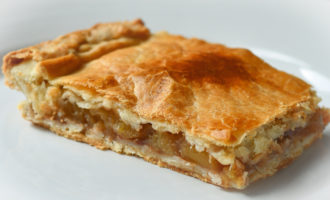
Apple Slab Pie
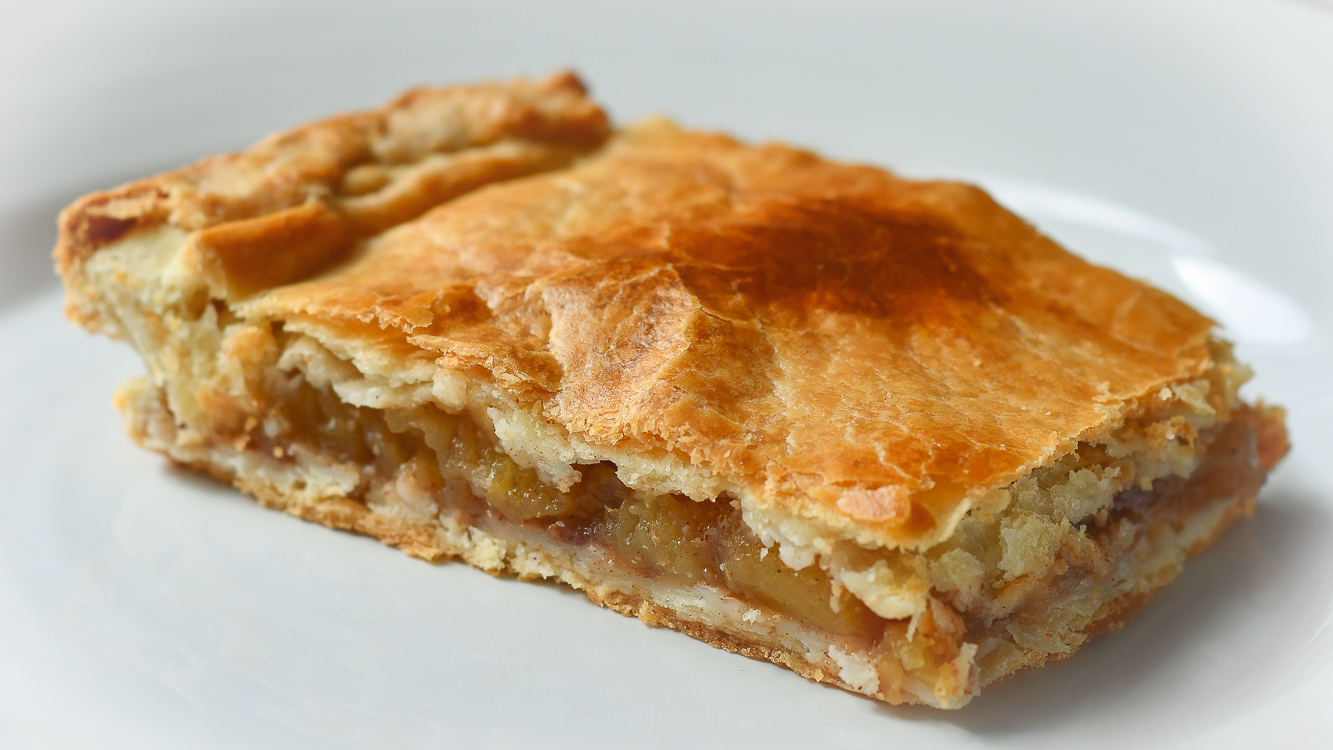
I have been trying to rationalize apple pie as breakfast food for years. I don’t know why I love it for breakfast so much, but I do. Maybe it’s the perfect pairing with coffee. Maybe it’s the excuse to stand at the refrigerator and spray canned whipped cream in my mouth first thing in the morning. I don’t know what it is, but I love apple pie in the morning. This year, I took a different approach to my post-apple picking pie making: the slab pie. With my favorite crust recipe and some inspiration from Smitten Kitchen, I was eager to test the slab pie ratio of crust to apples. I loved it and something else happened– the “apple pie for breakfast dilemma” was over. The slab pie was invented to eliminate the guilt of pie for breakfast. Think: healthy pop tart. You’re welcome. 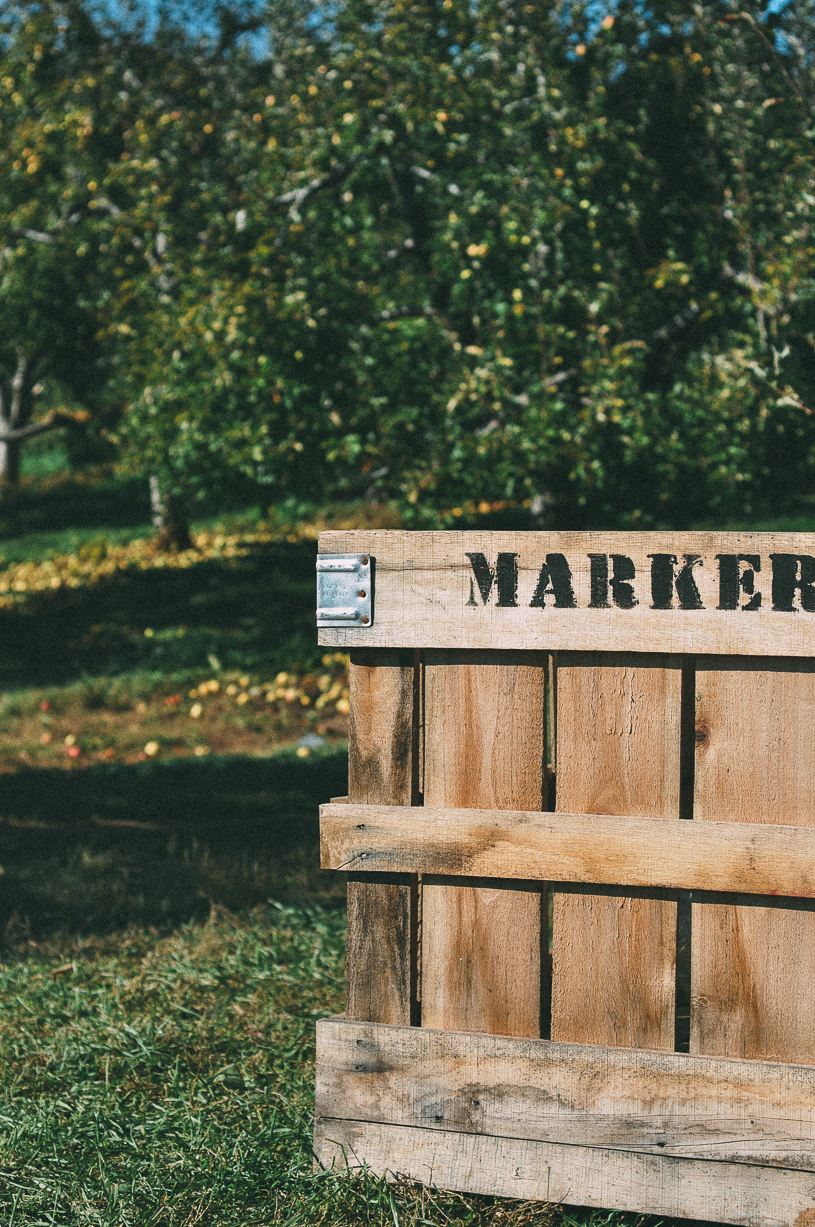
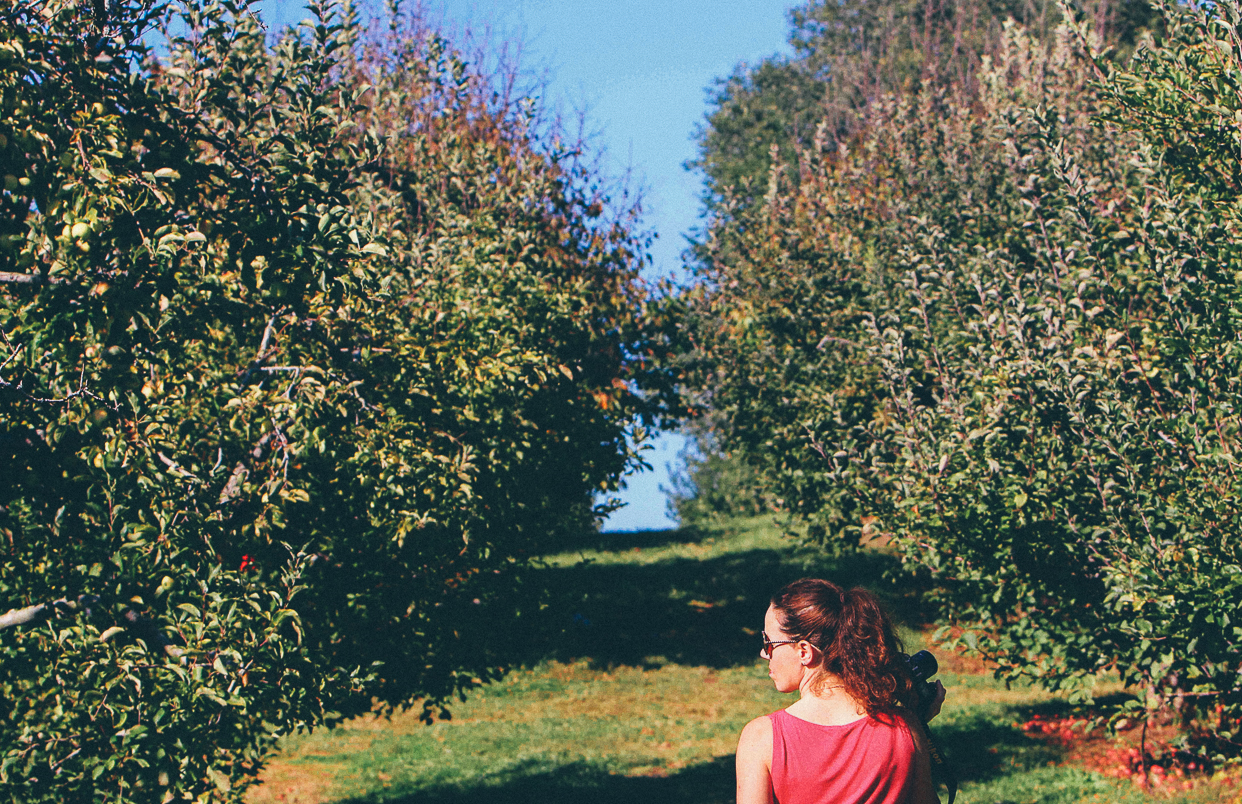
I look forward to the annual trek to the Virginia countryside to pick apples each fall. Stribling Orchard has become one of my favorites. Picking them off the tree, all the varieties, unwaxed, imperfect apples. I love them. I prefer Stayman apples for apple pie, which they have plenty of at Stribling. This year, I added some Arkansas Blacks to my pie. My friend, Lisa, has been talking about Arkansas Black apples for quite some time. Arkansas Black apples date back to 1870 and are native to Arkansas and Missouri; they are a variety of the Winesap.
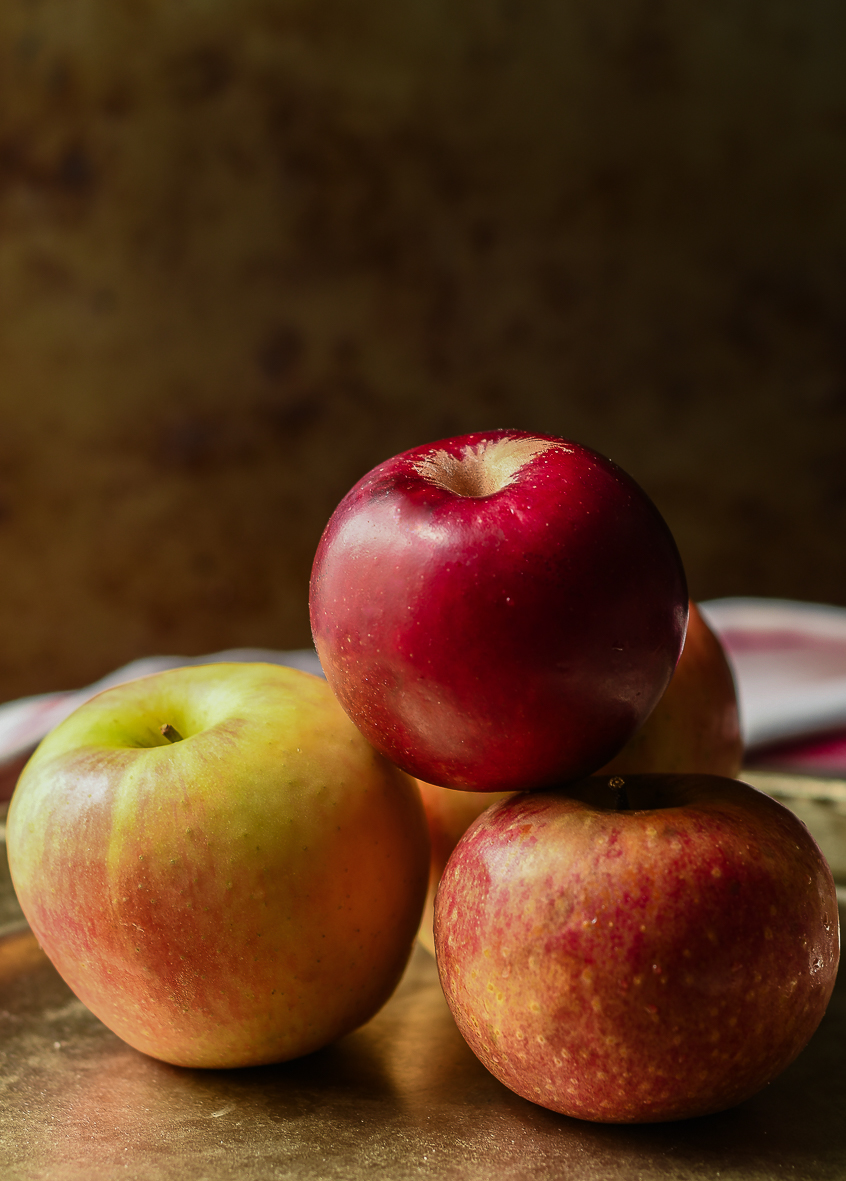
When I met with Lisa for dinner recently, she handed me a big ‘ole bag of Southern treats (just thinking about it makes me all “bless her sweet Southern heart”). The treats included Arkansas Black apples; Pure Sorghum Molasses (because I once blurted out “what the hell is sorghum?” when she described what she had placed on her buttered biscuit); Mountain Comb Honey; and Sweet Red Pepper Jelly. Arkansas Black apples (the top apple in the picture below) are medium size, dark brilliant red, and the flesh has a slight honey flavor. They’re beautiful. I felt like I put a little history and some Southern love in my apple slab pie. Bless your sweet Southern heart, Lisa!
Lisa is an incredibly talented person. Accomplished professional, emergency responder in New York City on 9/11, published poet. There are lifetimes of experience in this one amazing person. If you’re lucky enough to dig into her story, you’ll find it slathered with Southern charm, poured over with passion, infused with intellect, and sprinkled with wit. She’s a deep, intriguing soul. Here is a taste of her poetry.
Penitence Enough
If I thought it was penitence enough
for turning my back,
for this fraudulence I wear
like a pond film over my skin,
I’d return home,
and lay deep
in that Old Dominion soil.
I’d pull the hollyhocks close,
sprout pennyroyal – pungent mint
and purple bloom – from my teeth,
my eyes full of nothing
but the backs of Blue Ridge steeps,
ears tipped with corn tassels
and calamus root and nothing
but the roll of the Shenandoah,
the ring of a banjo carried down
on mountain wind.
I would stand still and long
as August heat
till the kudzu took me over,
wound itself through me,
anchored me to that land
I can still see under my nails
after months of scrubbing.
I’d press my face to the cool damp
of the cannery walls,
my knees against the porch boards.
I’d open veins and spill
against the sycamore roots,
give myself over,
give myself back,
and lay me down
in that red Virginia clay –
if I thought it would have me.
~ Lisa J. Parker
Apple Slab Pie

Ingredients
- Crust:
- 4 cups all purpose flour
- 1 3/4 cups unsalted butter
- 1 tablespoon sugar
- 2 teaspoons salt
- 1 tablespoon apple cider vinegar
- 1 egg
- 1/2 cup cold water
- Filling:
- Approximately 4 pounds apples (peeled, cored, chopped into 1/2-inch chunks; about 8 cups)
- 1/2 lemon
- 2/3 cup sugar (you can add up to 3/4 cup sugar if you like sweeter pie)
- 3 tablespoons cornstarch
- 1 teaspoon ground cinnamon
- 1/4 teaspoon ground nutmeg
- 1/4 teaspoon ground allspice
- 1/4 teaspoon ground ginger
- 1/8 teaspoon cayenne pepper
- 1/8 teaspoon table salt
- 1 egg for the egg wash
Instructions
Crust:
In a large mixing bowl, mix the flour, 1 tablespoon of sugar, salt, and cut in cold butter until the butter is pea sized or smaller and the butter/flour mixture is crumb-like. I use a hand-held pastry blender to cut in the butter. In a small bowl, whisk the vinegar, egg and cold water. Add this liquid to the flour mixture and, with your hands, mold the dough into a ball. Divide the dough in half (make one slightly larger and use that for the bottom crust). Cover the dough with plastic wrap and chill for at least 30 minutes. The dough can be made in advance and refrigerated for 3 days. If you make it ahead, take it out of the refrigerator 15 minutes before you roll it out.
Heat the oven to 375 degrees and line the bottom of a 10 x 15 x 1-inch baking sheet with parchment paper.
Slab Pie Filling:
In a large bowl, toss the cut apples with lemon juice. Then, mix in the sugar, cornstarch, cinnamon, nutmeg, allspice, ground ginger, cayenne pepper, and salt and stir to evenly coat the apples.
Assemble:
On a lightly floured surface, roll the larger dough half into an 18 x 13-inch rectangle. Work quickly, keeping the dough as cold as possible and using flour so it doesn’t stick to the counter. Transfer the rolled out dough to the prepared baking sheet; lightly press the dough into the sides and corners of the pan. Some of the dough will drape over the cookie sheet; trim this to 3/4-inch with scissors or a knife.
Pour apple mixture over and spread evenly in the dough-covered pan.
Roll the second and slightly smaller dough half into a 16 x 11-inch rectangle. Drape this over the apple filling and fold the bottom crust overhang over the edge of the top crust and seal them together with your fingers or by pressing with a fork. Cut small slits (vents) on the top piece of dough.
Brush the top dough with an egg wash and bake for 40 - 45 minutes until the crust is golden and the filling is bubbling.
Transfer to a wire rack until just warm (about 30 minutes). Serve with vanilla ice cream, whipped cream or enjoy plain as a hand pie!
This pie will keep at room temperature for 3 days.
Note: This slab pie cuts easily with a pizza cutter.
https://www.travelynneats.com/2018/11/25/apple-slab-pie/Rustic Country Meatballs
I needed a recharge day: full-on introvert, disconnect from the Interwebs, please leave a message at the sound of the beep. Beep. It was absolutely beautiful outside yesterday. Blue skies, cotton-puff clouds, crisp breeze, leaves blowing through the air and floating to the ground like an Autumn snowfall. I wanted to be out in it. Time for a nature recharge.
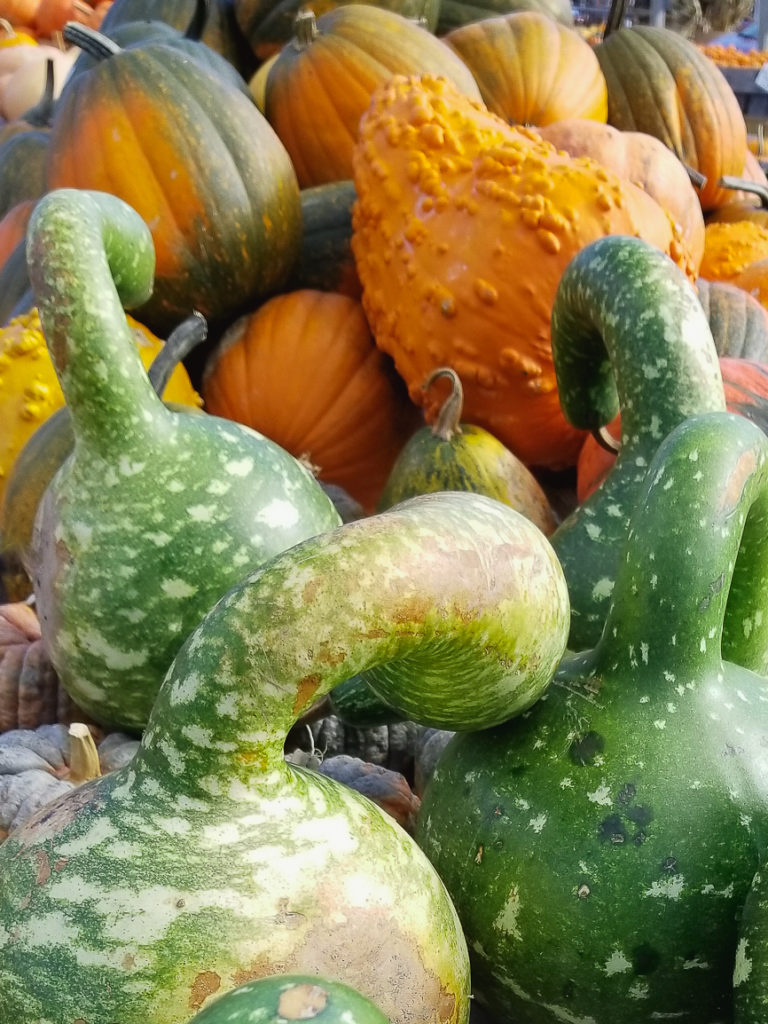
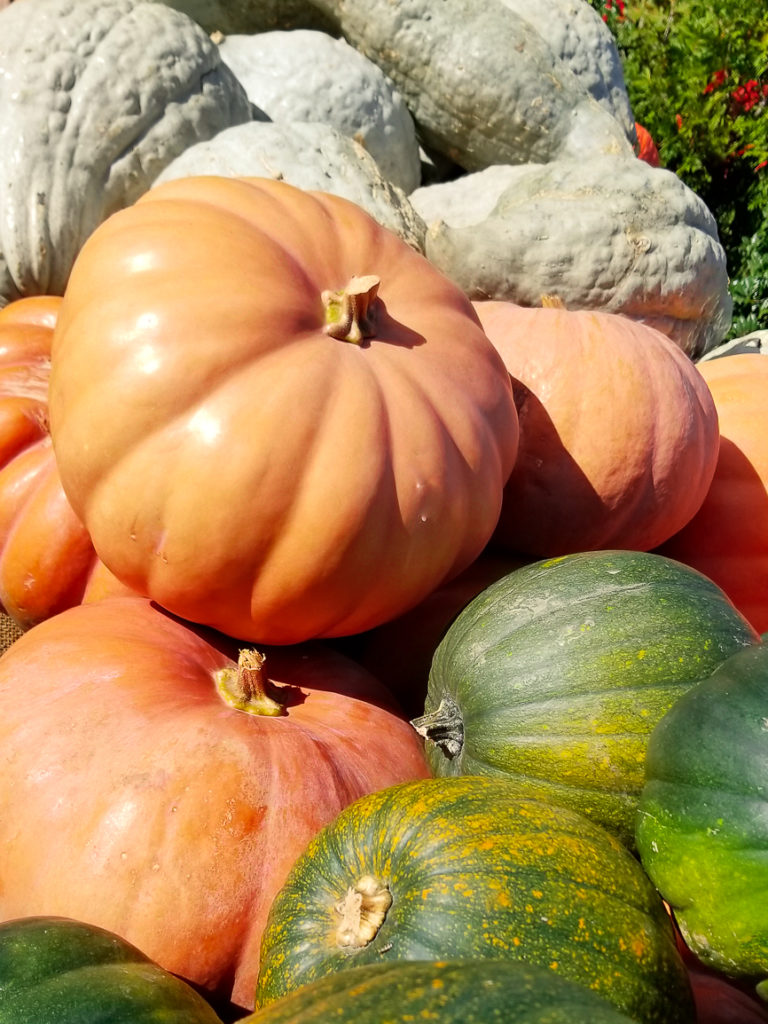
Since I feel like I have some catching up to do at the farmer’s market, my first stop was the Old Town Alexandria farmer’s market. It’s possible that I get unusually excited about the piles and piles of different apples and squash at the market this time of year. But, I really let out a ‘whoop whoop’ when I got to the Bon Vivant stand (my favorite breakfast spot in Del Rey, Alexandria) and found they were selling beef and chicken from Polyface Farm, located in Swoope, Virginia.
My friend, Stosh, tipped me off to Polyface Farm when my daydream of owning my own farm went off mute… More than the farm (that sells meat and eggs in the local area), my friend tipped me off to Joel Salatin, the owner of the farm and author of several books including Folks, This Ain’t Normal; Salad Bar Beef; The Marvelous Pigness of Pigs; and You Can Farm. I picked up a copy of You Can Farm: The Entrepreneur’s Guide to Start & Succeed in a Farming Enterprise because it “targets the wannabes, the folks who actually entertain notions of living, loving and learning on a piece of land.” If I’m going to dream, I might as well have a guide… More about this later… I grabbed 3 pounds of ground, grass-fed beef and went on my way. It was frozen solid, so I knew there was a little more adventure left in my day.
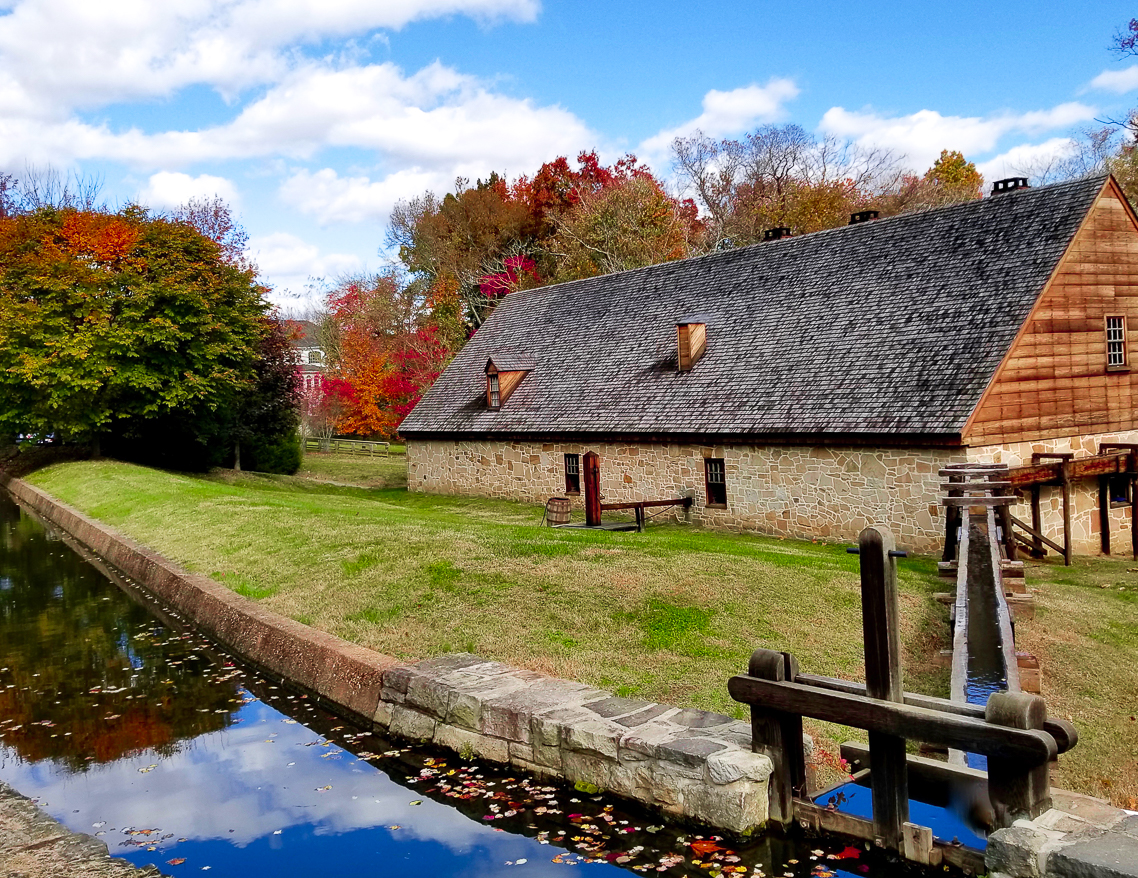
I took off from the market and drove south on the George Washington Memorial Parkway, through George Washington’s Mount Vernon, and then headed west to George Washington’s Grist Mill and Distillery. It was closed for the season, but I wanted to catch the colors and scope things out for a future visit.
From there, I headed north to Lake Accotink in Springfield, Virginia, for a quick walk around the lake.

I’d complete my giant loop by heading east for a stop at Nalls Produce. Nall’s Produce is another favorite. I stocked up on honey nut, delicata and acorn squashes; sweet onions; asian pears; and, of course, three overflowing mums for the front porch. On my way out, I stopped to check on Penny the Pig.
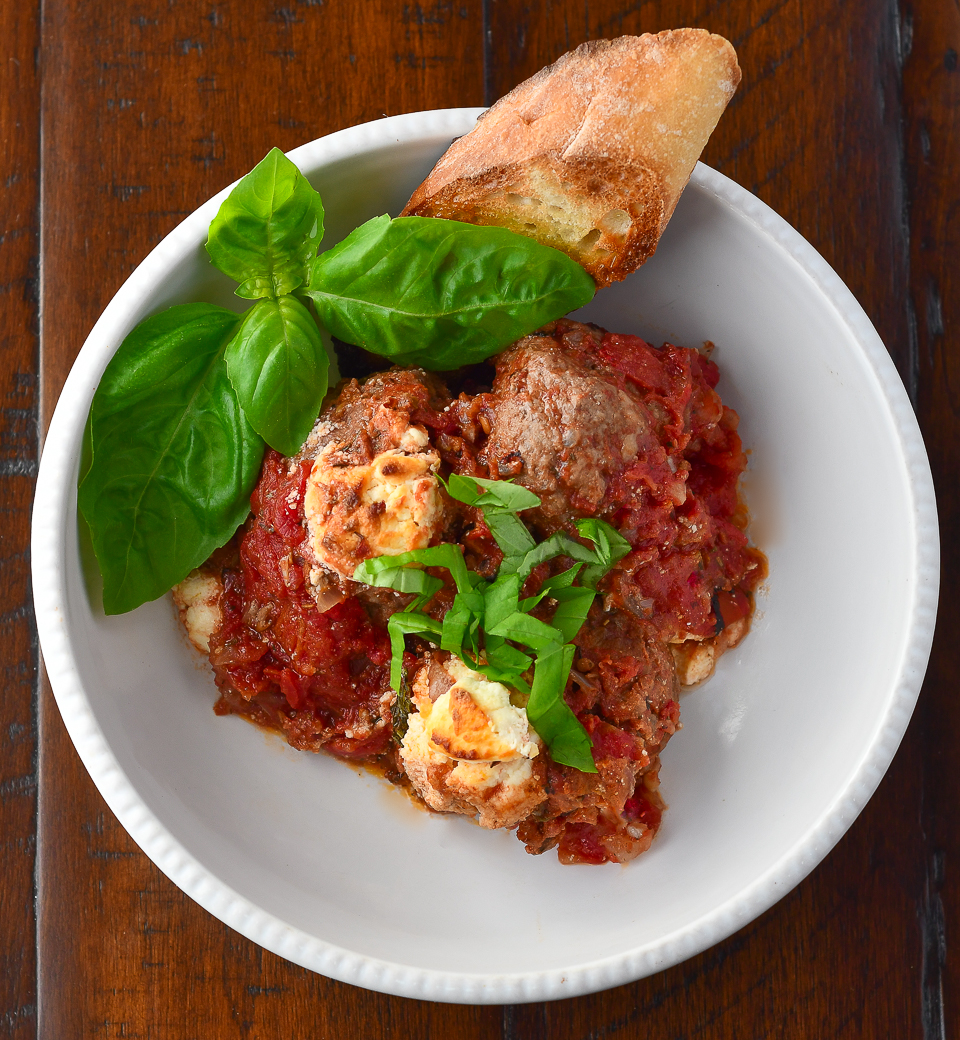
During the drive, I had plenty of time to contemplate big topics in my life. Like dinner. Like meatballs…in sauce…with crusty, toasted french bread plunged into the sauce.
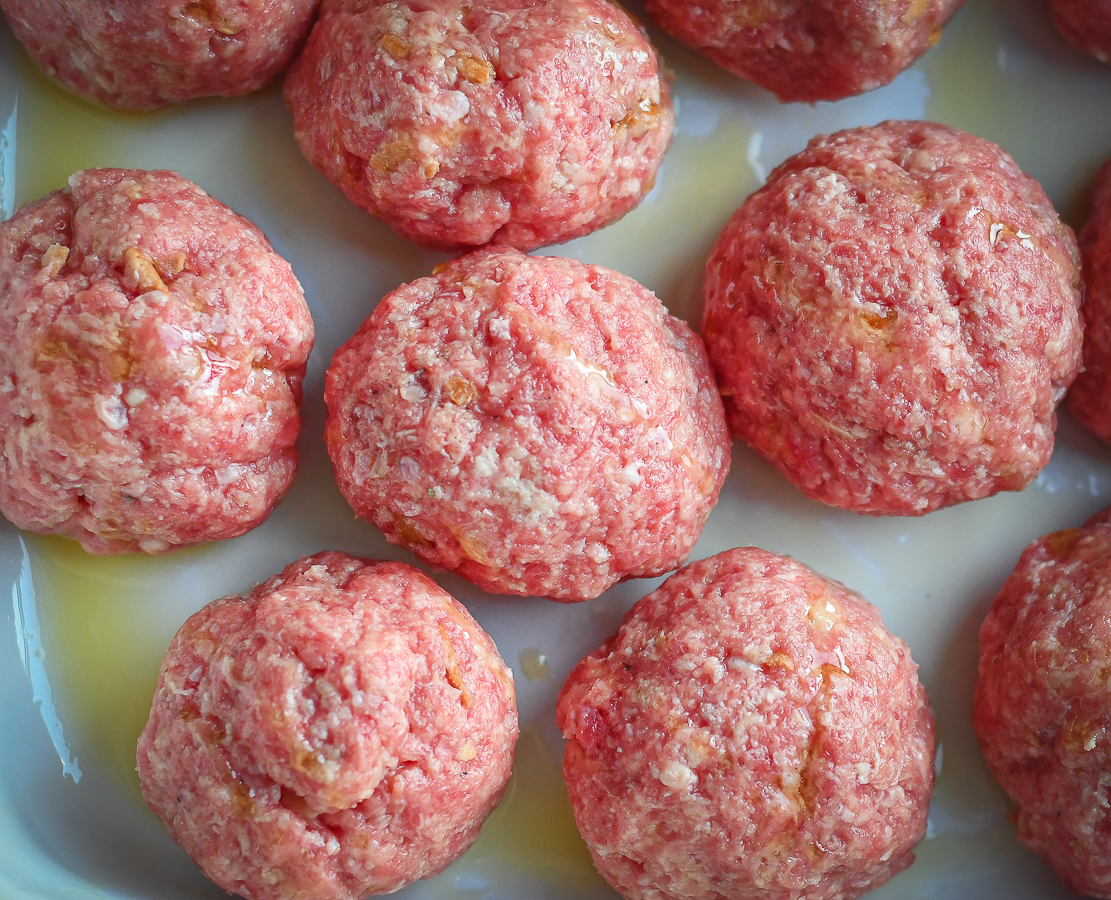
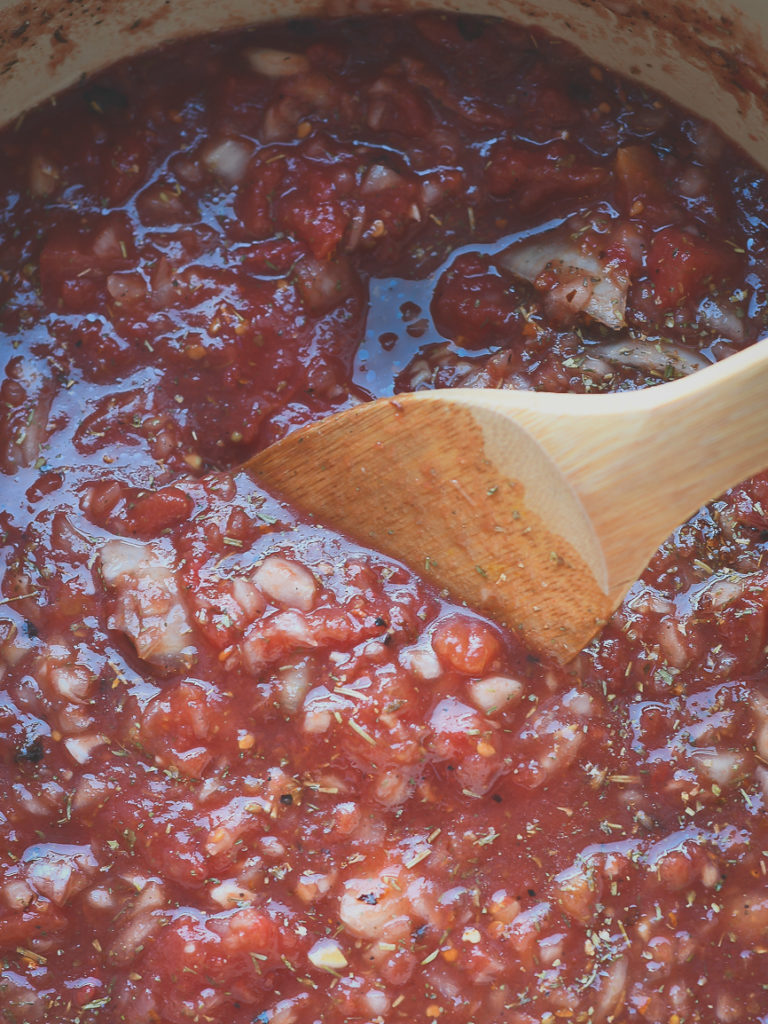

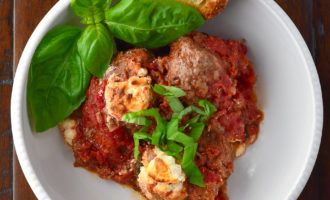
This meatball bake is so easy. The meatballs come together quickly. The sauce isn’t pre-cooked; just some dicing, mixing and pouring over the meatballs after they’ve browned a bit in the oven. The goat cheese and ricotta dollops give a tangy, but smooth creaminess to the dish, and the Herbs de Provence perfectly tie the sauce, cheese and meat together. This recipe makes a healthy serving of meatballs. Make sure your family is hungry, invite some friends over, or get ready for some leftovers (ohhhh…they taste so good the next day too). You can serve the meatballs over a pasta of your choice or simply in a bowl with a side of toasted french bread drizzled with olive oil. Comfort food any way you serve it, and your house will smell divine for hours!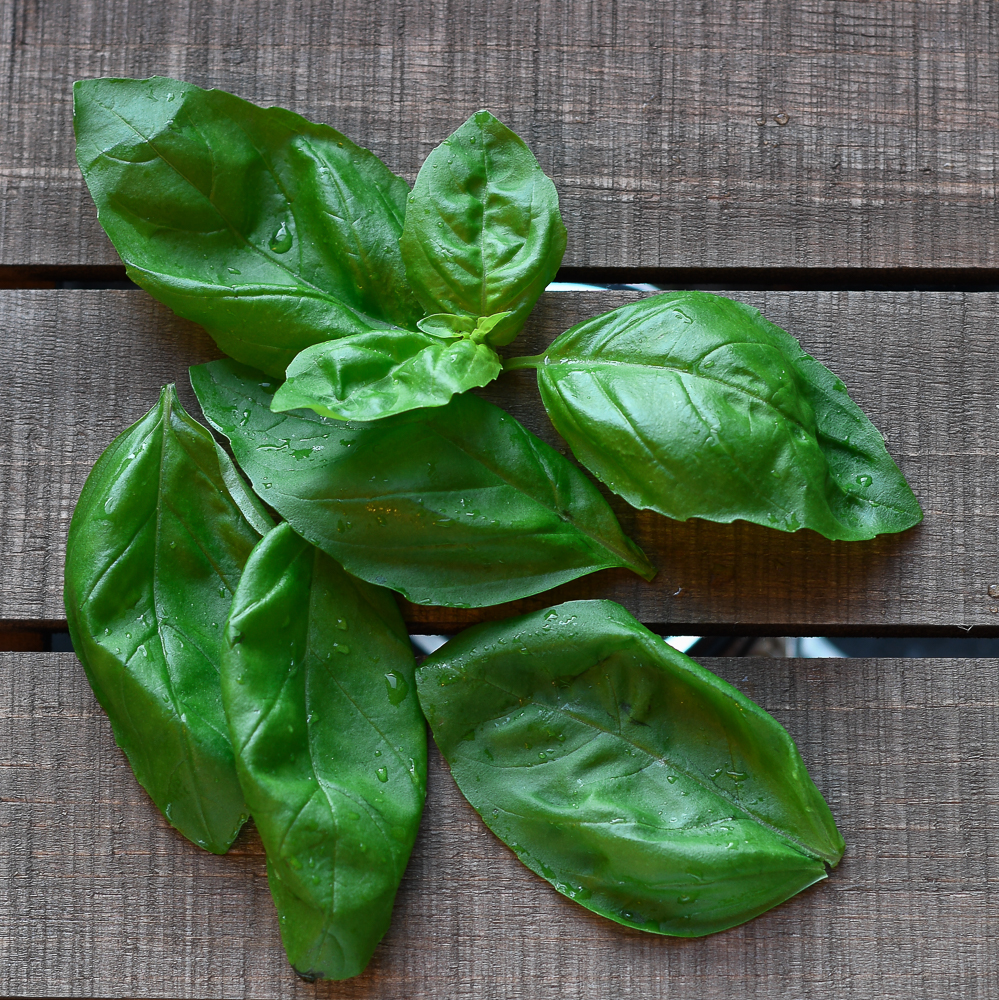
“The energy of the mind is the essence of life.”
~Aristotle

Rustic Country Meatballs

Ingredients
- Extra virgin olive oil
- 2 cups torn french bread
- 2/3 cup whole milk
- 2 pounds ground beef
- 1 large egg
- 1/2 cup red wine
- 1 (28 oz) can whole peeled San Marzano tomatoes
- 1 (14.5 oz) can fire roasted diced tomatoes
- 1/2 cup oil-packed sun dried tomatoes, drained & chopped
- 1 sweet onion, chopped
- 2 garlic cloves, minced
- 2 teaspoons Herbs de Provence
- 1 teaspoon dried oregano
- 1 teaspoon crushed red pepper flakes
- salt and black pepper
- 4 oz goat cheese
- 2/3 cup ricotta cheese
- fresh basil, chiffonade (thinly sliced), for serving
- pasta or toasted french bread drizzled with olive oil, for serving
Instructions
Preheat the oven to 450 degrees. Grease a 9 x 13-inch baking dish with olive oil.
Meatballs:
Place the torn bread in a small bowl. Add the milk and squeeze the bread and milk together with your hands, breaking up the bread into small pieces and helping the milk soak in. Let the bread soak for 5 minutes until all the milk is absorbed in the bread. Place the crumbled, milk-soaked bread into a large bowl.
Add the ground beef and egg to the soaked, crumbled bread and mix it all together with your hands. Roll and form the meat mixture into meatballs (about 2 1/2 tablespoons-- the meat ball should be on the larger side and fill the palm of your hand). This should make about 16-18 meatballs. Place the meatballs in the greased baking dish and bake for 20 minutes, until the meatballs are browned on the outside but not cooked through.
Sauce:
While the meatballs are baking, in a large bowl, add the San Marzano tomatoes and crush them with your hands (go a little slow as the tomatoes will squirt, which is fun but messy). Then add the fire roasted tomatoes, sun dried tomatoes, wine, onion, garlic, Herbs de Provence, oregano, red pepper flakes, and a pinch of salt and black pepper.
After the meatballs have browned, pour the sauce over the meatballs. Cover the baking dish with aluminum foil and bake for 25 minutes until the meatballs have cooked through. Remove the foil and add chunks of goat cheese and dollops of the ricotta throughout the sauce. Return the dish to the oven (uncovered) and bake until the cheese is golden on top, about 15 minutes (check at this point and add 5-10 more minutes, if needed, to brown the cheese).
Serve over pasta or with toasted french bread. Sprinkle with the basil.
Personally, a large bowl of meatballs and sauce with toasted french bread (to sop up the sauce) is my favorite! If serving with french bread, after you remove the meatballs from the oven, leave the oven on. Place diagonal slices of french bread drizzled with olive oil on a baking sheet and cook in the 450 degree oven for 5 minutes (or until lightly toasted).
Enjoy!
https://www.travelynneats.com/2018/11/04/rustic-country-meatballs/Stuffed Squash Blossoms
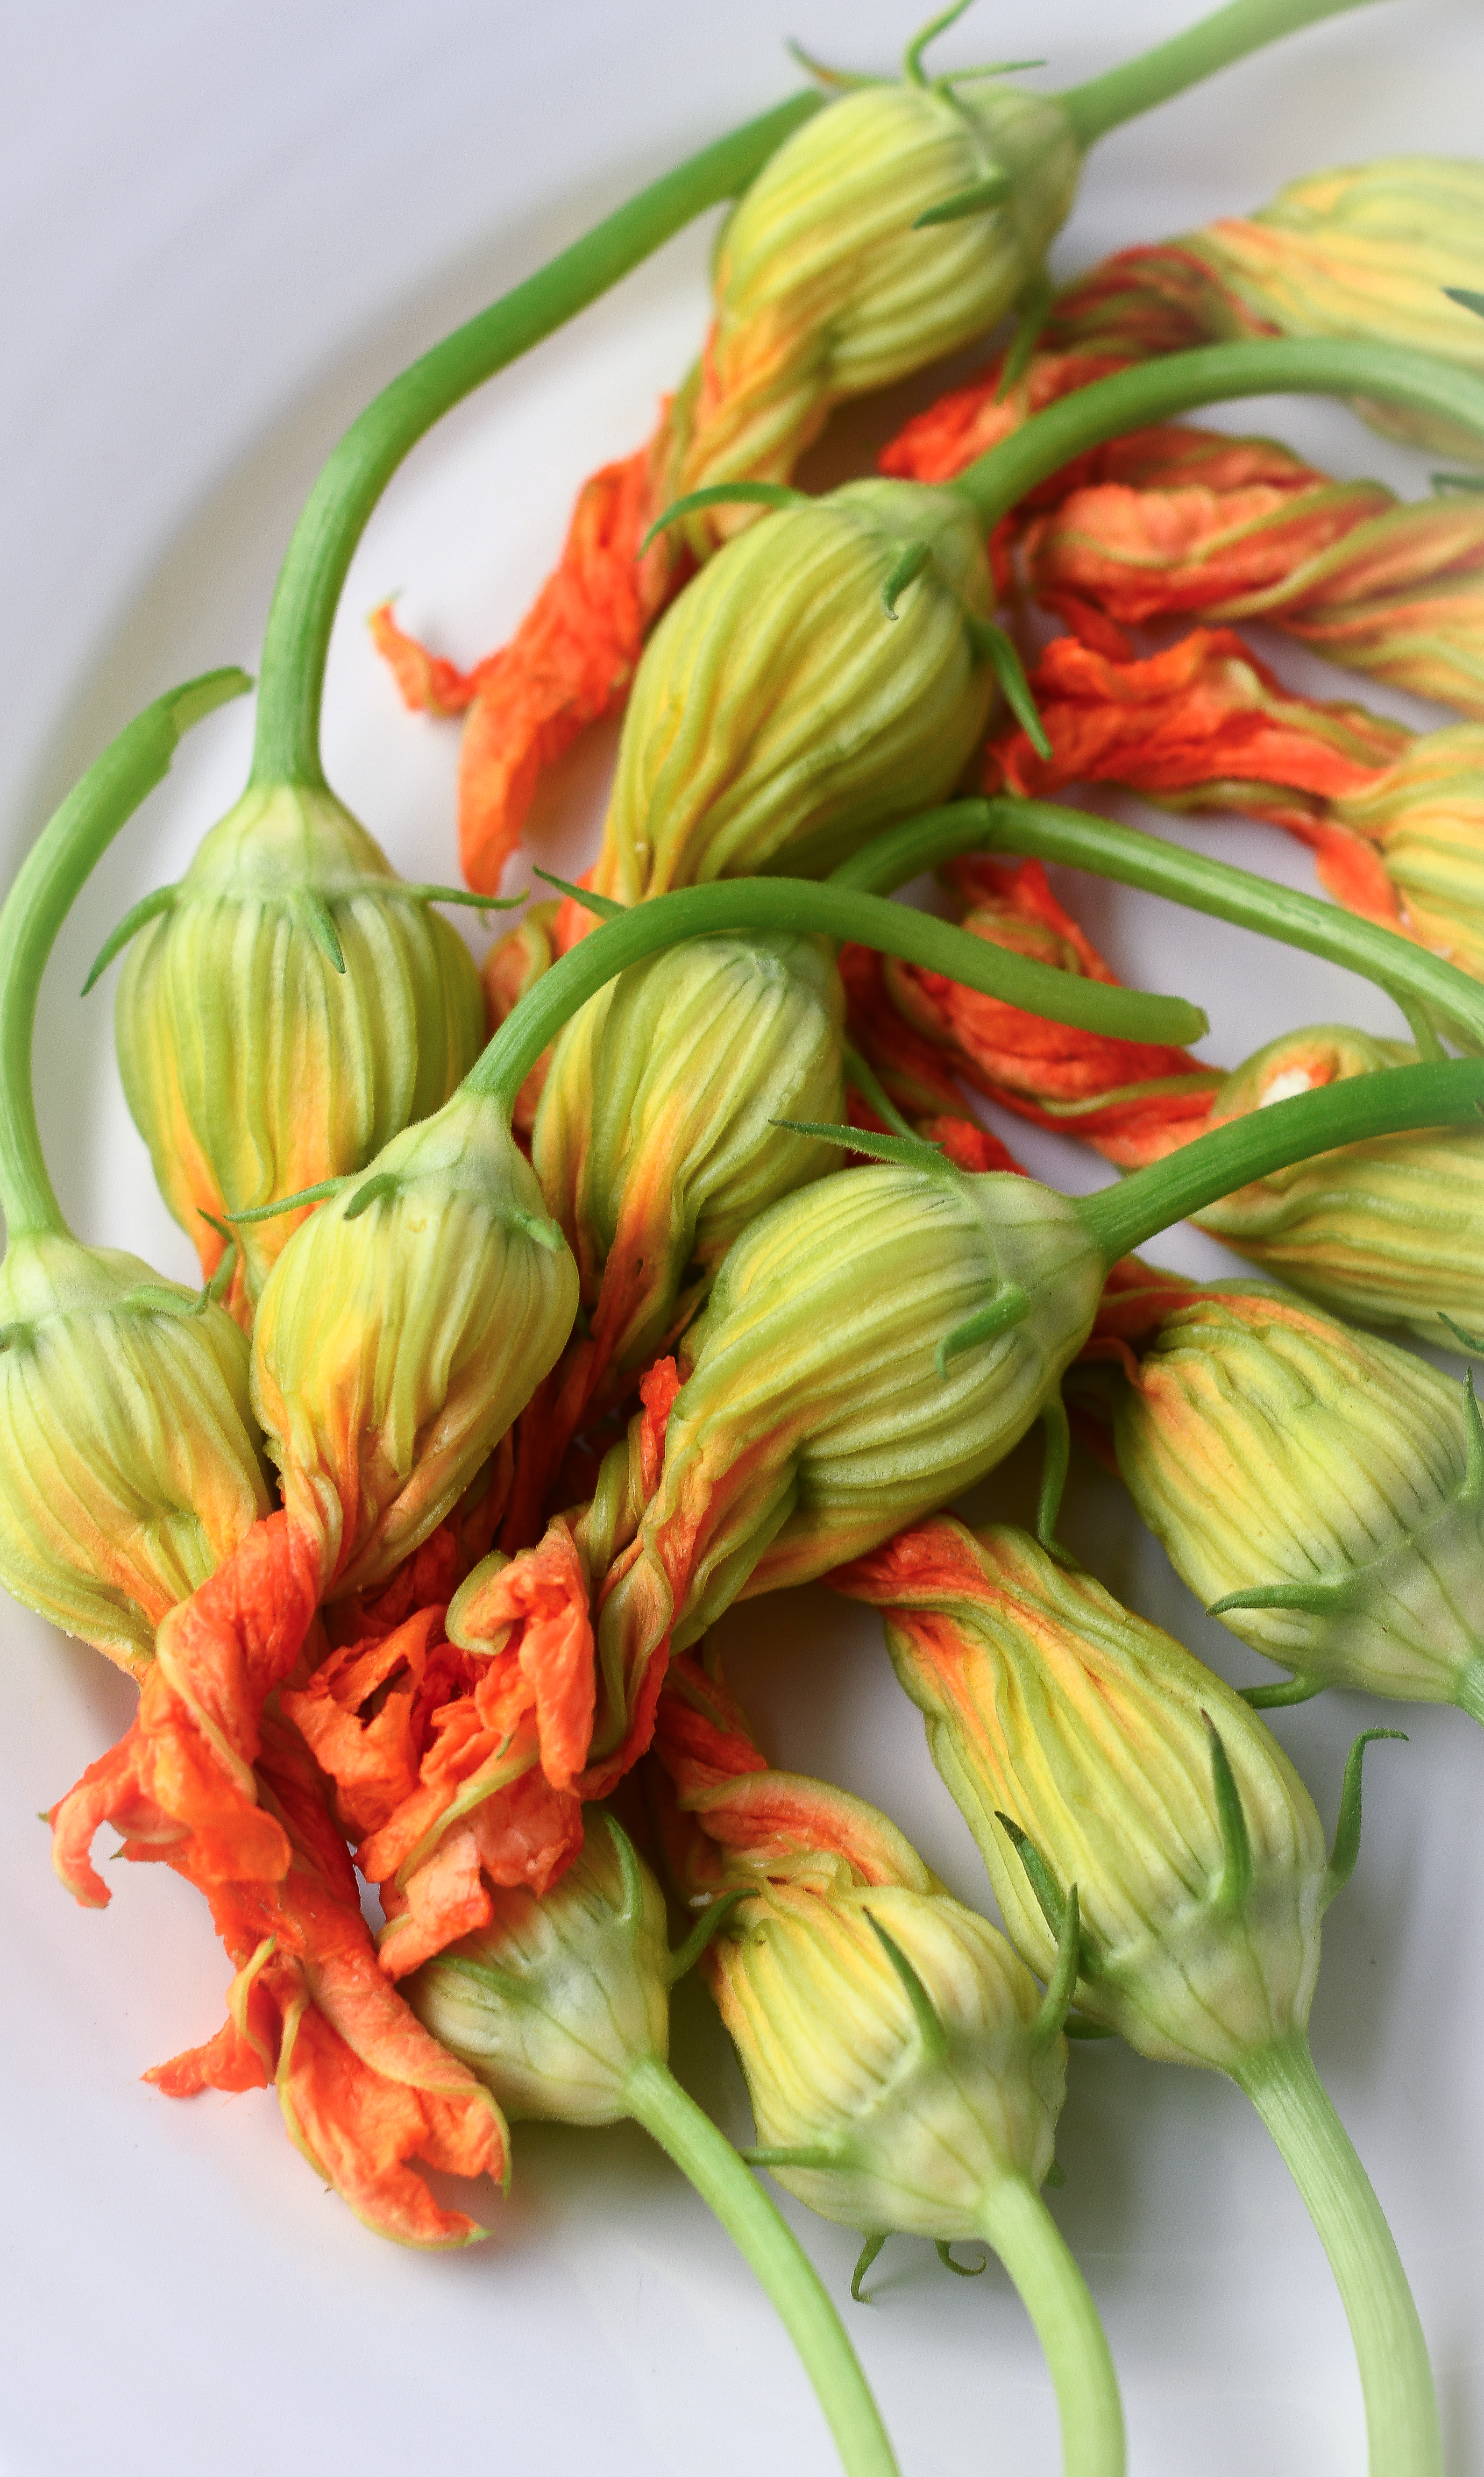
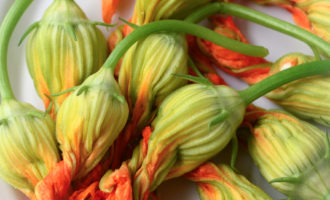
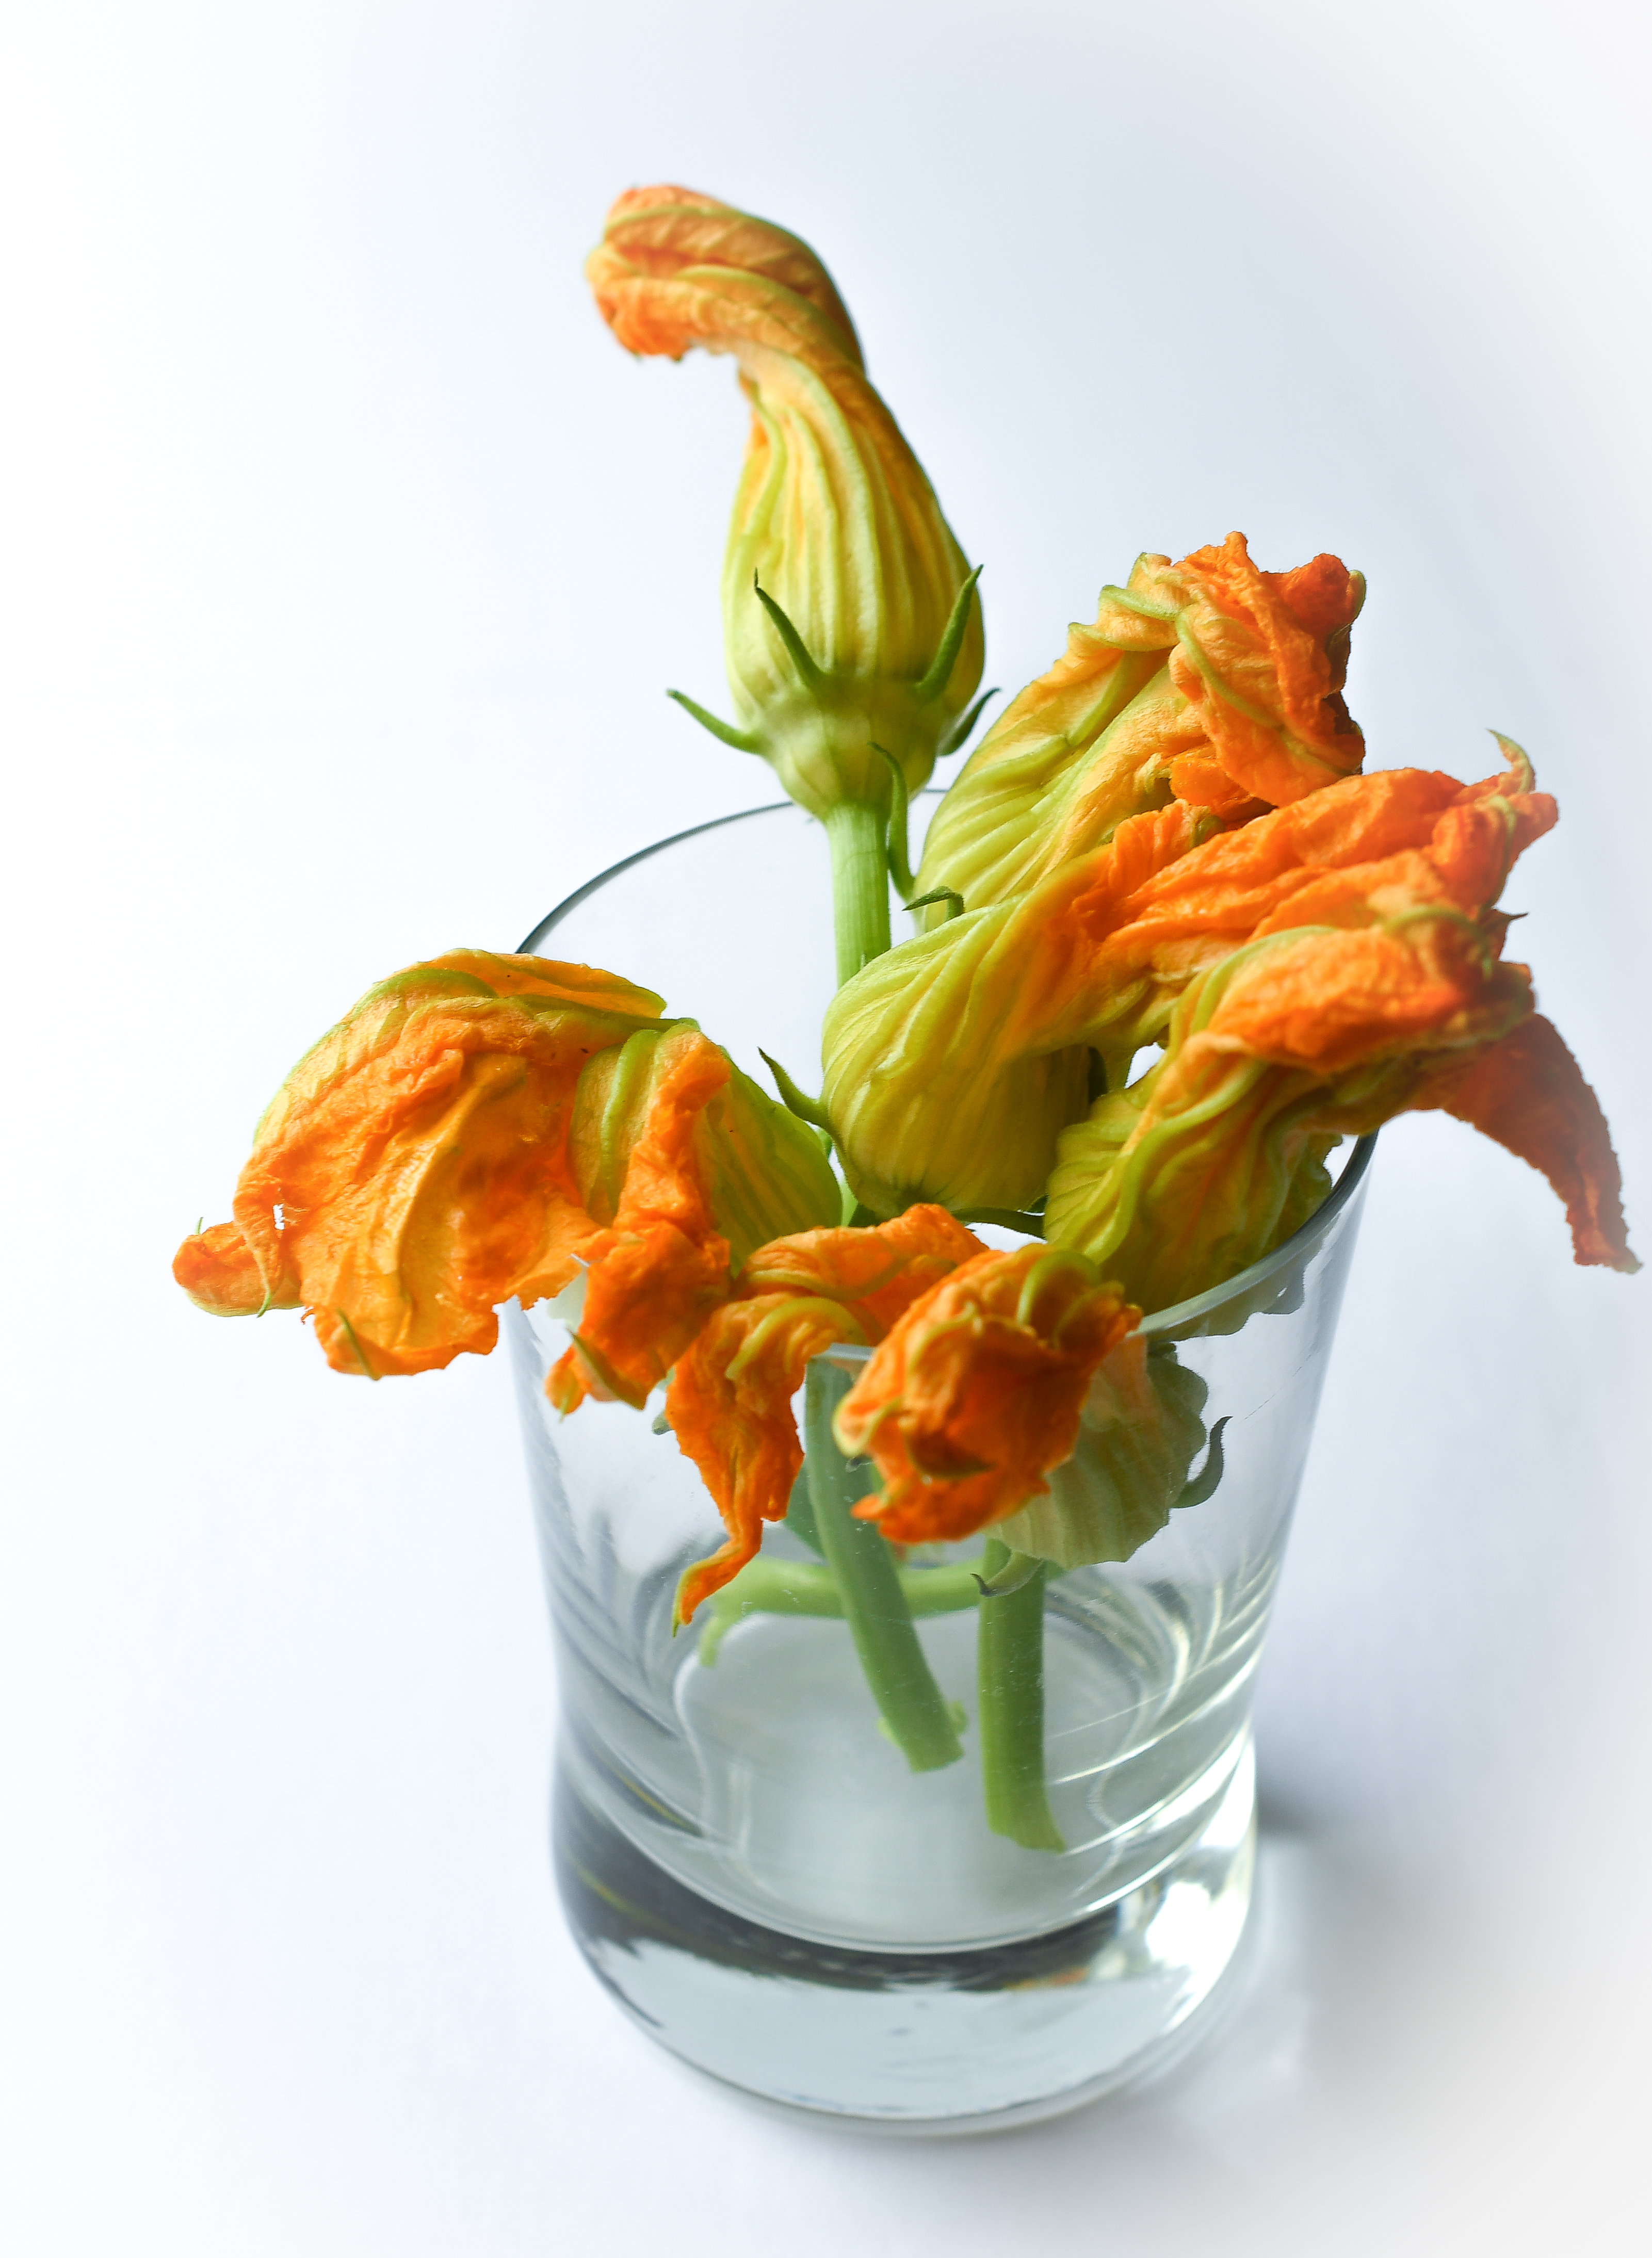
Time can get away from you when you’re not paying attention. There it is. Eighteen months since my last post. Sooo tempting to think of all the excuses “but, I broke my camera” (ah yes, the casualty during a trip to Israel with my mom last April) … “my job is too busy right now” … “I’m distracted with this relationship” … “oh, I’m changing jobs, I’ll just… maybe when I settle in…” And, suddenly, summer was nearing its end and I realized I hadn’t even been to the farmer’s market this year. So, I did one of those Saturday morning-yoga pants-messy bun (no, that sounds cute… this was a post-workout, sweat dripping, hair frizzed out)-kind-of-farmer’s-market-morning. It struck me that morning how much I had missed it. There’s just this feeling at the farmer’s market that I love of connecting to community, to local farmers, to fresh food. There is also something really special about the transition of the market between the seasons. Squash blossoms are one of those treats during the summer to fall transition. Looks like I picked the right time to dive back in.
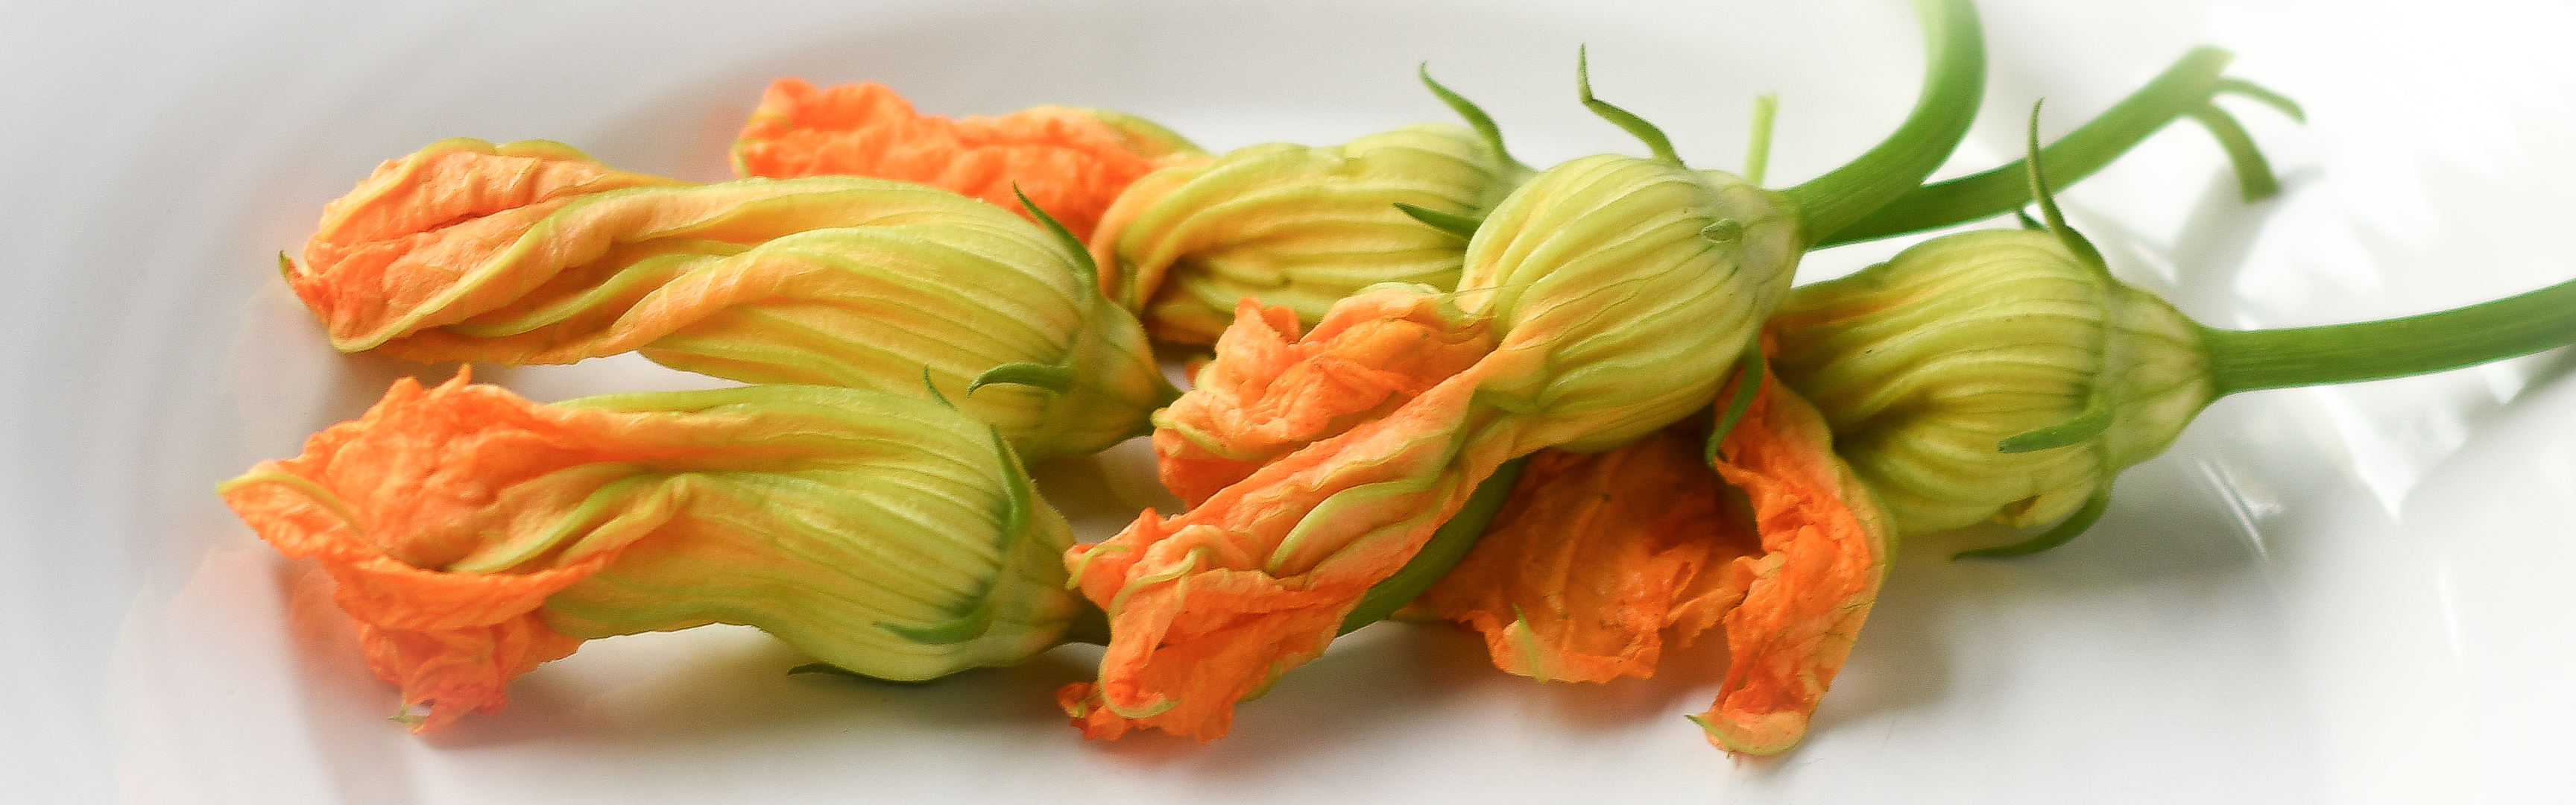
Squash blossoms. So beautiful. So delicate. So ready to be stuffed with ricotta. Yes, holding that fragile flower and wondering how in the world you’ll stuff and fry it without decimating it is a completely valid thought! Don’t be intimidated though; it’s really quite easy. There are a few little tricks. But, I’m telling you–you got this! Stuffed squash blossoms make a beautiful appetizer, they lay perfectly on top of a salad, and talk about an impressive side dish…! My problem was keeping them long enough to “properly” serve these gorgeous buds. My “I’ll try just one” turned into an “oooh, hot hot hot…” breathing out of a mouth full of fried flower cheesy goodness. I ate all of them…right off the paper towel…didn’t even make it to a plate. I’d love to show you the final product, but there are a few things that get rusty after not blogging for over a year (my appetite was not one of them…).
“And suddenly you know: It’s time to start something new and trust the magic of beginnings.”
~ Eckhart Tolle
Stuffed Squash Blossoms

Ingredients
- Squash blossoms:
- 1 cup whole-milk ricotta
- 1 large egg yolk
- 1/4 cup finely cut basil
- 2/3 cup grated parmesan cheese, divided
- 12 to 16 zucchini squash blossoms
- 1/2 cup plus 1 tablespoon all-purpose flour
- 3/4 cup chilled seltzer or club soda
- Approximately 3 cups vegetable oil for frying
- Tomato sauce:
- 1 garlic clove, minced
- 1/4 teaspoon hot red pepper flakes
- 2 tablespoons olive oil
- 28 oz can of San Marzano tomatoes, chopped
- 1/2 cup water
- 1/2 teaspoon sugar
Instructions
Make tomato sauce first:
Cook garlic and red pepper flakes in oil in a 2 quart heavy saucepan over medium heat until garlic is golden (30-45 seconds). Add chopped tomatoes, water, sugar and 1/2 teaspoon salt and simmer (uncovered) for 30 minutes (stirring occasionally) until thickened.
Prepare the ricotta filling:
While the tomato sauce is simmering, stir together the ricotta, egg yolk, thinly sliced basil, 1/3 cup parmesan, and 1/8 teaspoon each of salt and pepper. Place the ricotta filling in a pastry bag or in a plastic ziplock bag with a small tip cut off one of the corners of the plastic bag.
Prepare squash blossoms:
Carefully open each blossom. This can be a little tricky as they are delicate. Gently open the petals (lightly untwist the petals, there are four...don't pull too hard as you don't want to rip the petals down to the base). When you open the flower petals, you will find the stamen or pistil. You can use your fingers or small scissors to carefully remove it. At this point, you can remove the blossom from the baby squash or stem (I keep the stem on mine to use as a handle when turning in the pan, but the texture is a little tough so you may not want to eat it later). Lightly rinse under cool water and drain on paper towels.
Fill the blossoms:
When the blossoms have dried off a bit, open the petals again and fill the blossom with approximately 2 teaspoons of ricotta filling by gently squeezing it from the bag into the open blossom. Then, gently twist the end of the blossom to close the filling inside. Note: You will probably have some filling left over. I squeezed my leftover ricotta filling into my scrambled eggs the next morning 😉
Whisk together the flour, remaining 1/3 cup parmesan, 1/4 teaspoon salt, and seltzer water in a small bowl.
Fry the stuffed blossoms:
Heat 1/2 inch oil to 375°F in a 10-inch heavy skillet. While the oil is heating, dip half of the blossoms in batter to thinly coat. Fry the coated blossoms, turning once, until golden (1 to 2 minutes total).
With tongs, transfer the fried blossoms to paper towels to drain. Coat and fry the remaining blossoms. Season with salt and serve immediately with the zesty tomato sauce.
https://www.travelynneats.com/2018/10/28/stuffed-squash-blossoms/
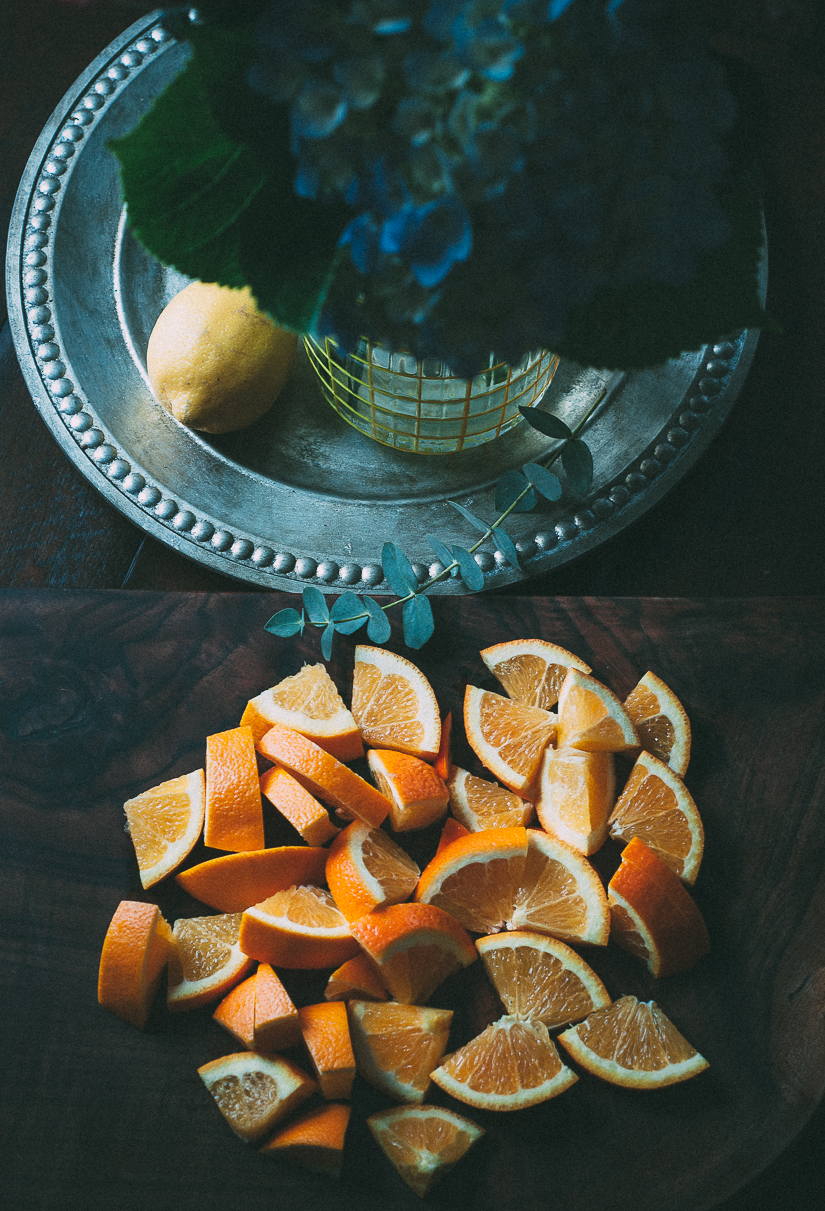
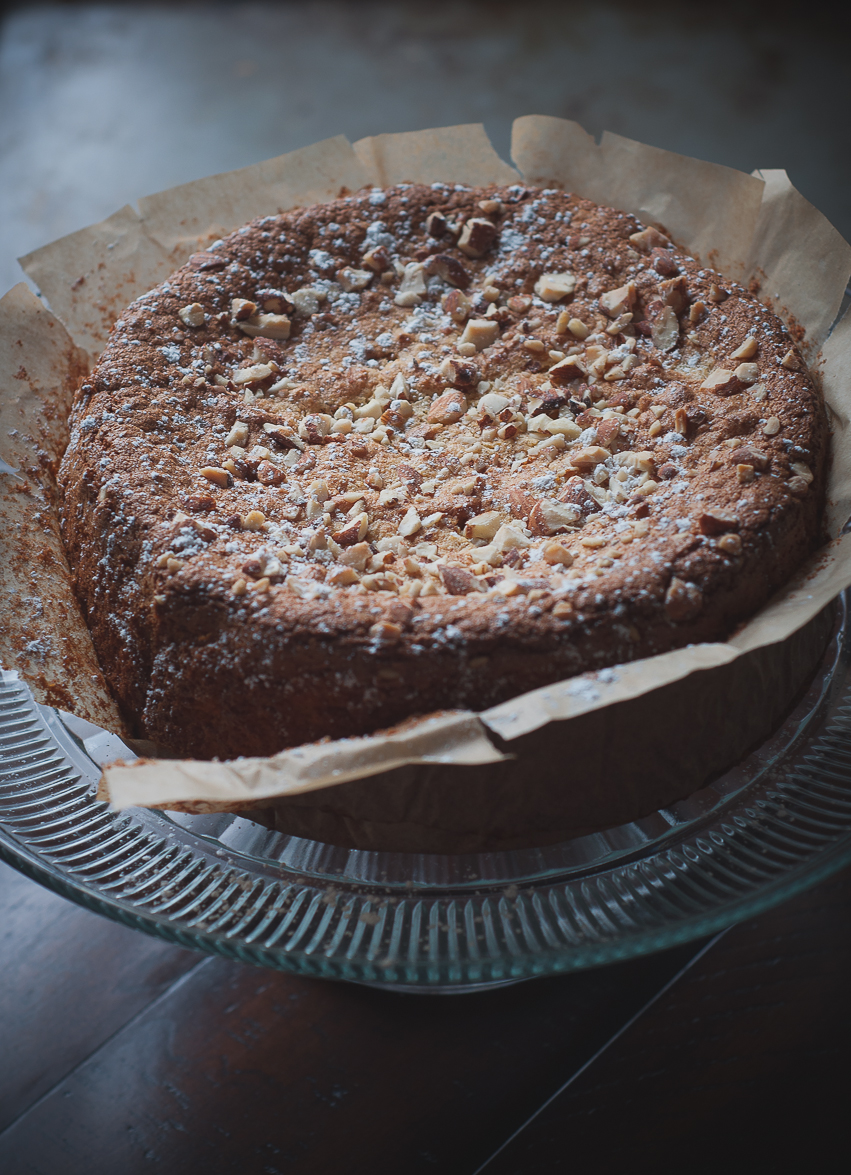
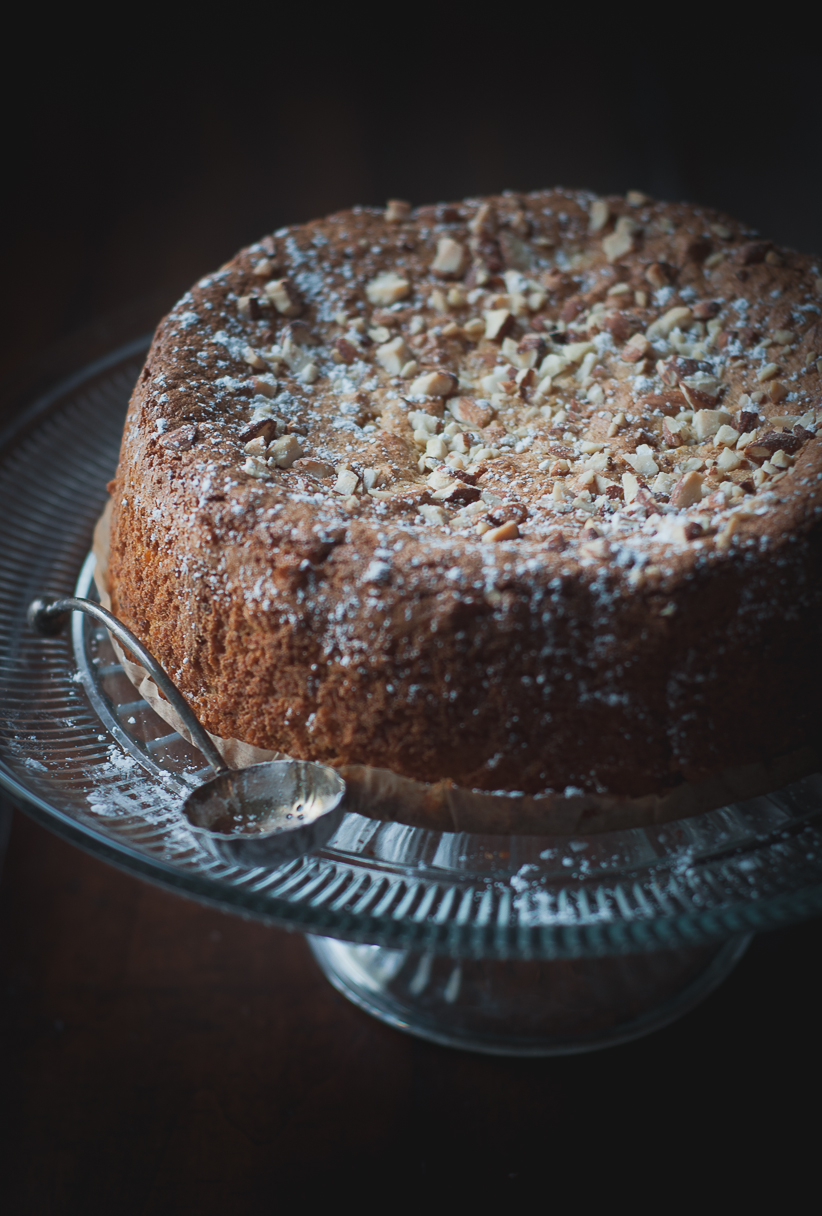
Almond, Orange & Saffron Cake
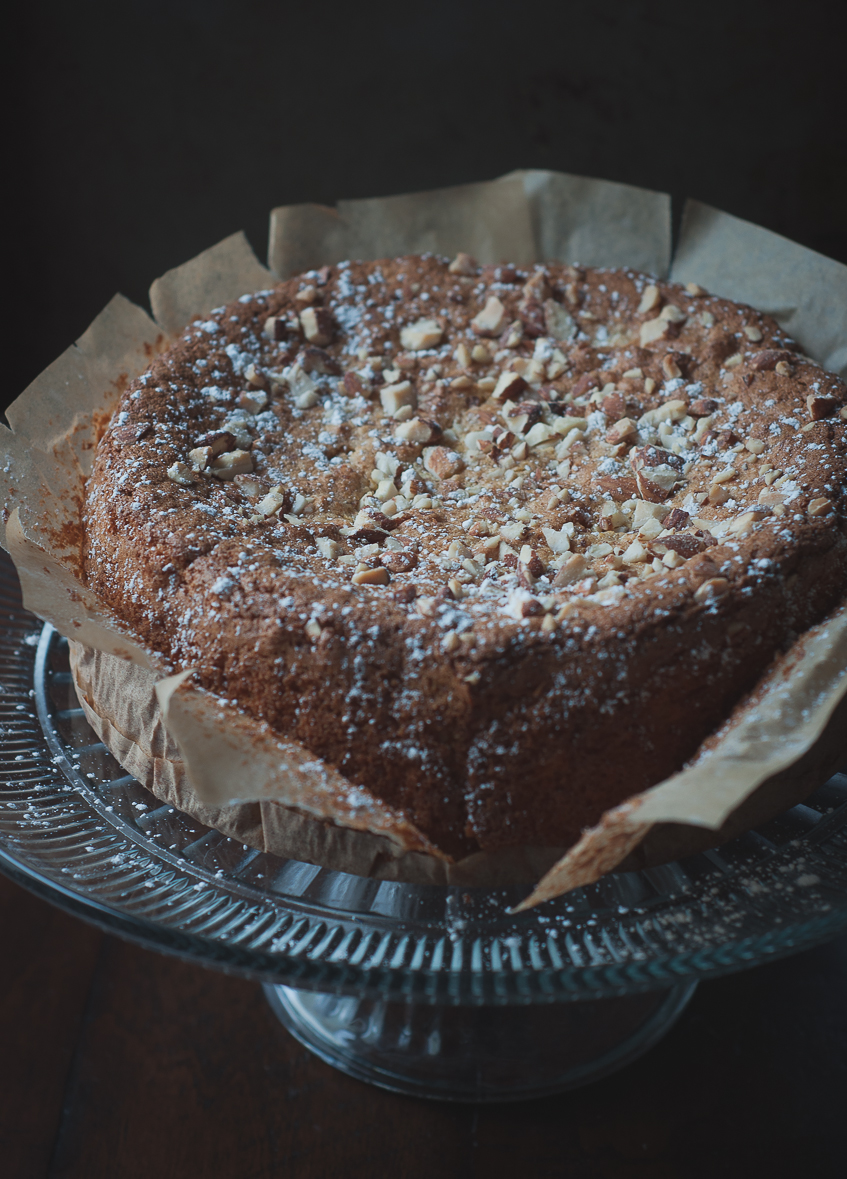
I love contrast. Light, dark, bitter, sweet, soft, strong, black, white, whisper, loud, cause, effect, beginning, end. Sometimes it’s not enough to luxuriate in the gray area; you have to stretch your arms wide and reach out to the fringes. You know, pull the ends together to a point of juxtaposition… Maybe that’s this cake for me. Bright, dark, nutty, deep, citrus spark, spicy, intense, playful.
Besides the delightful contrast in flavors, there is much to love about this cake. It’s a gluten-free sweet, under 10 ingredients, and surprisingly easy to make! If you’re wanting something different, don’t wait.
Sublime upon sublime scarcely presents a contrast, and we need a little rest from everything, even the beautiful.
~ Victor Hugo
Almond, Orange & Saffron Cake
2017-04-02 14:17:42
Serves 8
Moist, light, bittersweet orange mixed with spicy notes and subtle almond flavors. This cake is gluten free, delicious, and sure to catch your guest's attention.
Prep Time
15 min
Cook Time
50 min
Total Time
1 hr 5 min
Nutrition Facts
Serving Size
135g
Servings
8
Amount Per Serving
Calories 386
Calories from Fat 188
% Daily Value *
Total Fat 22g
34%
Saturated Fat 3g
13%
Trans Fat 0g
Polyunsaturated Fat 5g
Monounsaturated Fat 13g
Cholesterol 117mg
39%
Sodium 49mg
2%
Total Carbohydrates 39g
13%
Dietary Fiber 5g
19%
Sugars 32g
Protein 12g
Vitamin A
5%
Vitamin C
29%
Calcium
14%
Iron
11%
* Percent Daily Values are based on a 2,000 calorie diet. Your Daily Values may be higher or lower depending on your calorie needs.
Ingredients
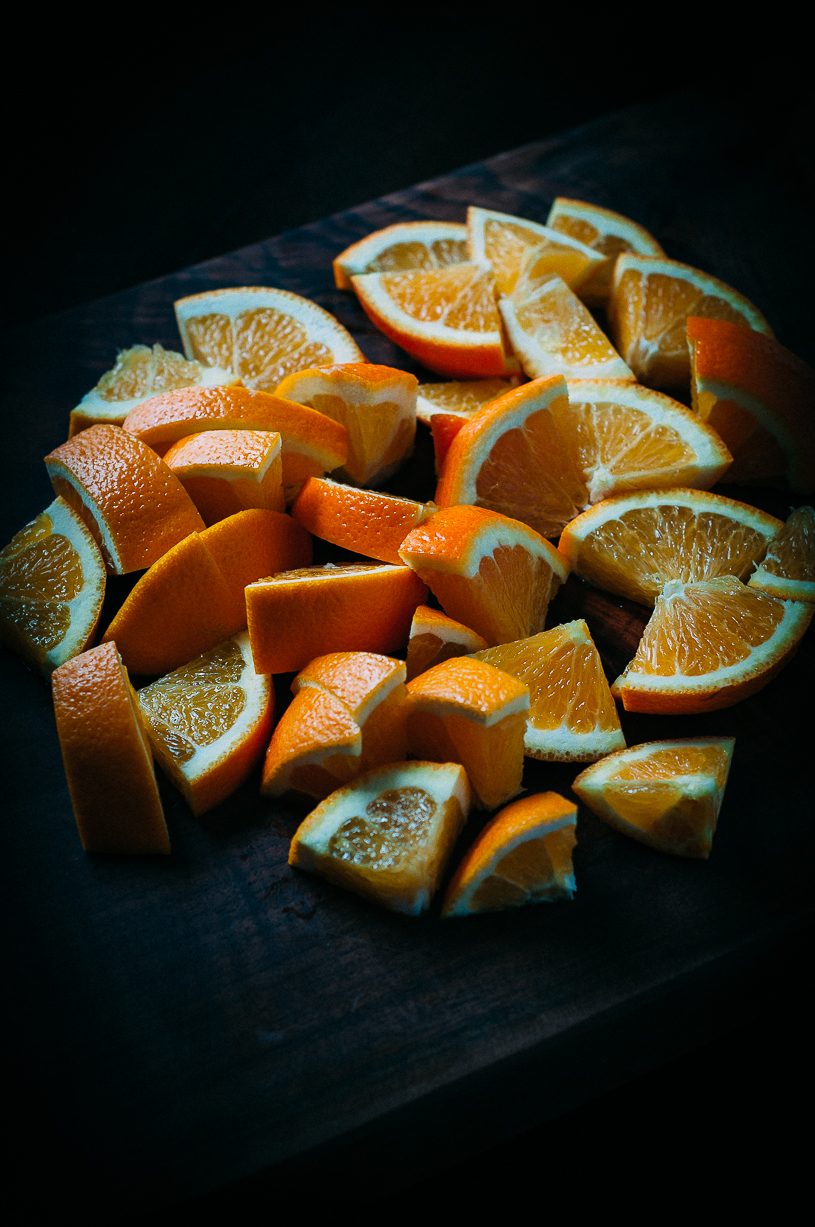
- 2 medium oranges, chopped (including peel)
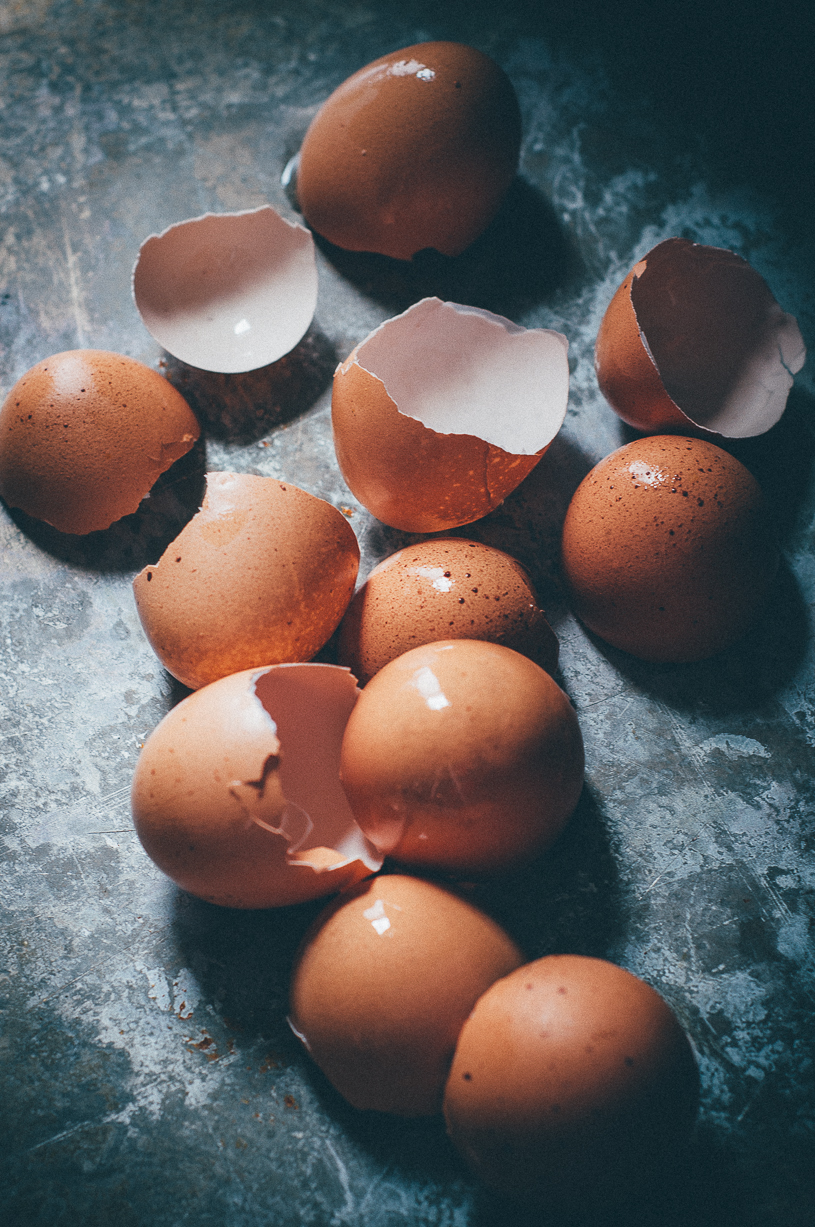
- 5 eggs, separated
- Pinch of ground cardamom
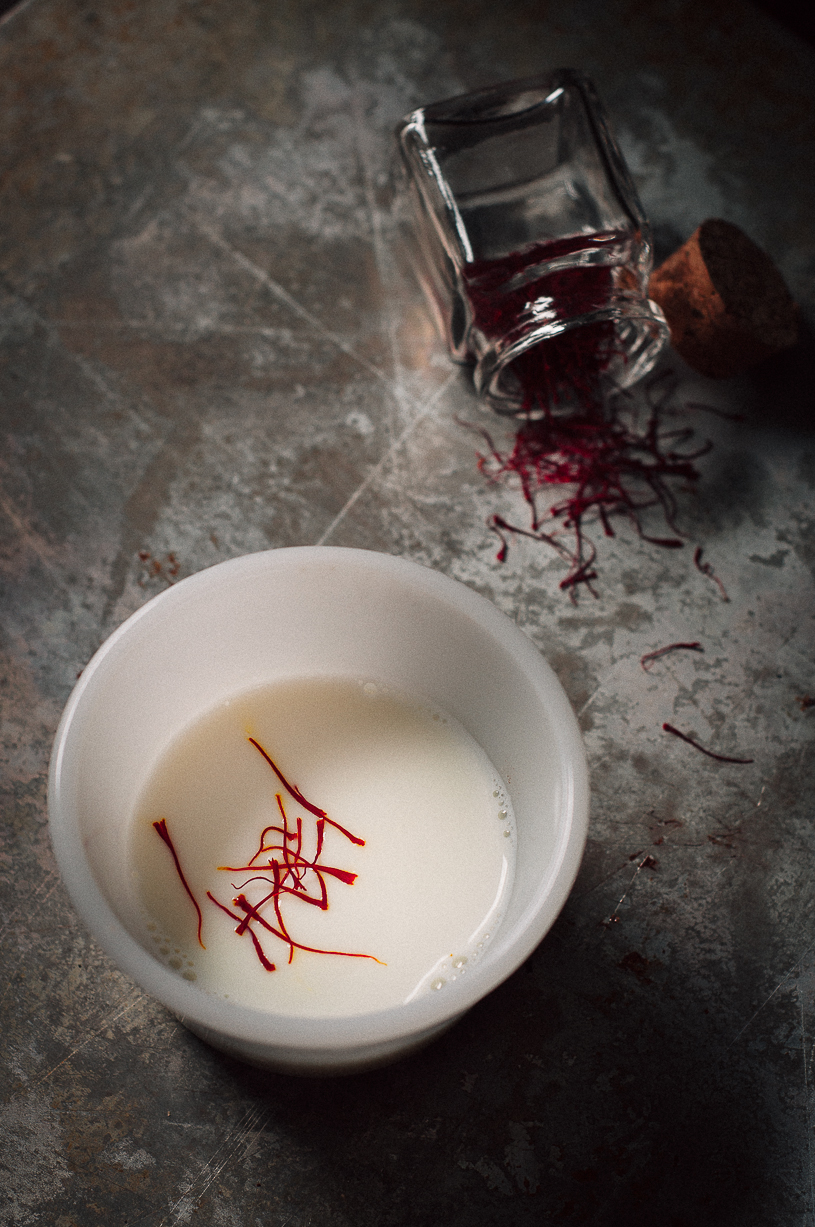
- Pinch of saffron threads
- 1/4 cup milk (or unsweetened original almond milk), for soaking saffron threads
- 1 cup superfine sugar
- 2 cups ground raw almonds (grind to a flour consistency in a food processor)
- 2 tablespoons sliced or finely chopped raw almonds
- 2 tablespoons powdered sugar
Instructions
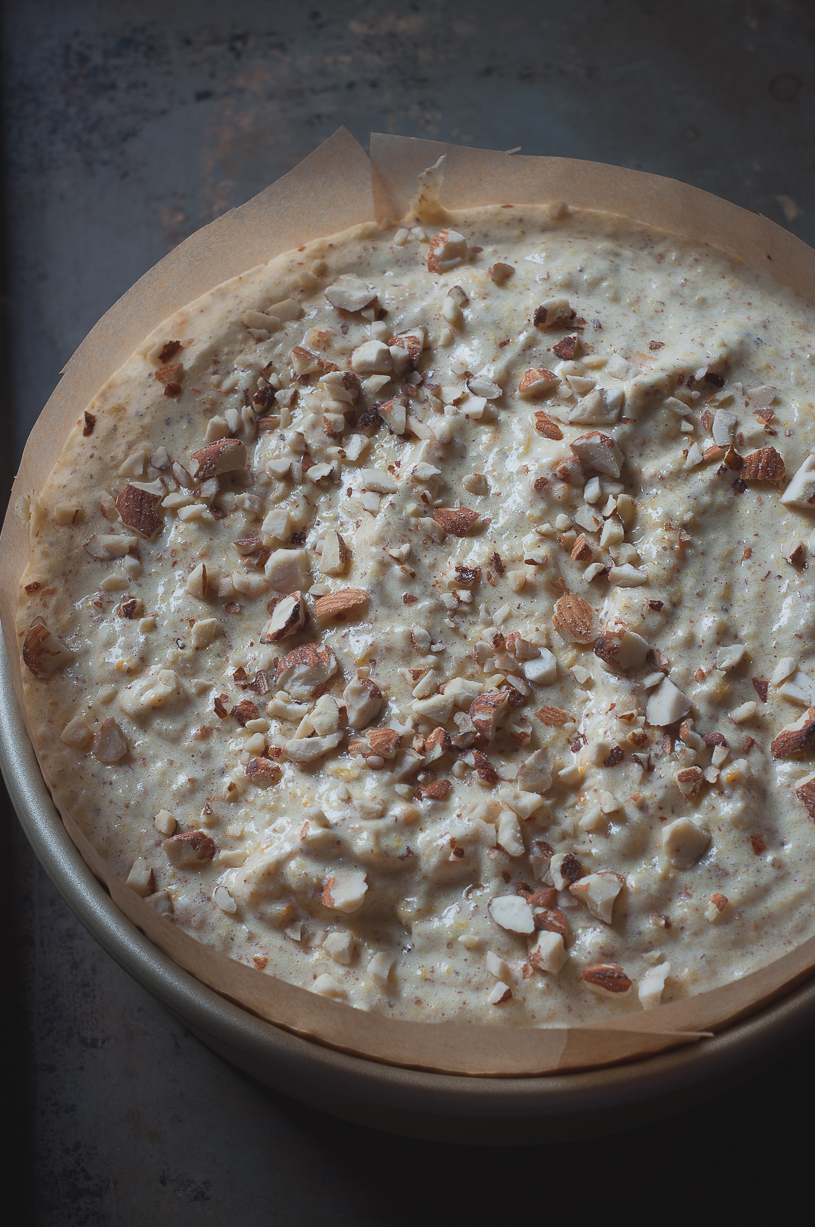
- Preheat oven to 350 degrees F. Line the base and sides of a 9-inch cake pan with parchment paper.
- Warm the milk (or almond milk) for 30 seconds in the microwave in a small bowl. Remove the milk from the microwave and place a small pinch (5-6) of saffron threads in the warm milk. Soak the threads in the milk for 30 minutes.
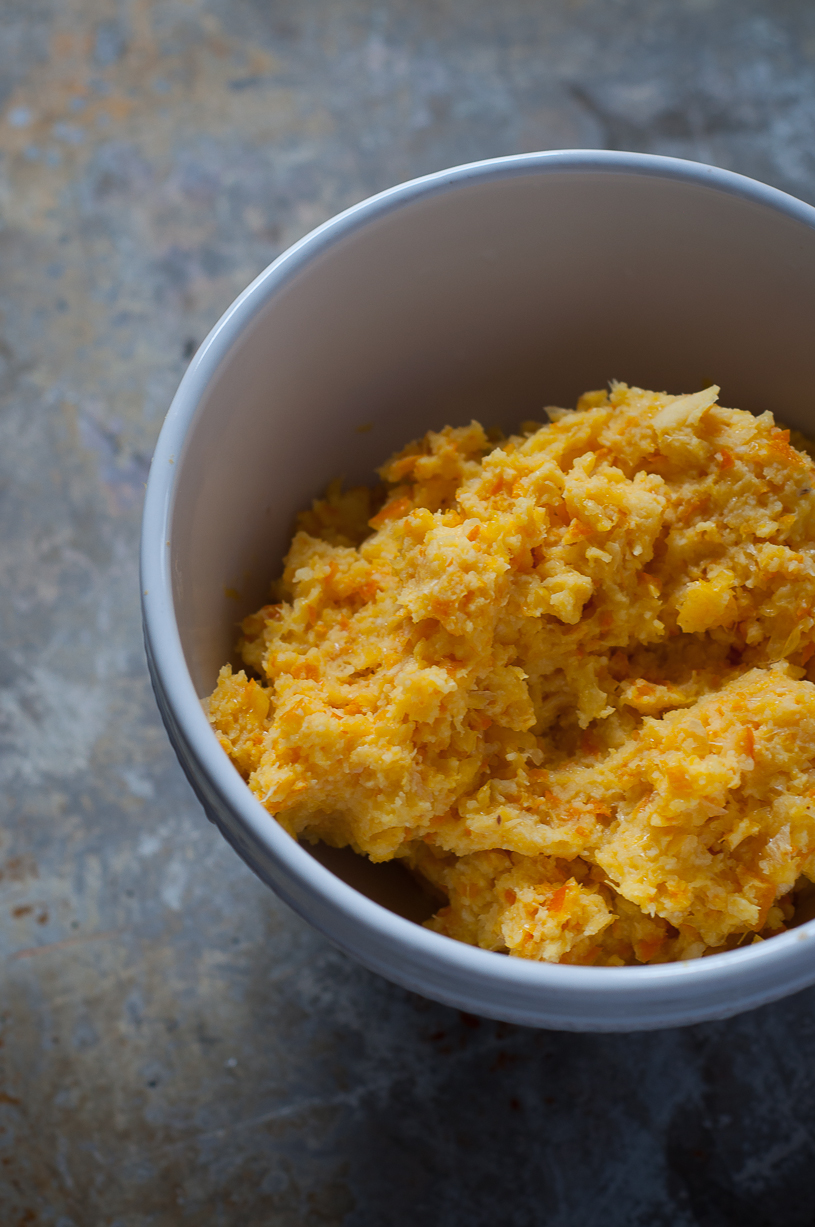
- While the saffron is soaking, heat the chopped oranges in a pan over low heat with 1 tablespoon of water. Cover and cook with a gentle simmer for 30 minutes, until the oranges are soft and the liquid has evaporated. Remove the pan from the heat and let cool. When cool, finely chop the oranges in a food processor.
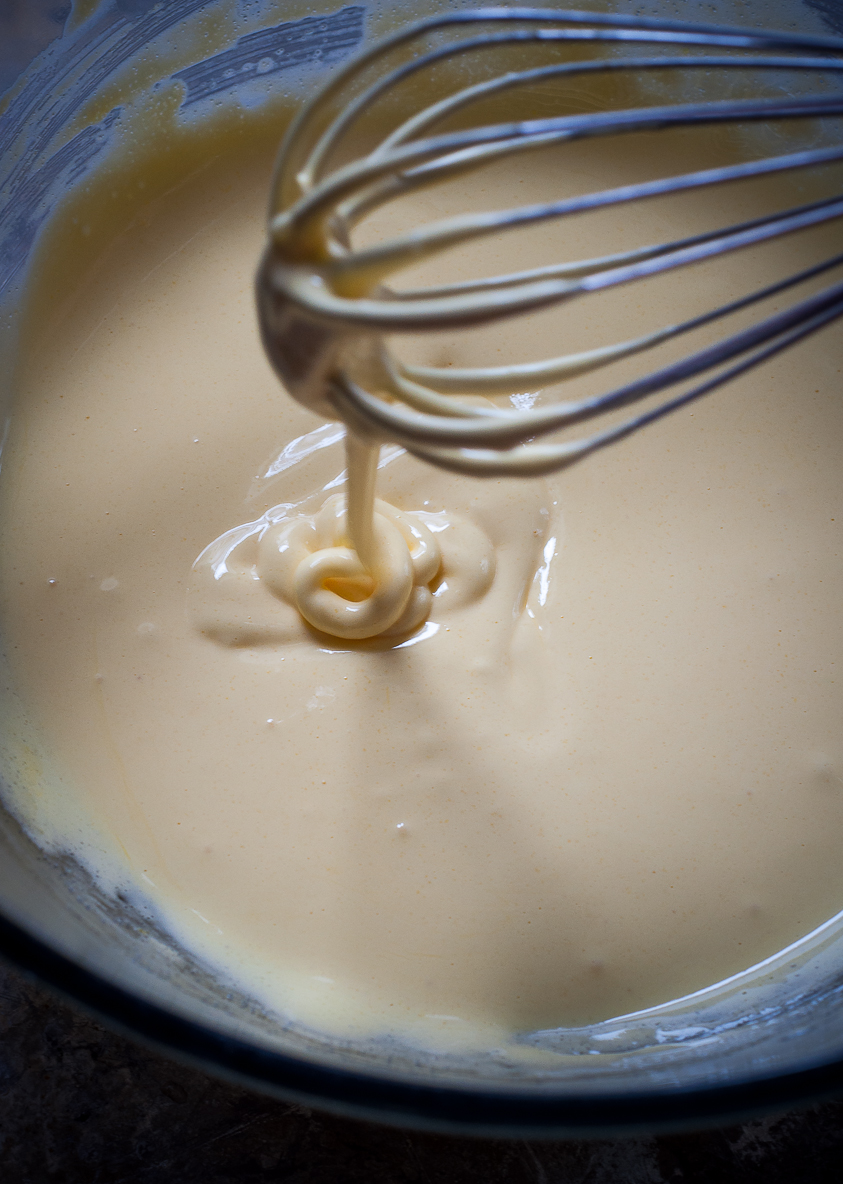
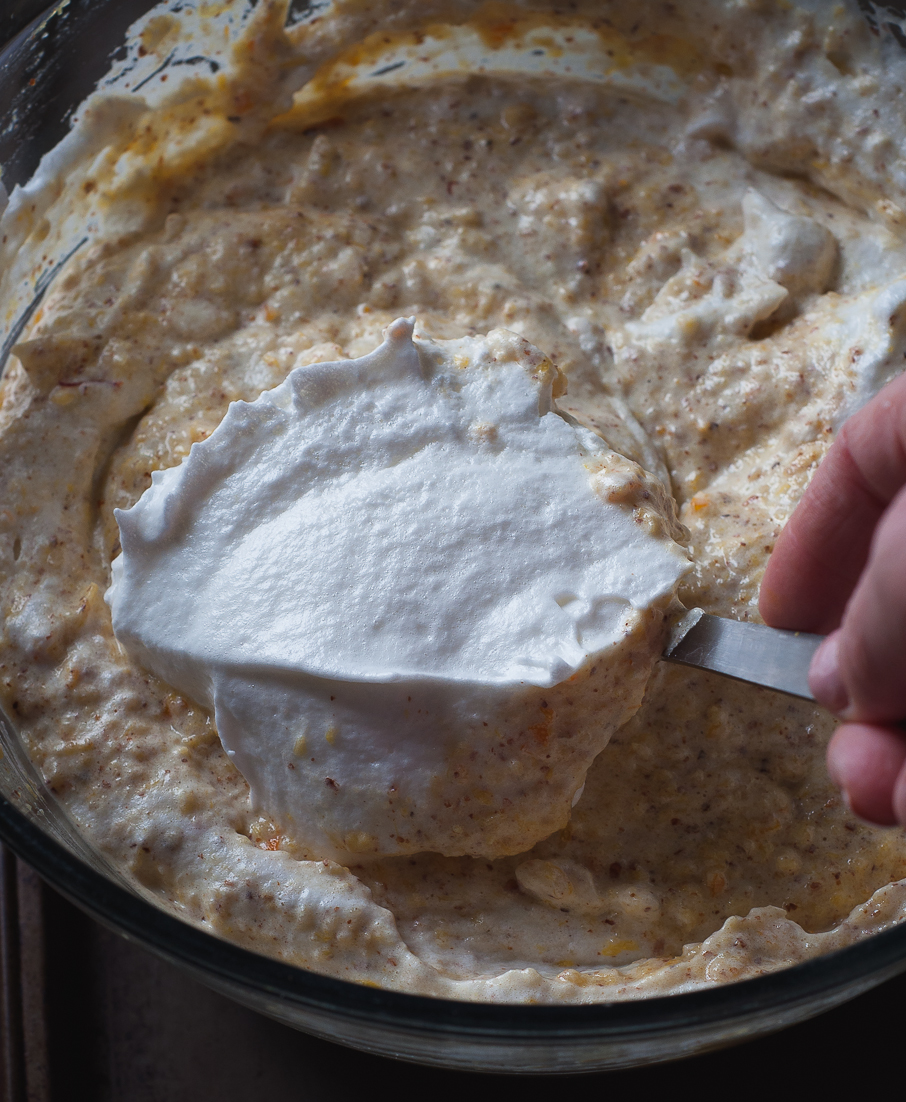
- Whisk the egg whites in a clean, dry bowl until soft peaks form. Gradually stir in the superfine sugar and continue to whisk for 1 minute.
- In a separate bowl, whisk the egg yolks together with the remaining superfine sugar for 2-3 minutes. Whisk in the oranges and then fold in the ground almonds, ground cardamom, and saffron (with the soaking milk). With a large metal spoon, fold in spoonfuls of egg whites until everything is well combined.
- Pour the mixture into the prepared cake pan, sprinkle with sliced or chopped almonds and bake in the oven for 50-55 minutes (or until golden brown). Check every 20 minutes while baking.
- Let the cake cool in the pan before turning out and dusting with powdered sugar.
- Store in an airtight container for 3 days.
Adapted from My Indian Cookbook
Adapted from My Indian Cookbook
TraveLynn Eats https://www.travelynneats.com/
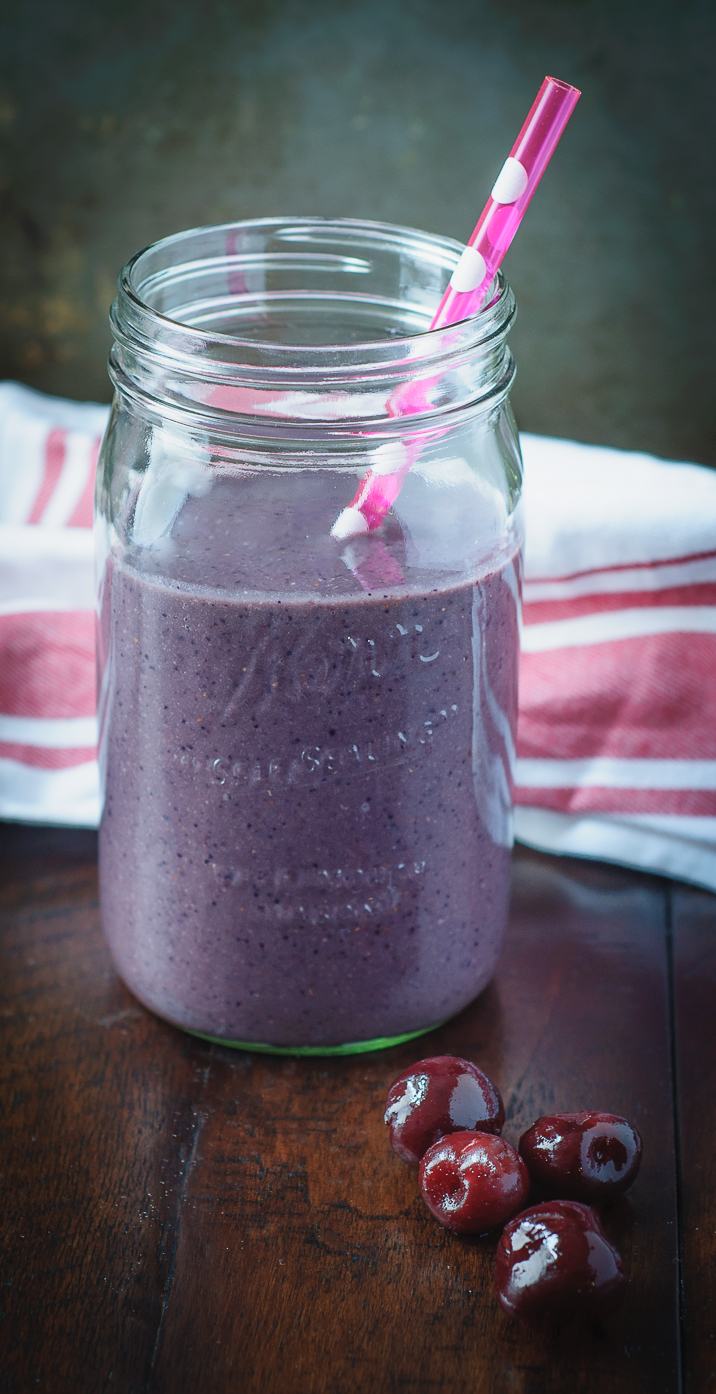
Chocolate Cherry Breakfast Smoothie
Life offers up some sweet moments. Many are obvious, but far more interesting are the ones you have to pay attention to… the not-so-obvious. The space between. The silence between the notes. The pause between the inhale and the exhale. These are the gems. This is where I find that place that feels worthy of pause, of wonder, of contemplation, of curiosity.
So, while I was aimlessly scrolling the internet one evening, I just about breezed by this article: “Jennifer Aniston Shares Her Signature Breakfast Smoothie.” I paused, though, when I saw the opening line, “What did it take for Jennifer Aniston to squeeze into that glittering Saint Laurent dress…?” …and I chuckled and the inner monologue started. Now I was hooked; I kept reading. What did it take, how did she do it?… I purposely skipped past the part that said “In addition to exercising 4-5 days a week…” and saw that Jen “starts each day with a healthy homemade shake.” Oh yes, a shake… I can do that.
Whether you’ve had a chocolate covered cherry or black forest cake, you’re probably well aware that chocolate and cherries are a classic pair. Oh yes, chocolate and cherries are good for your SOUL… but the combo in this smoothie is good for your soul wrapper too!
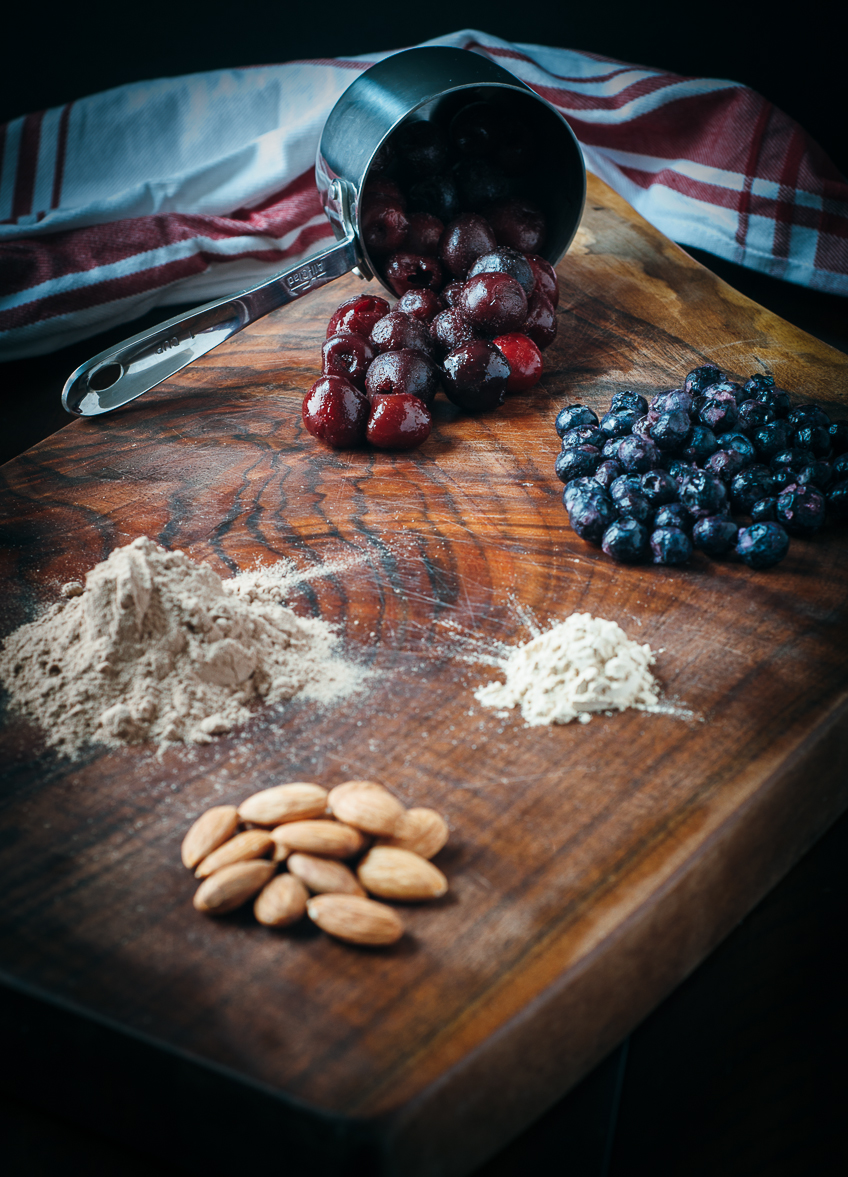
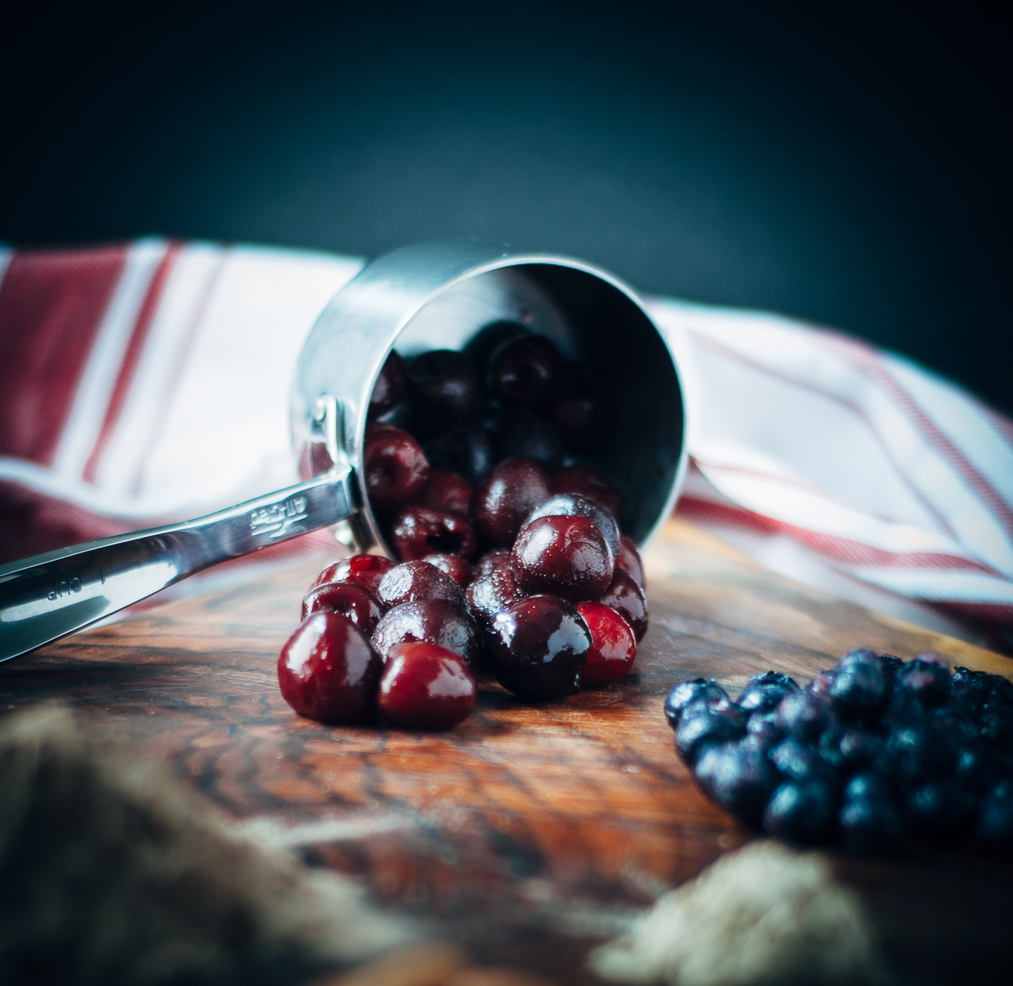
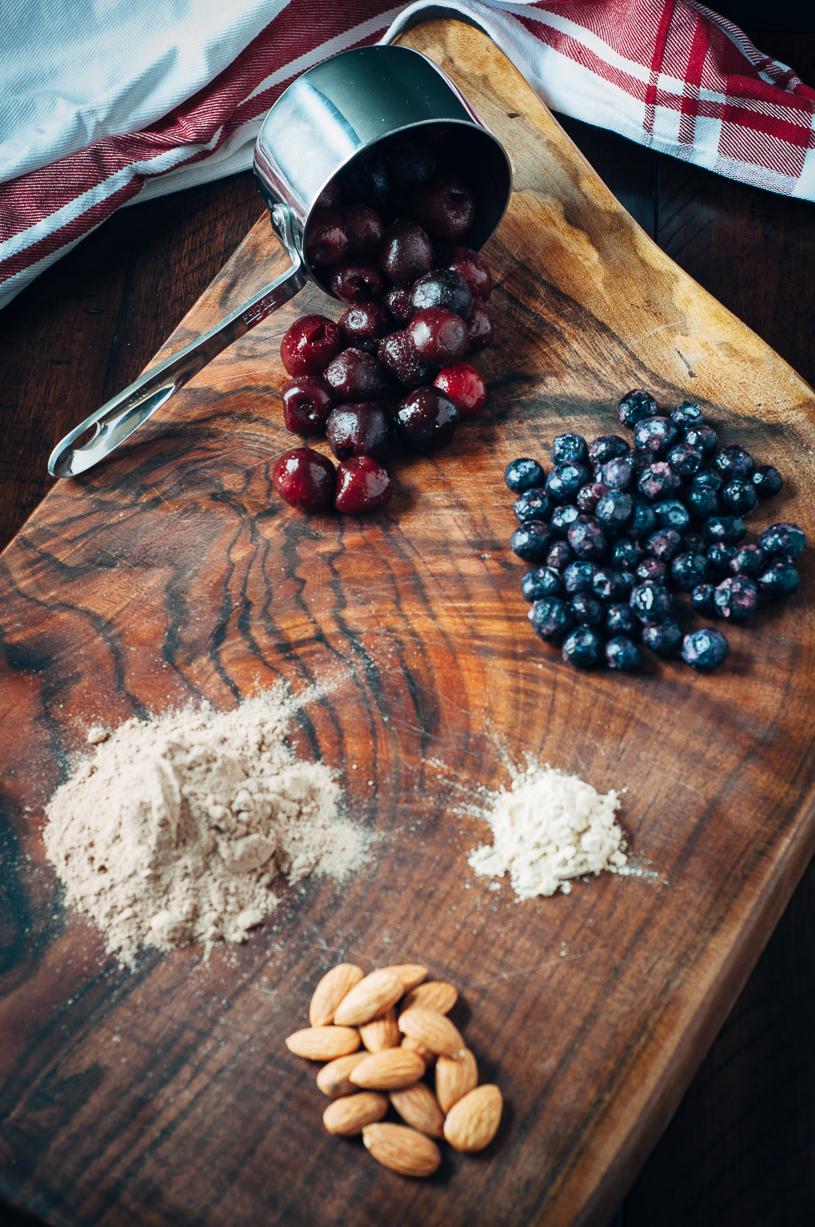
Chocolate almond milk, frozen banana, cherries, blueberries, organic raw almonds, Maca root powder, vegan chocolate protein powder (I’ve grown attached to Vega Protein & Greens), and just a couple drops of liquid stevia.
I’m glad I stopped and read further. I’m glad I got past my drink-this-smoothie-look-like-Jen-Aniston snort laugh (and trust me, I’d drink a helluva lot of smoothies to look like her!). Because, I found a wonderful, easy, naturally sweet, healthy, smoothie. It’s my go-to morning shake.
I love finding the sweetness in the not-so-obvious…
While I’m reveling in unexpected sweetness, I find that lately –in the midst of seeming chaos– I’m paying more attention to the delicate space between the craziness. I’m nurturing this perspective. I’ve been shifting focus from the disaster to the rescuer, from the problem to the volunteer …to the grass-root solution. …a donation made. …the community engaged.
I didn’t quite expect to find myself at the Women’s March in Washington DC last month. I don’t do crowds. Certainly, not 500,000-large crowds. But, I felt compelled to go. No sign, no plan. Just me, feeling like I needed to be a part of our great democracy in action. I piled into the Metro. And, what seemed like an eternity later, I was birthed out of L’Enfant Metro stop, moving in a sea of people with pink hats and funny-witty-punchy-serious-naughty-poignant-creative signs.
Moments later, at Independence and 6th Street, and surrounded by more people than I felt comfortable with, I climbed a tree, nestled between two limbs, and perched there for 5 hours listening to Gloria Steinem, Michael Moore, Alicia Keys, Senator Duckworth, Madonna, and many others. I didn’t go to see these people; I had no idea they’d be there. But, I appreciated each speaker. I heard them: stand up, take action.
As far as the march goes… It took a heckofa long time to actually start moving. The march route was so packed we were wedged in place for hours; but then a budge, and then a few feet, and then we walked for miles. It was peaceful. It was powerful. It was a day that I pledged: from now on don’t complain, do something. It was a special day. There was a sweetness in it I was not expecting.
But, you clicked on this link because you were looking for something sweet …like chocolate cherry sweet. Keep scrolling…

As we become purer channels for God’s light, we develop an appetite for the sweetness that is possible in this world. A miracle worker is not geared toward fighting the world that is, but toward creating the world that could be.
~ Marianne Williamson
Chocolate Cherry Breakfast Smoothie
2017-01-20 18:49:07
Serves 1
Chocolate and cherries combine in a naturally sweet and healthy smoothie. This is soon to become your go-to, guilt-free morning shake!
Prep Time
5 min
Total Time
5 min
Nutrition Facts
Serving Size
990g
Servings
1
Amount Per Serving
Calories 562
Calories from Fat 92
% Daily Value *
Total Fat 13g
20%
Saturated Fat 1g
5%
Trans Fat 0g
Polyunsaturated Fat 2g
Monounsaturated Fat 6g
Cholesterol 3mg
1%
Sodium 77mg
3%
Total Carbohydrates 99g
33%
Dietary Fiber 13g
54%
Sugars 74g
Protein 20g
Vitamin A
29%
Vitamin C
37%
Calcium
84%
Iron
29%
* Percent Daily Values are based on a 2,000 calorie diet. Your Daily Values may be higher or lower depending on your calorie needs.
Ingredients
- 1 cup unsweetened chocolate almond milk
- 1 cup frozen cherries
- 1 cup frozen blueberries
- 1/2 frozen banana
- 1 cup ice
- 1 scoop chocolate flavor vegan protein powder
- 1/2 tablespoon maca powder
- 2-3 drops of liquid sweetener or stevia
- 10 raw almonds
Instructions
- Place all ingredients in blender with the liquids first. Blend until smooth.
Notes
- Initially spotted on the InStyle.com fashion magazine. What a great find!
TraveLynn Eats https://www.travelynneats.com/
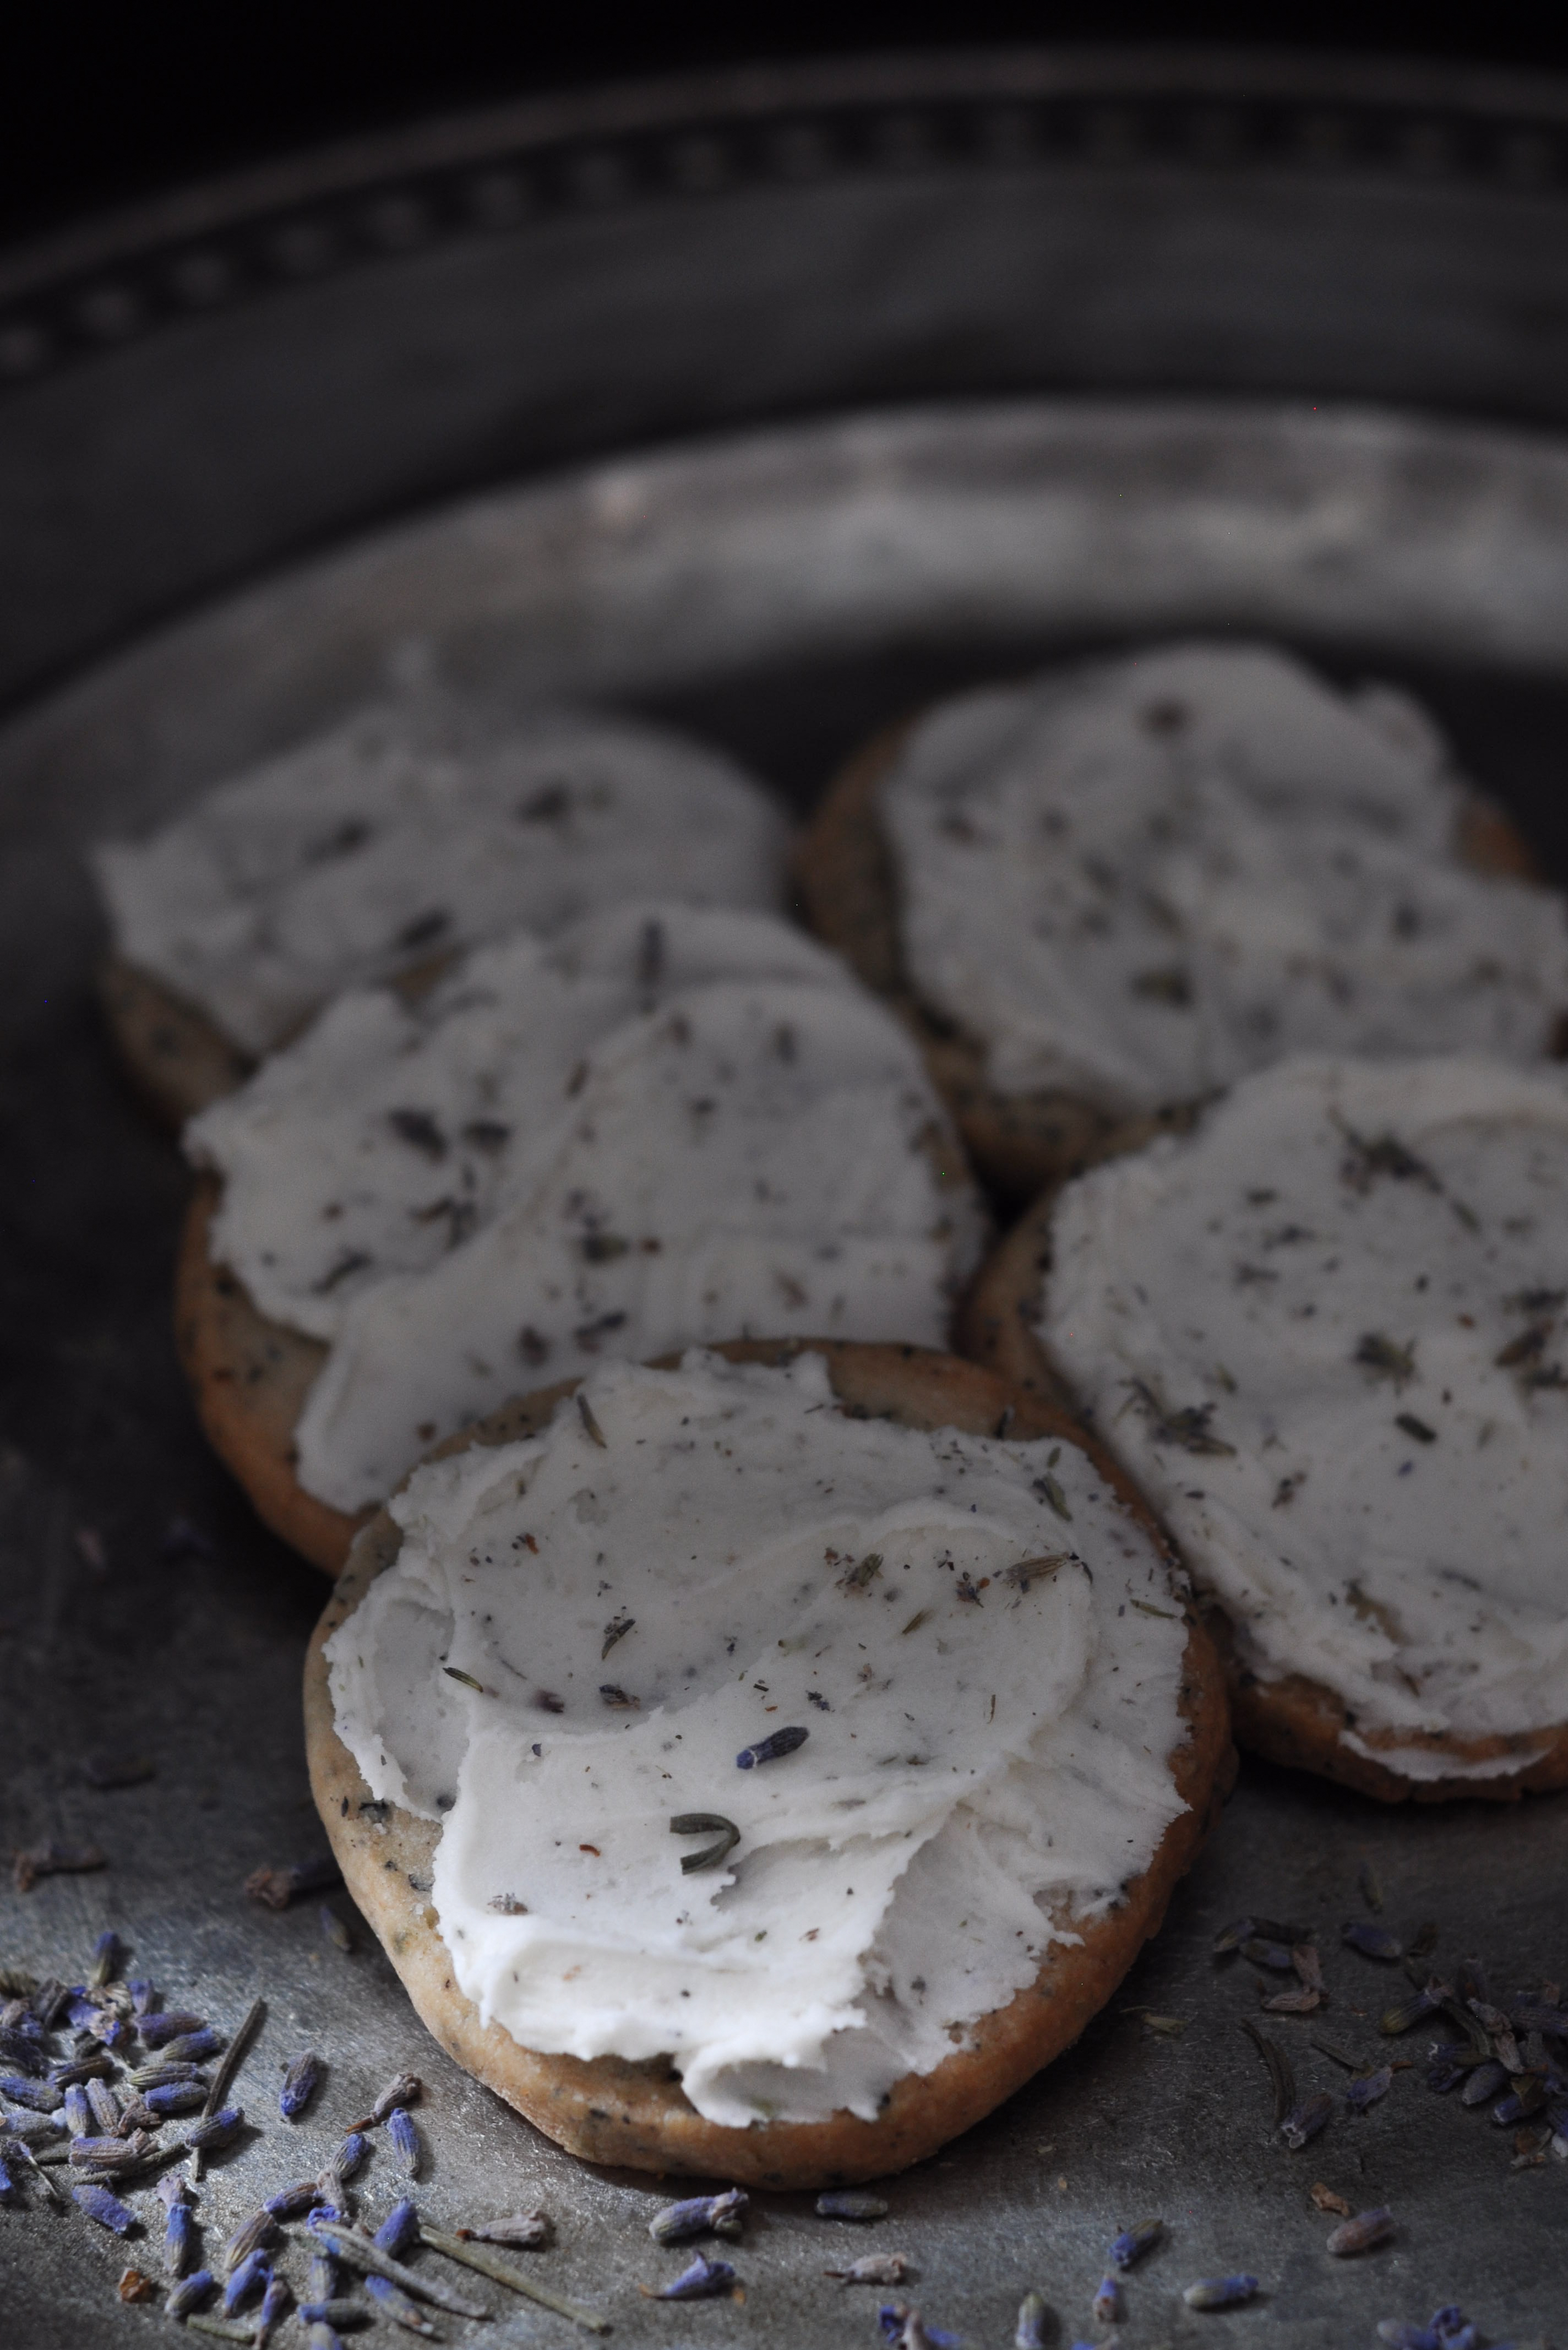
Earl Grey Shortbread with Lavender Buttercream
I went full on Christmas this year. Ok, well, I had some B- gift giving moments, cards that never went out, and I got a tad bit cranky at the fifth office holiday party event. Overall, though, I gave this year’s Christmas a valiant effort. I type this as I’m on my fourth back-to-back viewing of the 24-hour A Christmas Story extravaganza that plays on TBS each year. #familytradition…
I had a holiday first this year though: a Christmas Cookie Exchange, courtesy of my dear friend, Josie. Right, I know, how do you get to 40-something (aka ’29 again’) before attending your first Cookie Exchange?… I don’t “do” Christmas cookies. Don’t get me wrong, that wasn’t an uppity “don’t do” … that was a baking hesitance on my part. In fact, baking is actually quite intimidating to me. Cooking is an art; baking is a science. I’m a ‘dash of this, dash of that, throw it in a pan’ kind-of-gal. You ask me to add a cup of flour and there’s a good chance I’m gonna plunge my hand into the flour bag and scoop out about a cuppa flour… As much as I want to believe it’s just a ‘dash of this, a splash of that, pop it in the oven and forget about it’ –this doesn’t work in baking. So, I gave great thought to what I was going to take to my inaugural Cookie Exchange.
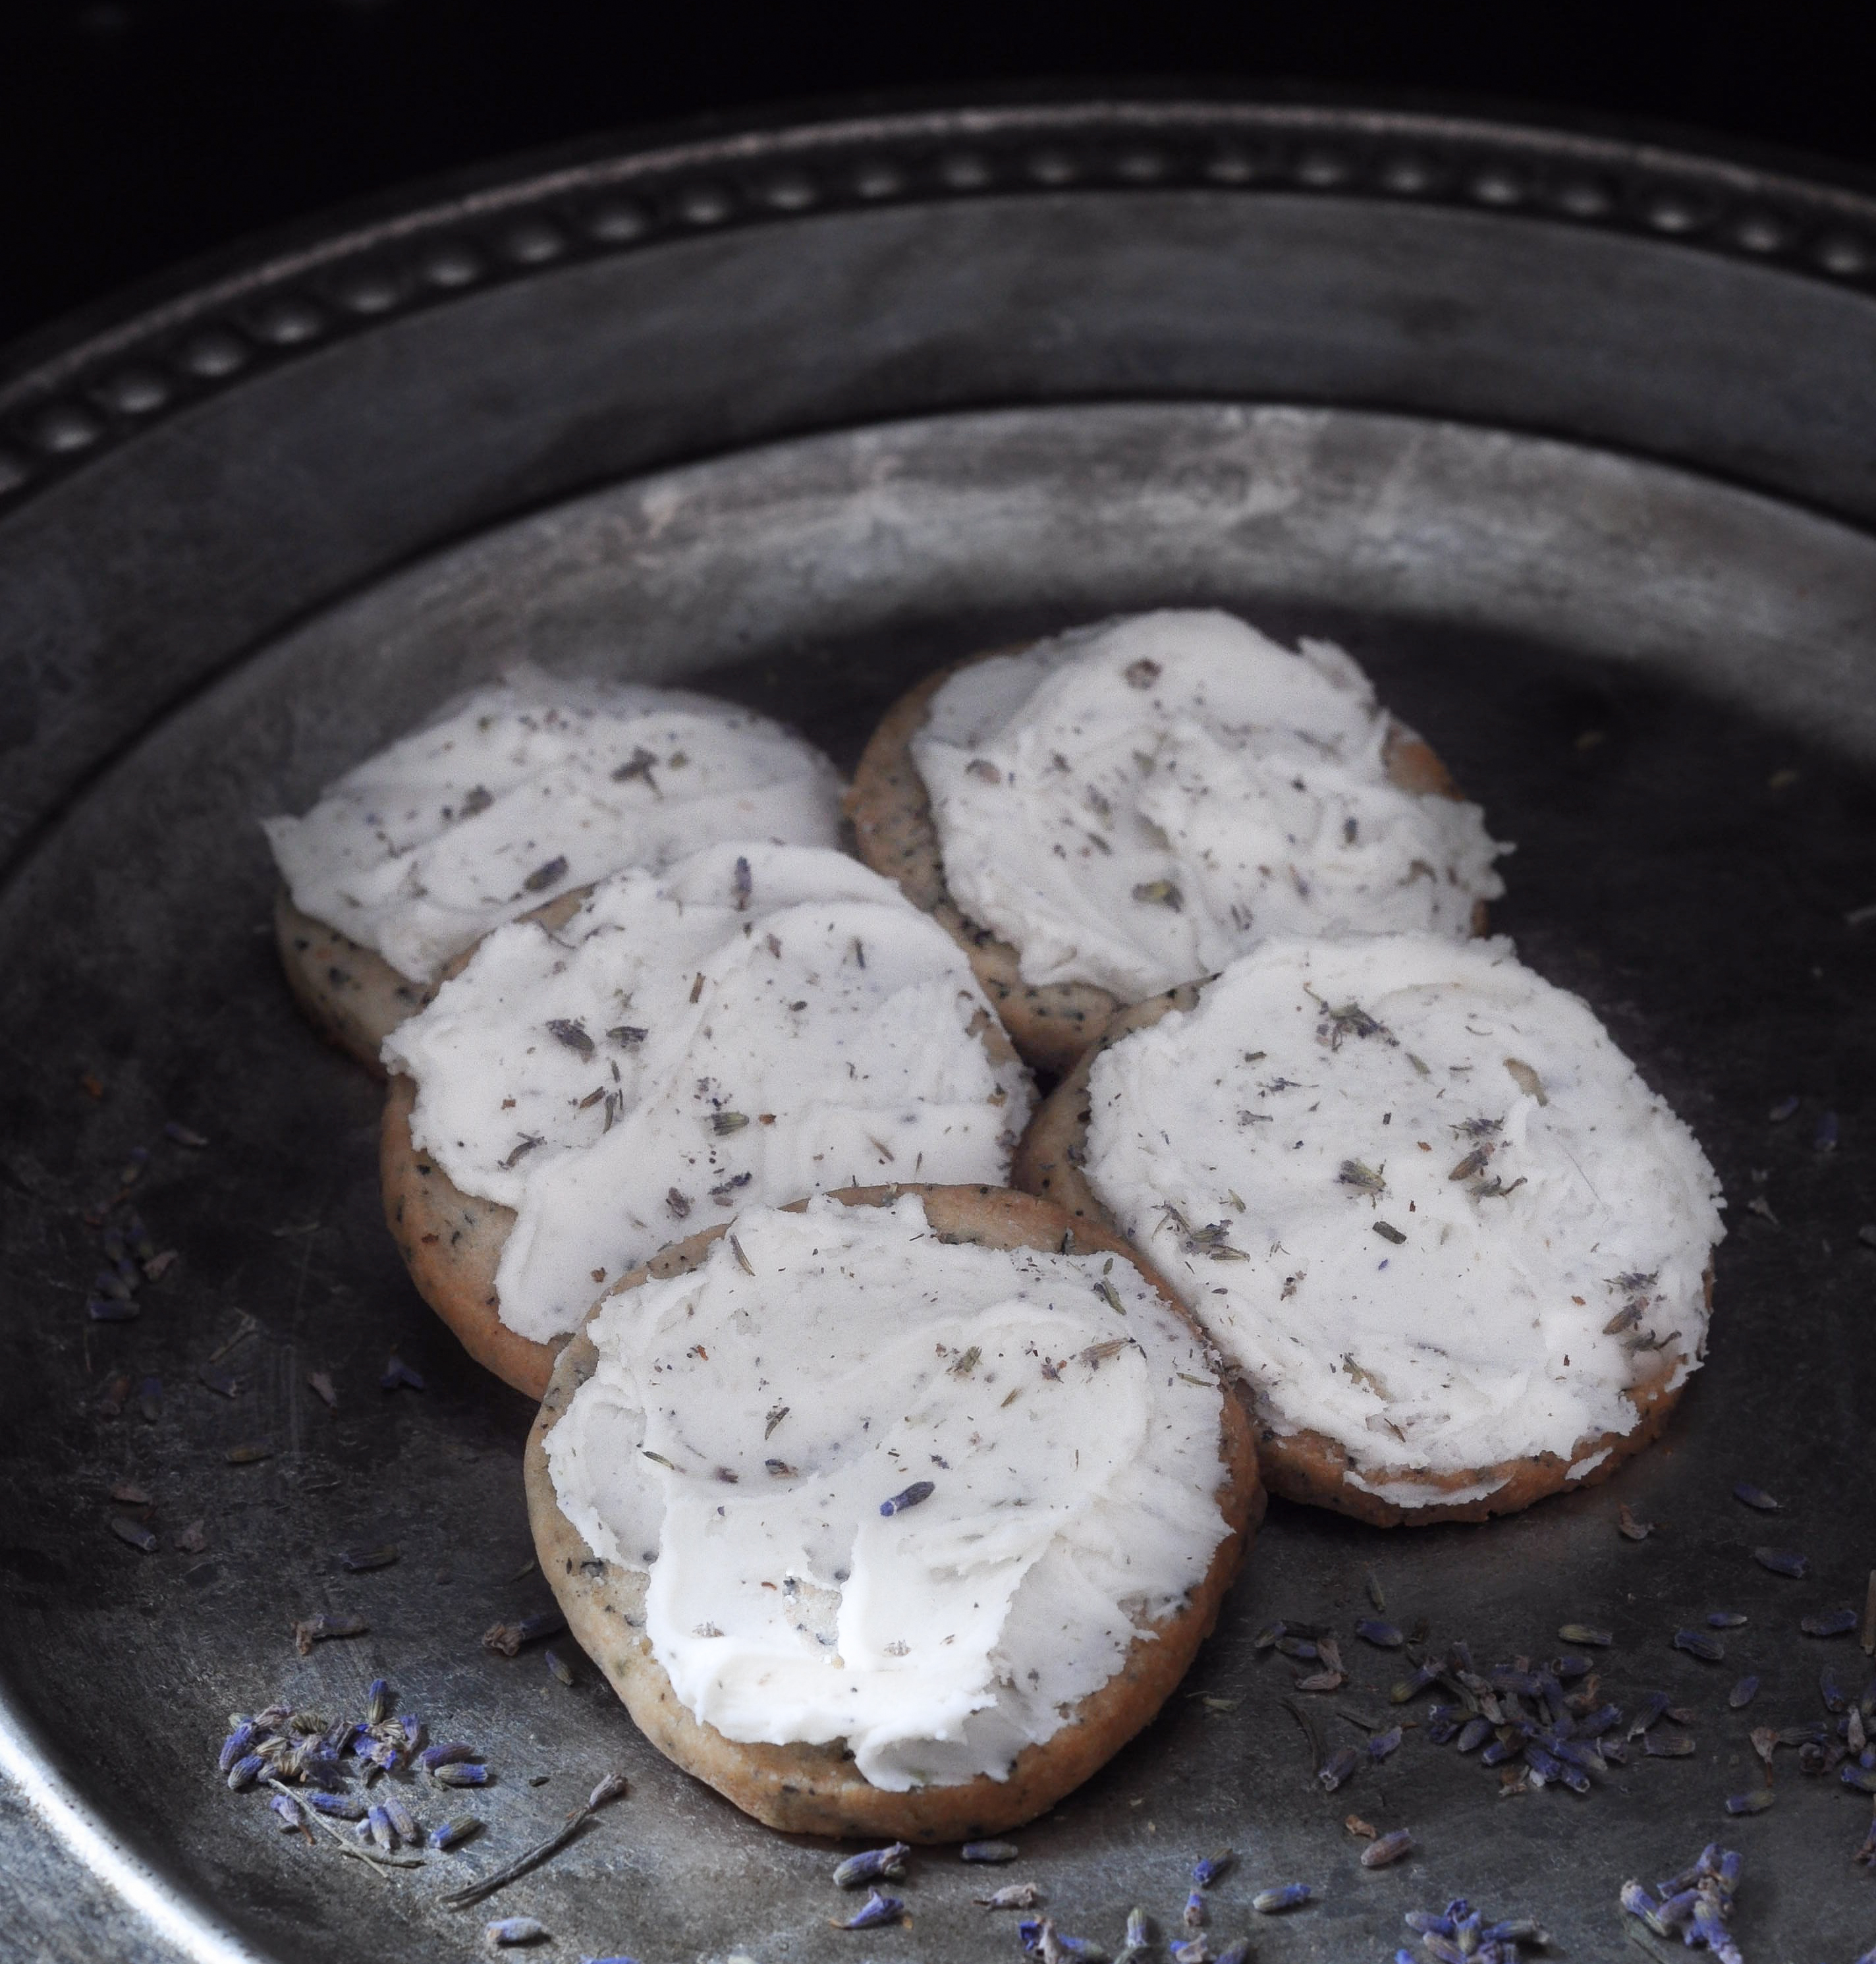
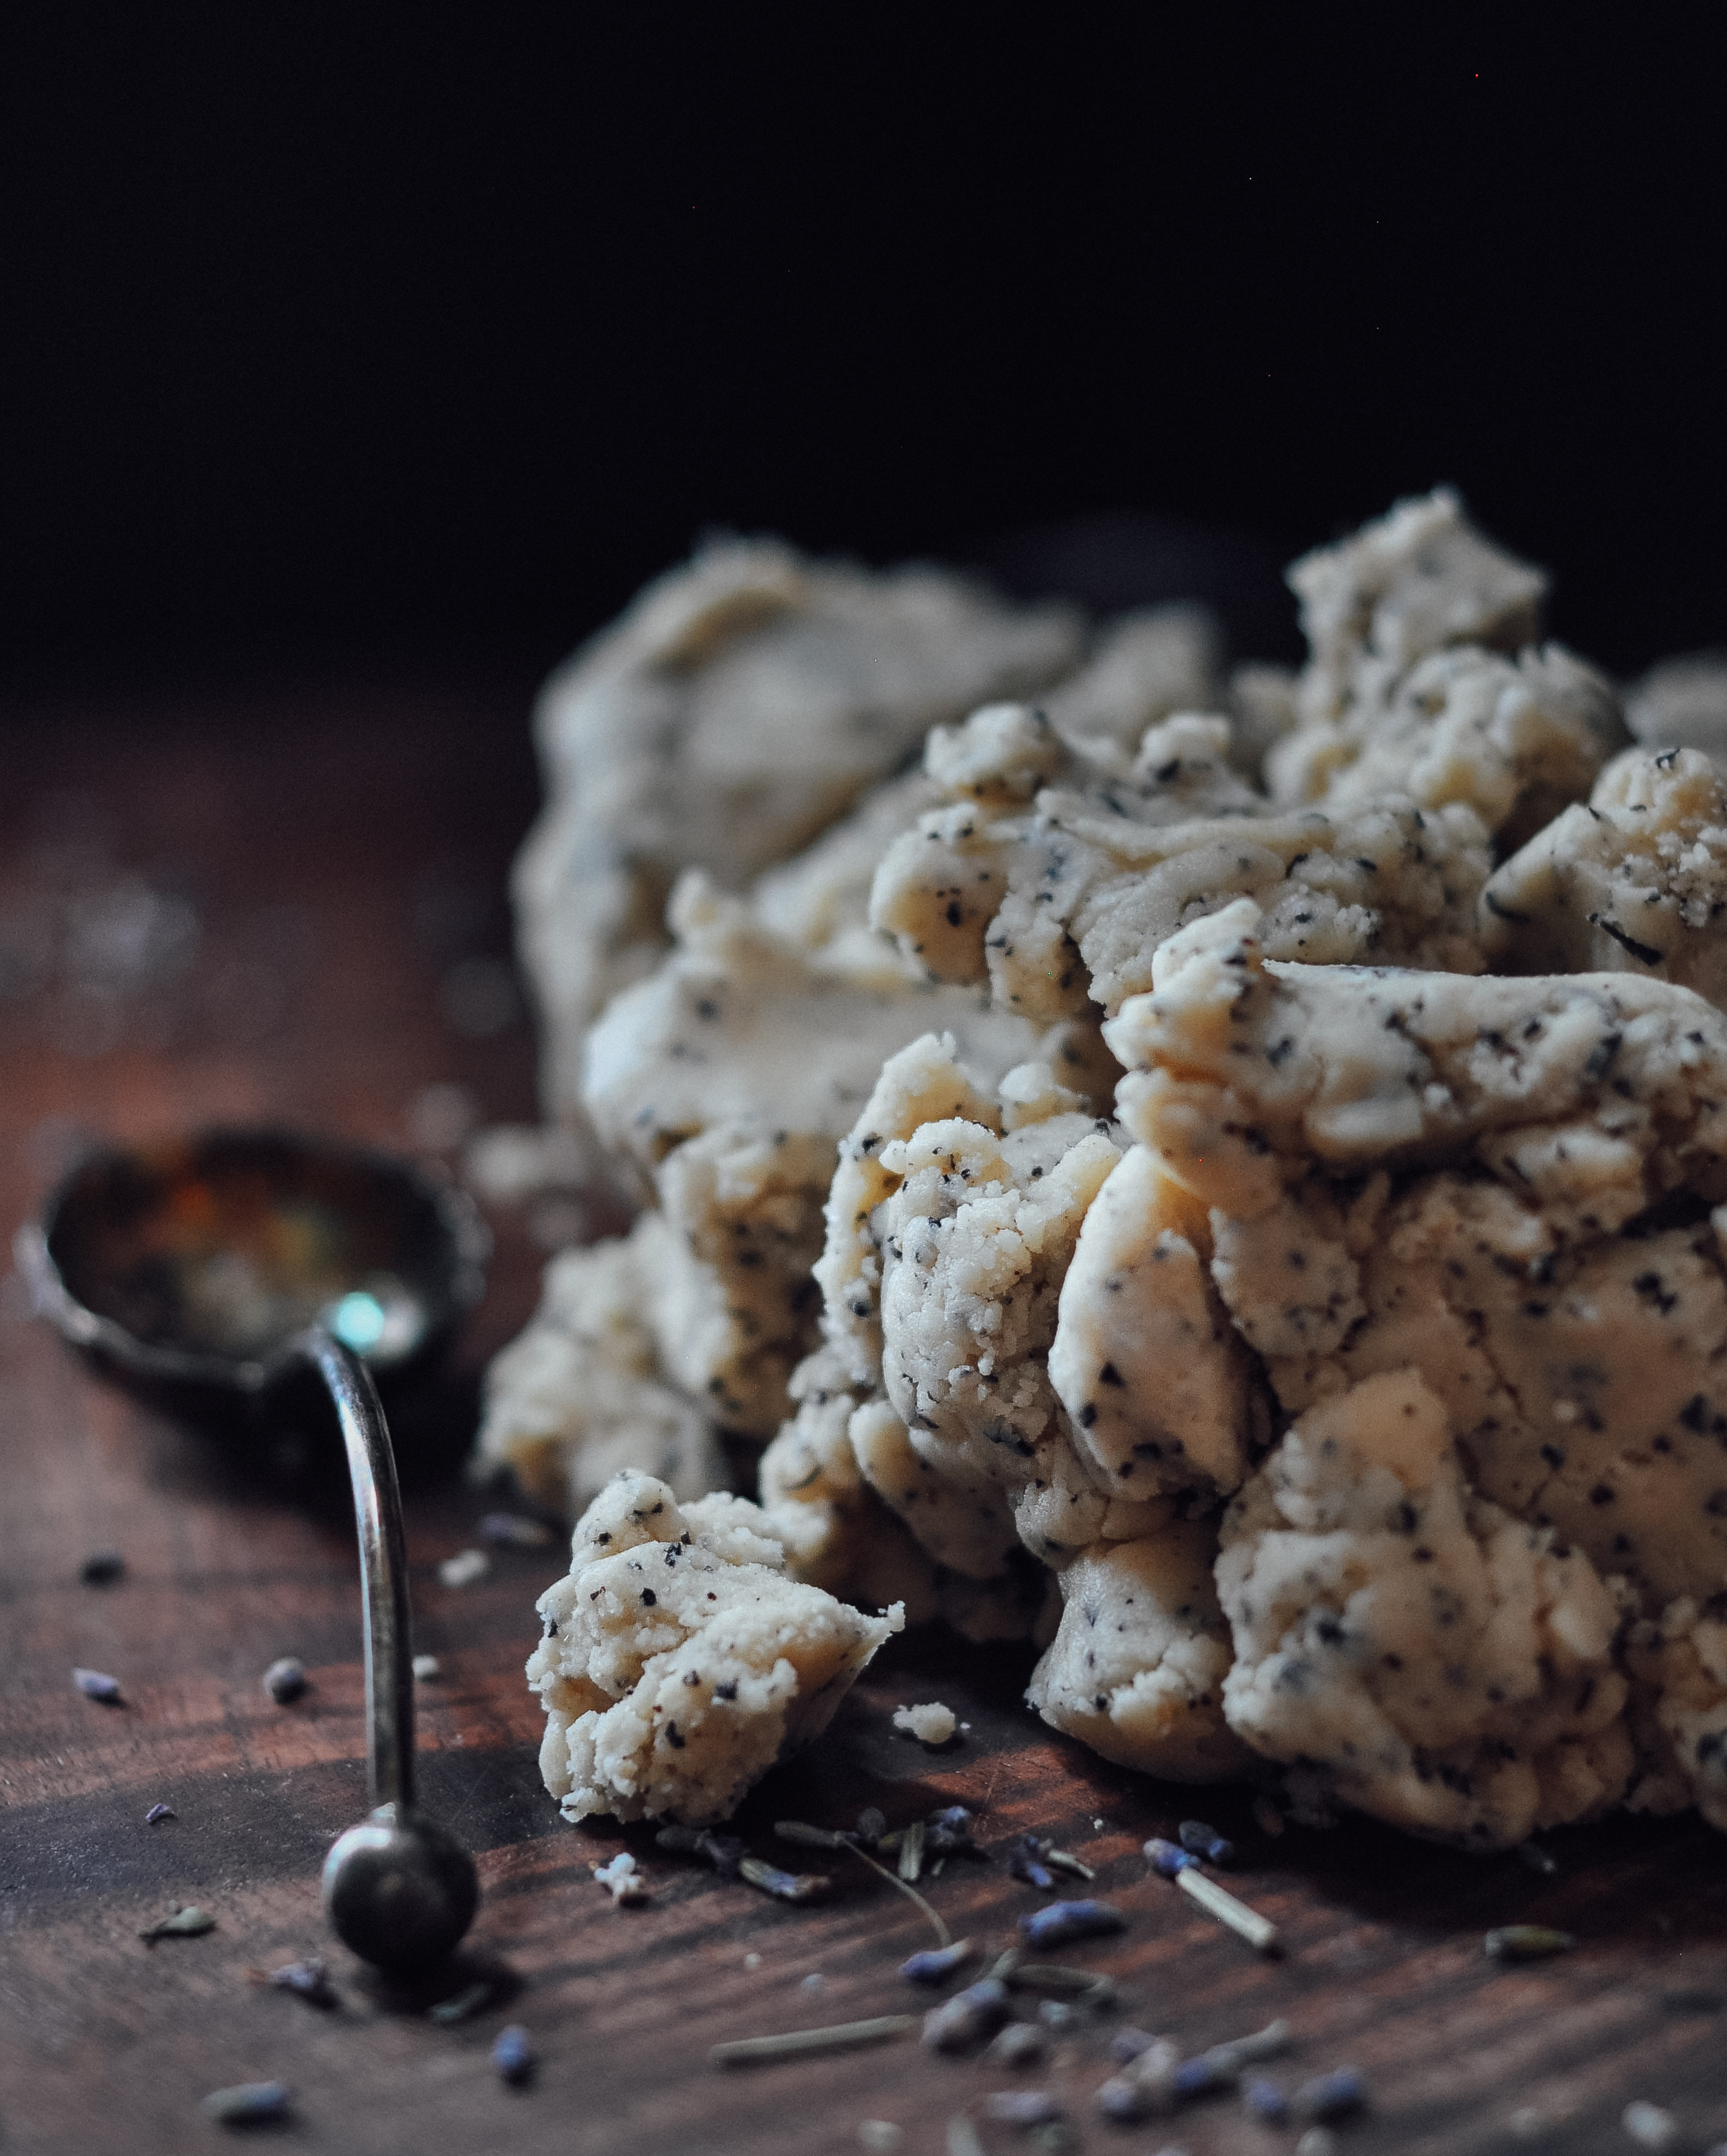
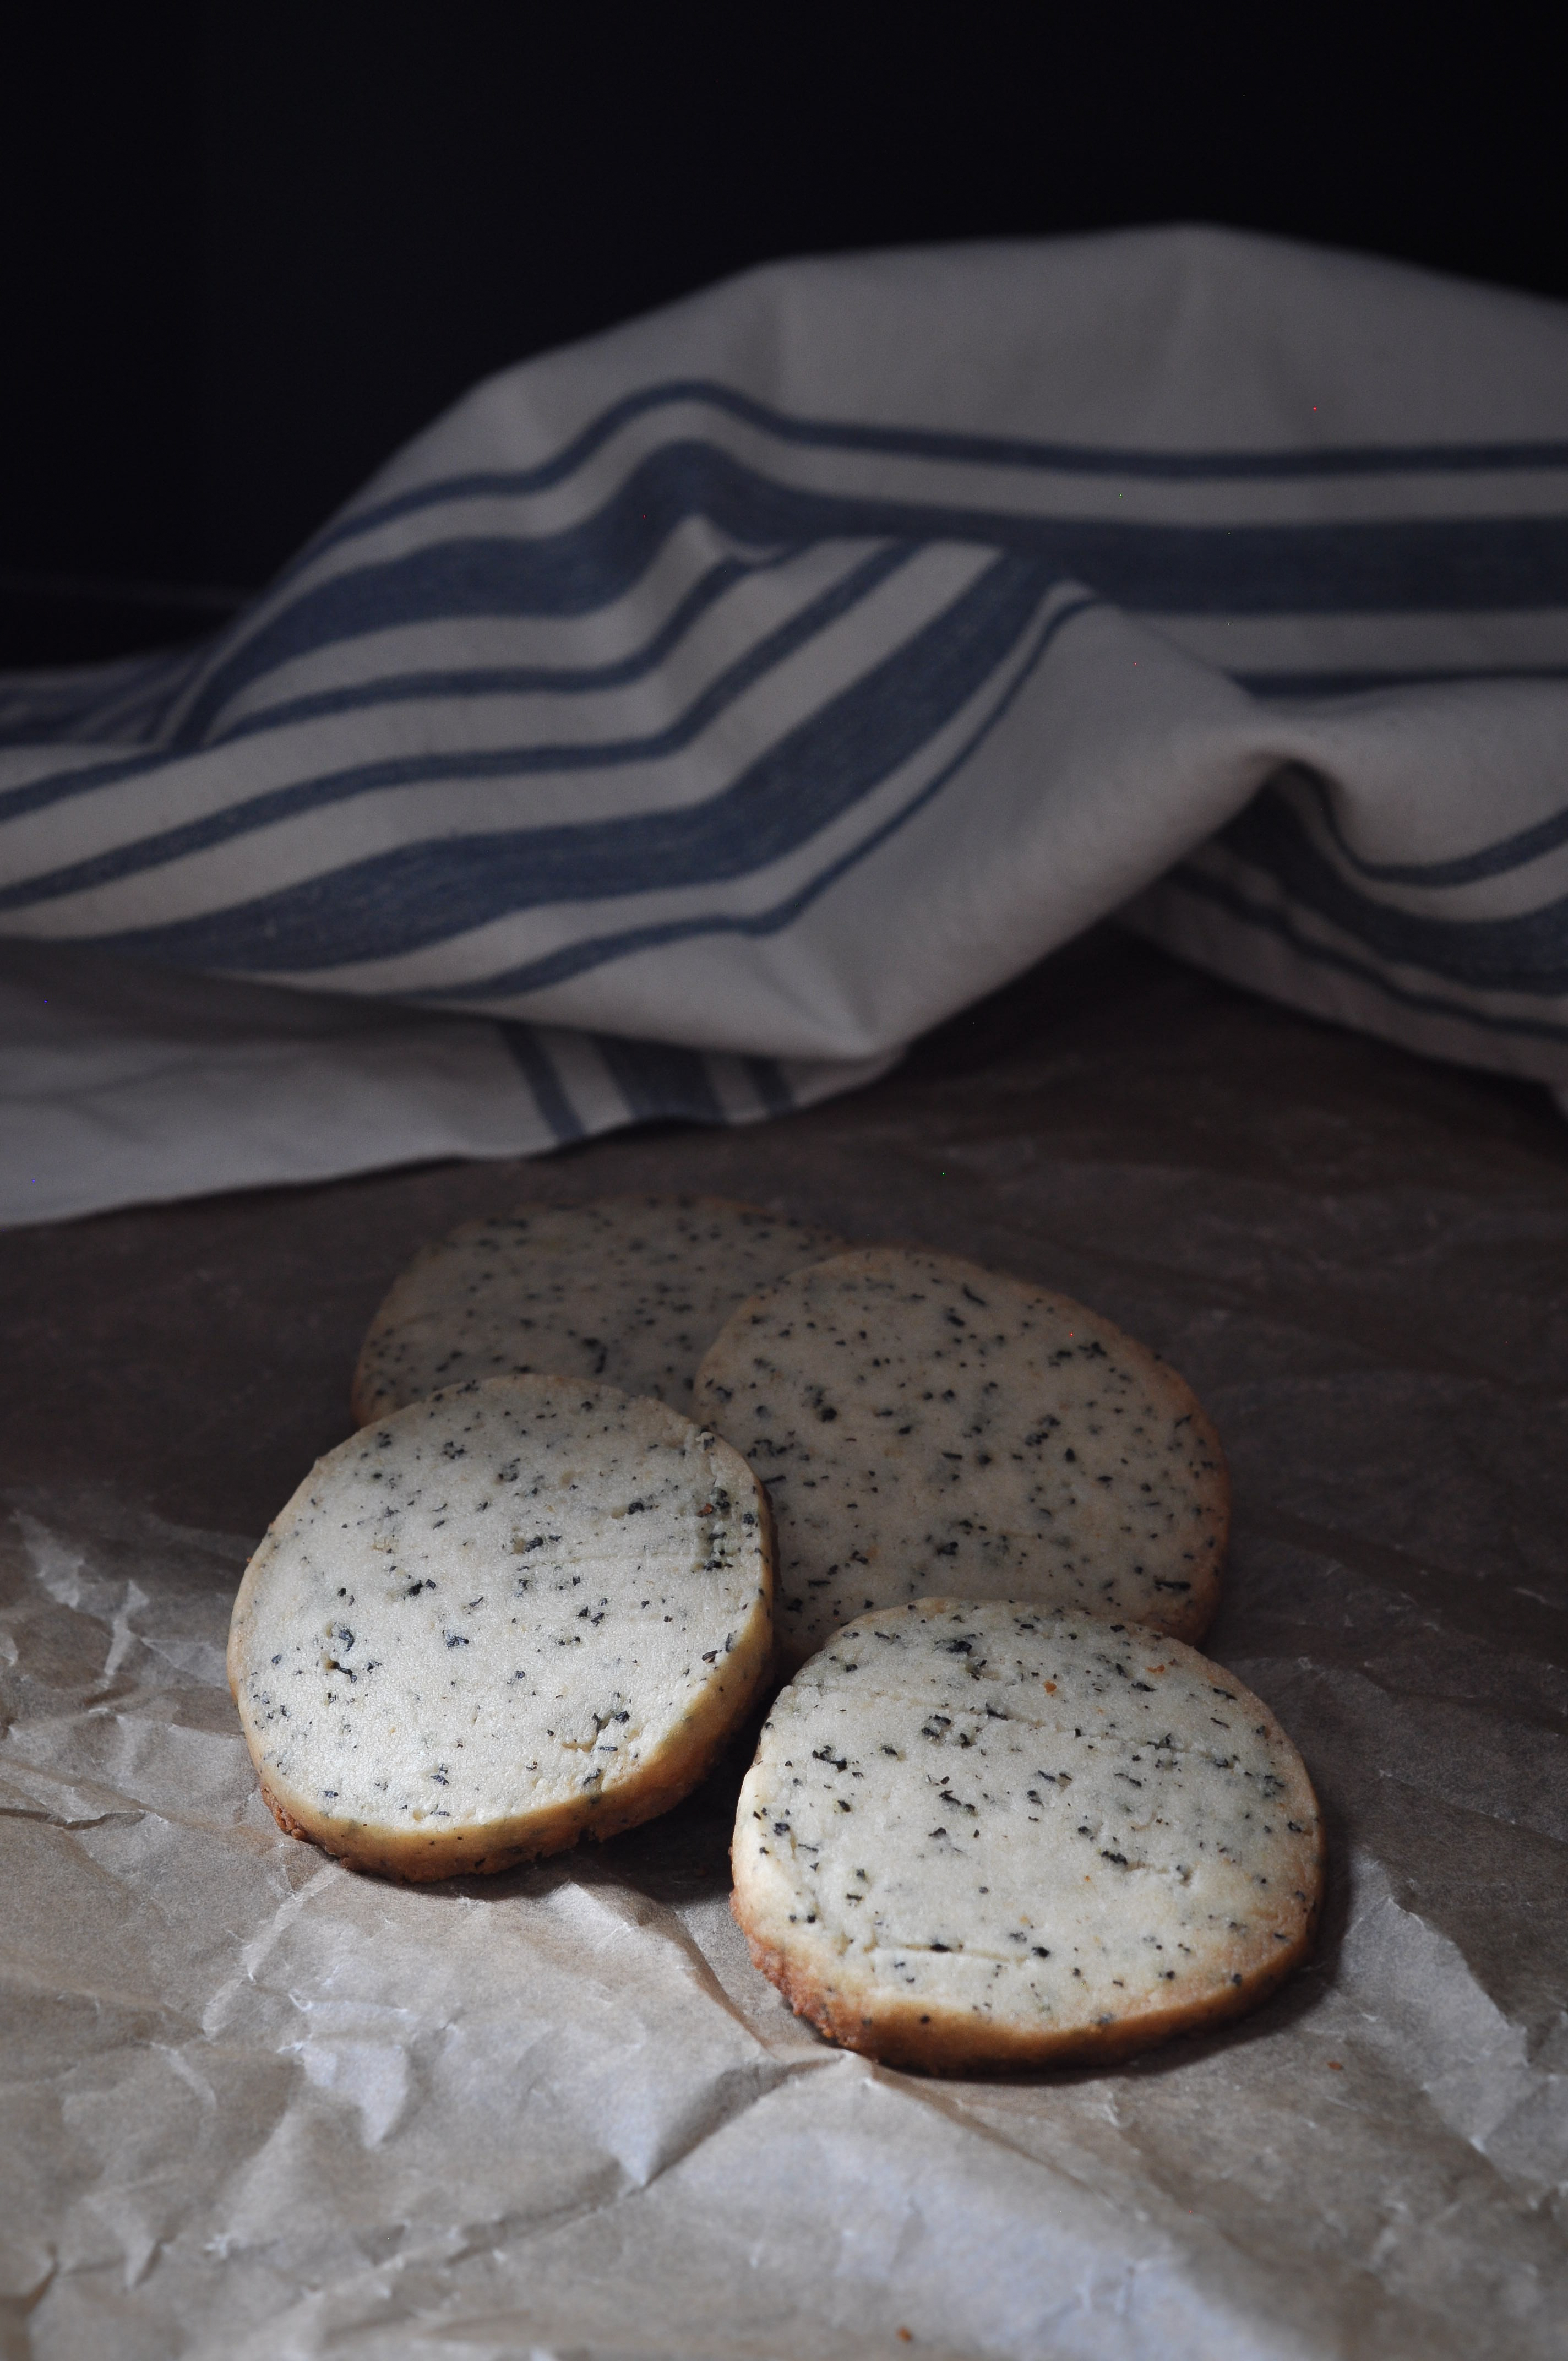
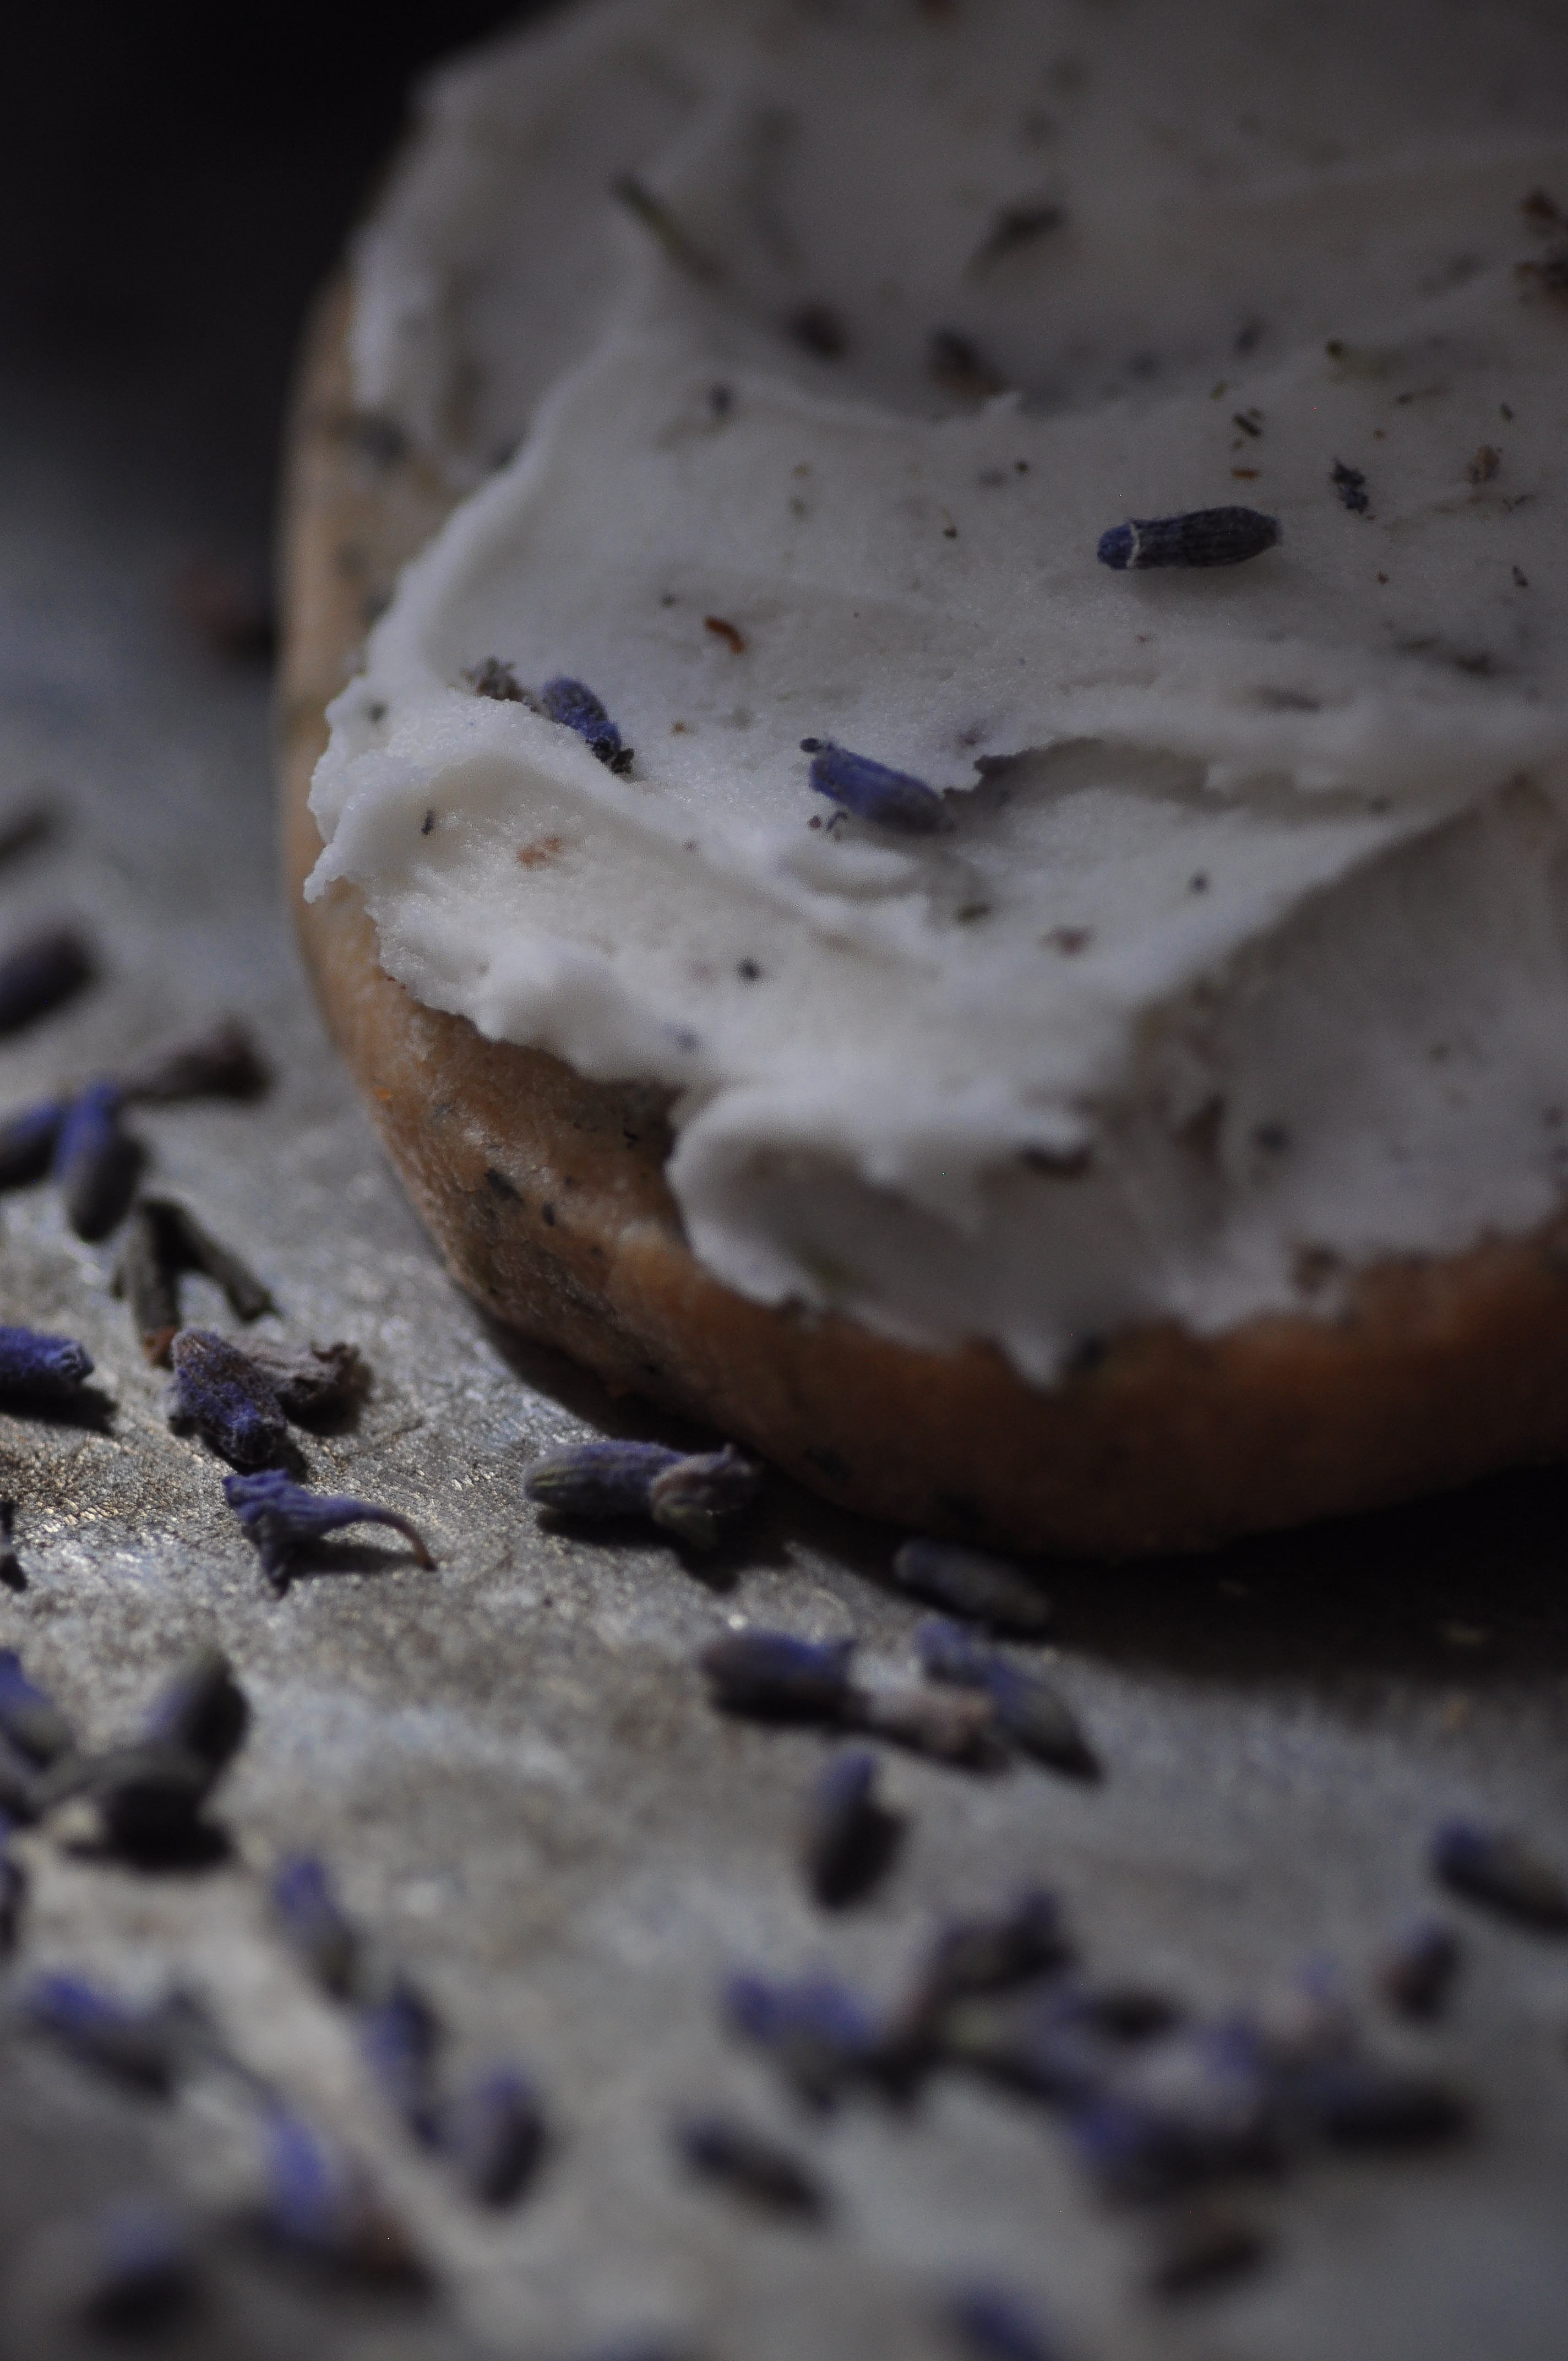
I knew I wanted to combine Earl Grey and Lavender in some combination, and I had been thinking about this for quite some time. I figured two dozen would be more than enough (well, two dozen minus the few I burned… it happens…). I found out later (i.e., reading the “bring 4 dozen” invite right before driving to the event) that the goal of a Cookie Exchange is not to bring your most unique recipe. The goal is to bring a shit ton of cookies, the Christmas kind. So, I kinda did this “Ahh, Lynn, epic fail on the Cookie Exchange” when I re-read the invite. Then, I swirled some Lavender Buttercream on my Earl Grey shortbread, took a bite, and soliloquized: “Ohhhh, Lynn, epic cookie win…epic.cookie.win…”
As I mentioned, I have been wanting to bring Earl Grey and Lavender together. Two delicate, intriguing flavors. Both so distinct, yet there is clear harmony between these two flavors. I opened up my tin of Earl Grey tea, then I twisted off the top of a glass jar full of organic culinary lavender buds, and I took a big whiff of both. It took me back to sipping a cup of tea while admiring my little garden when I lived in Harrogate, England. Then, my daydreaming went off in another direction and I embraced a big ‘ole dose of sentimentality over some amazing friendships I’ve made as I’ve moved around over the past 20 years. One of them: my wonderful gal pal, Josie. My little baking “lightbulb” went on and I knew Earl Grey and Lavender were going to come together in a non-traditional Christmas cookie for her Cookie Exchange.
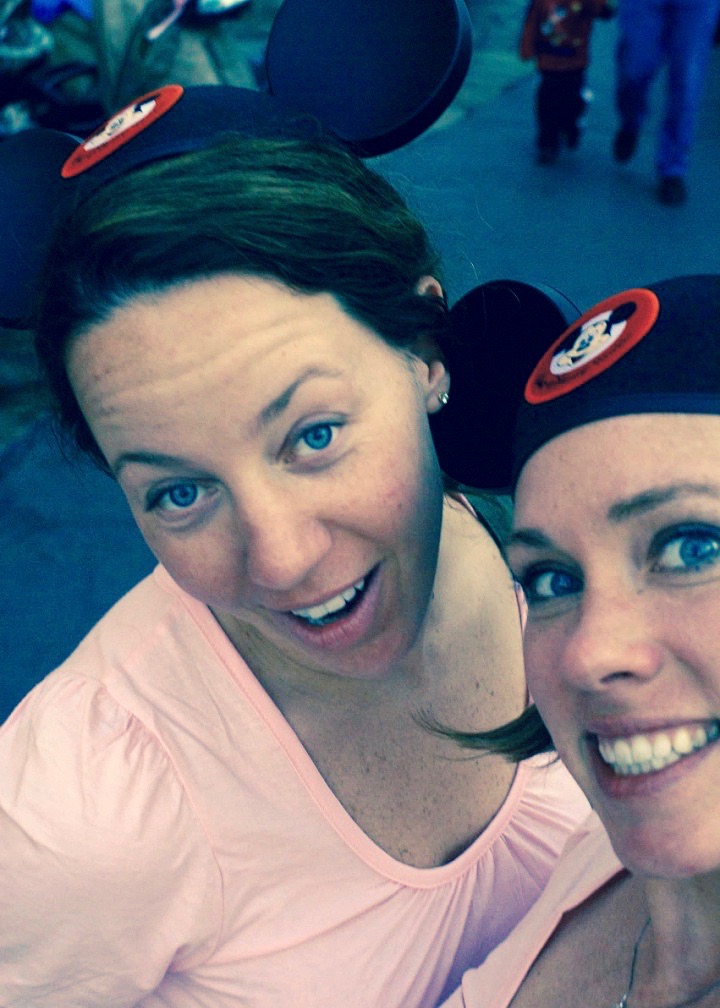
…and how could I not get sentimental when, a few weeks ago, Josie sent me a picture album from a trip we took to Disney World & Epcot Center for New Year’s Eve about 8 years ago. When I met up with Josie in Florida way back on that day, she gave me a huge hug and then immediately provided one condition for our trip: we were wearing matching outfits and it would include mouse ears. How could I resist?… I still have my shirt…


“The most beautiful discovery true friends make is that they can grow separately without growing apart.”
~Elizabeth Foley
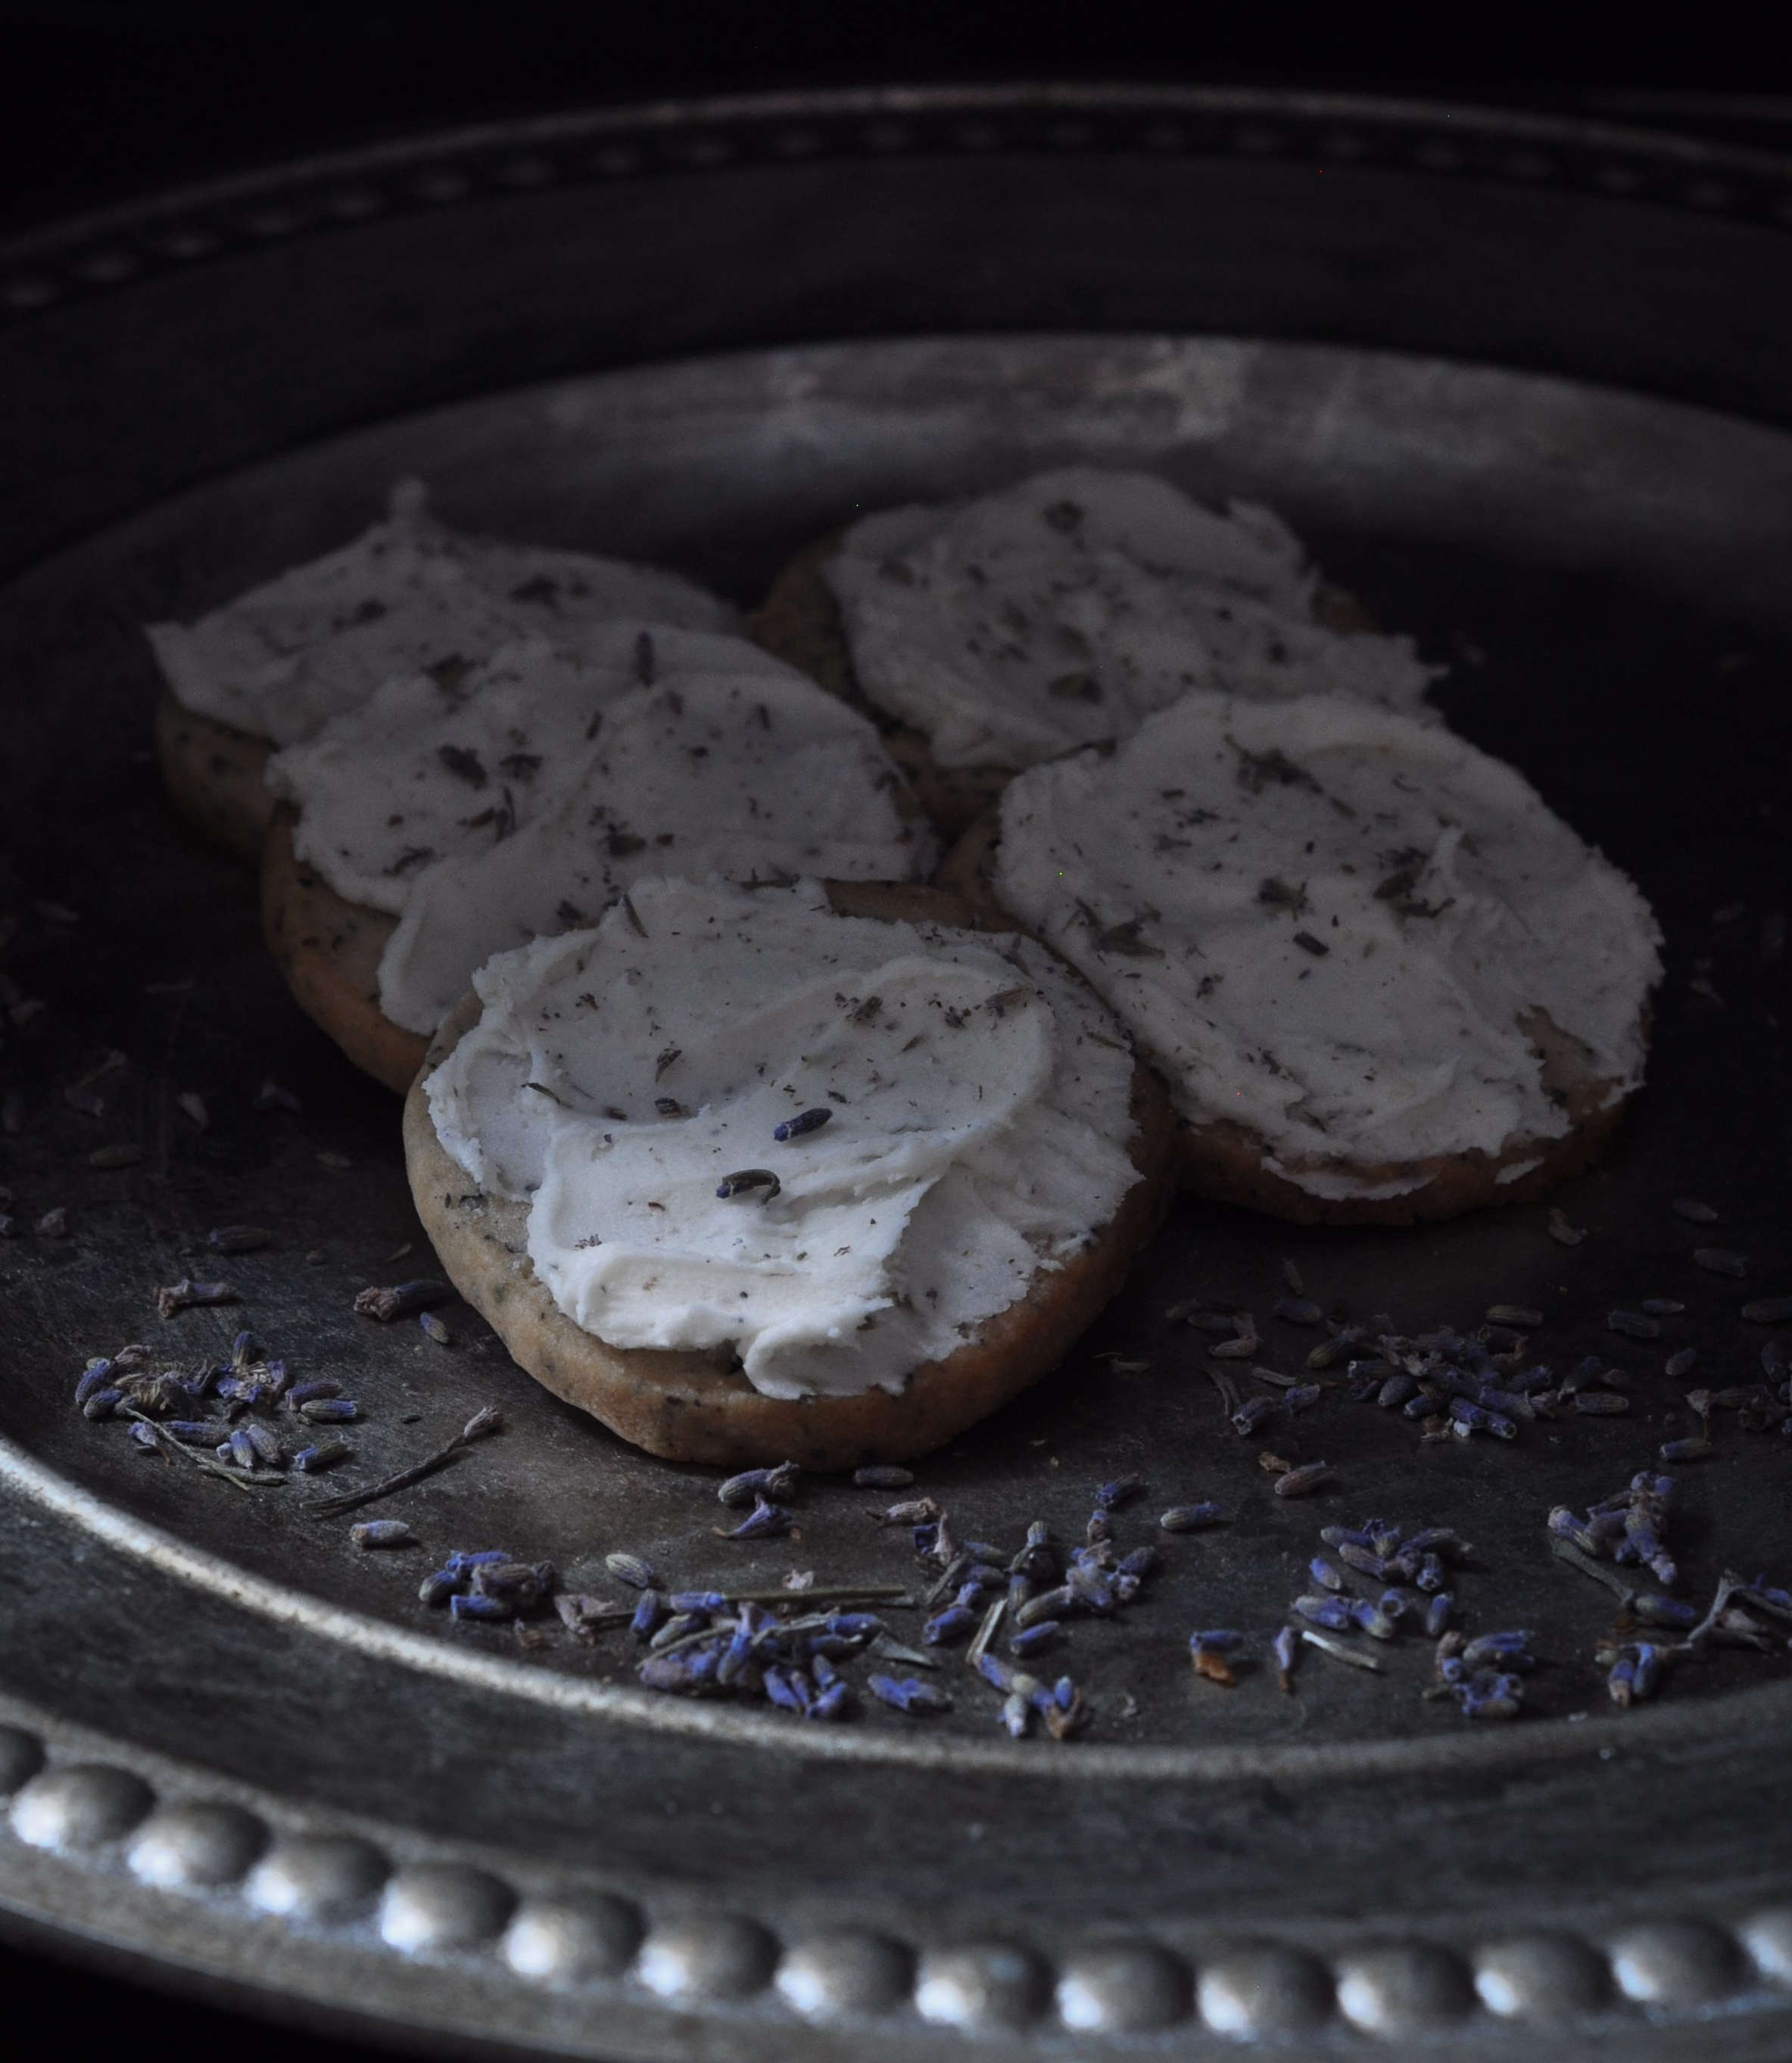
You can check out this shortbread recipe at the FeedFeed’s website as featured on the Shortbread Feed.
FeedFeed is a great resource for recipes and connecting home chefs, food lovers, bloggers!
Earl Grey Shortbread with Lavender Buttercream
2016-12-19 20:05:06
Yields 24
Fragrant, delicate with perfect floral notes. Earl Grey tea and lavender combine in this delightful little cookie.
Prep Time
45 min
Cook Time
12 min
Total Time
1 hr
Nutrition Facts
Serving Size
50g
Yields
24
Amount Per Serving
Calories 241
Calories from Fat 119
% Daily Value *
Total Fat 14g
21%
Saturated Fat 9g
43%
Trans Fat 1g
Polyunsaturated Fat 1g
Monounsaturated Fat 3g
Cholesterol 36mg
12%
Sodium 52mg
2%
Total Carbohydrates 29g
10%
Dietary Fiber 0g
1%
Sugars 21g
Protein 1g
Vitamin A
8%
Vitamin C
0%
Calcium
1%
Iron
1%
* Percent Daily Values are based on a 2,000 calorie diet. Your Daily Values may be higher or lower depending on your calorie needs.
Shortbread
- 2 cups all-purpose flour
- 2 tablespoons loose Earl Grey tea leaves
- 1/2 teaspoon Kosher salt
- 3/4 cup powdered sugar
- 1 teaspoon pure vanilla extract
- 1 cup unsalted butter, room temperature
Lavender Buttercream
- 3/4 cups unsalted butter, room temperature
- 3 1/2 cups powdered sugar
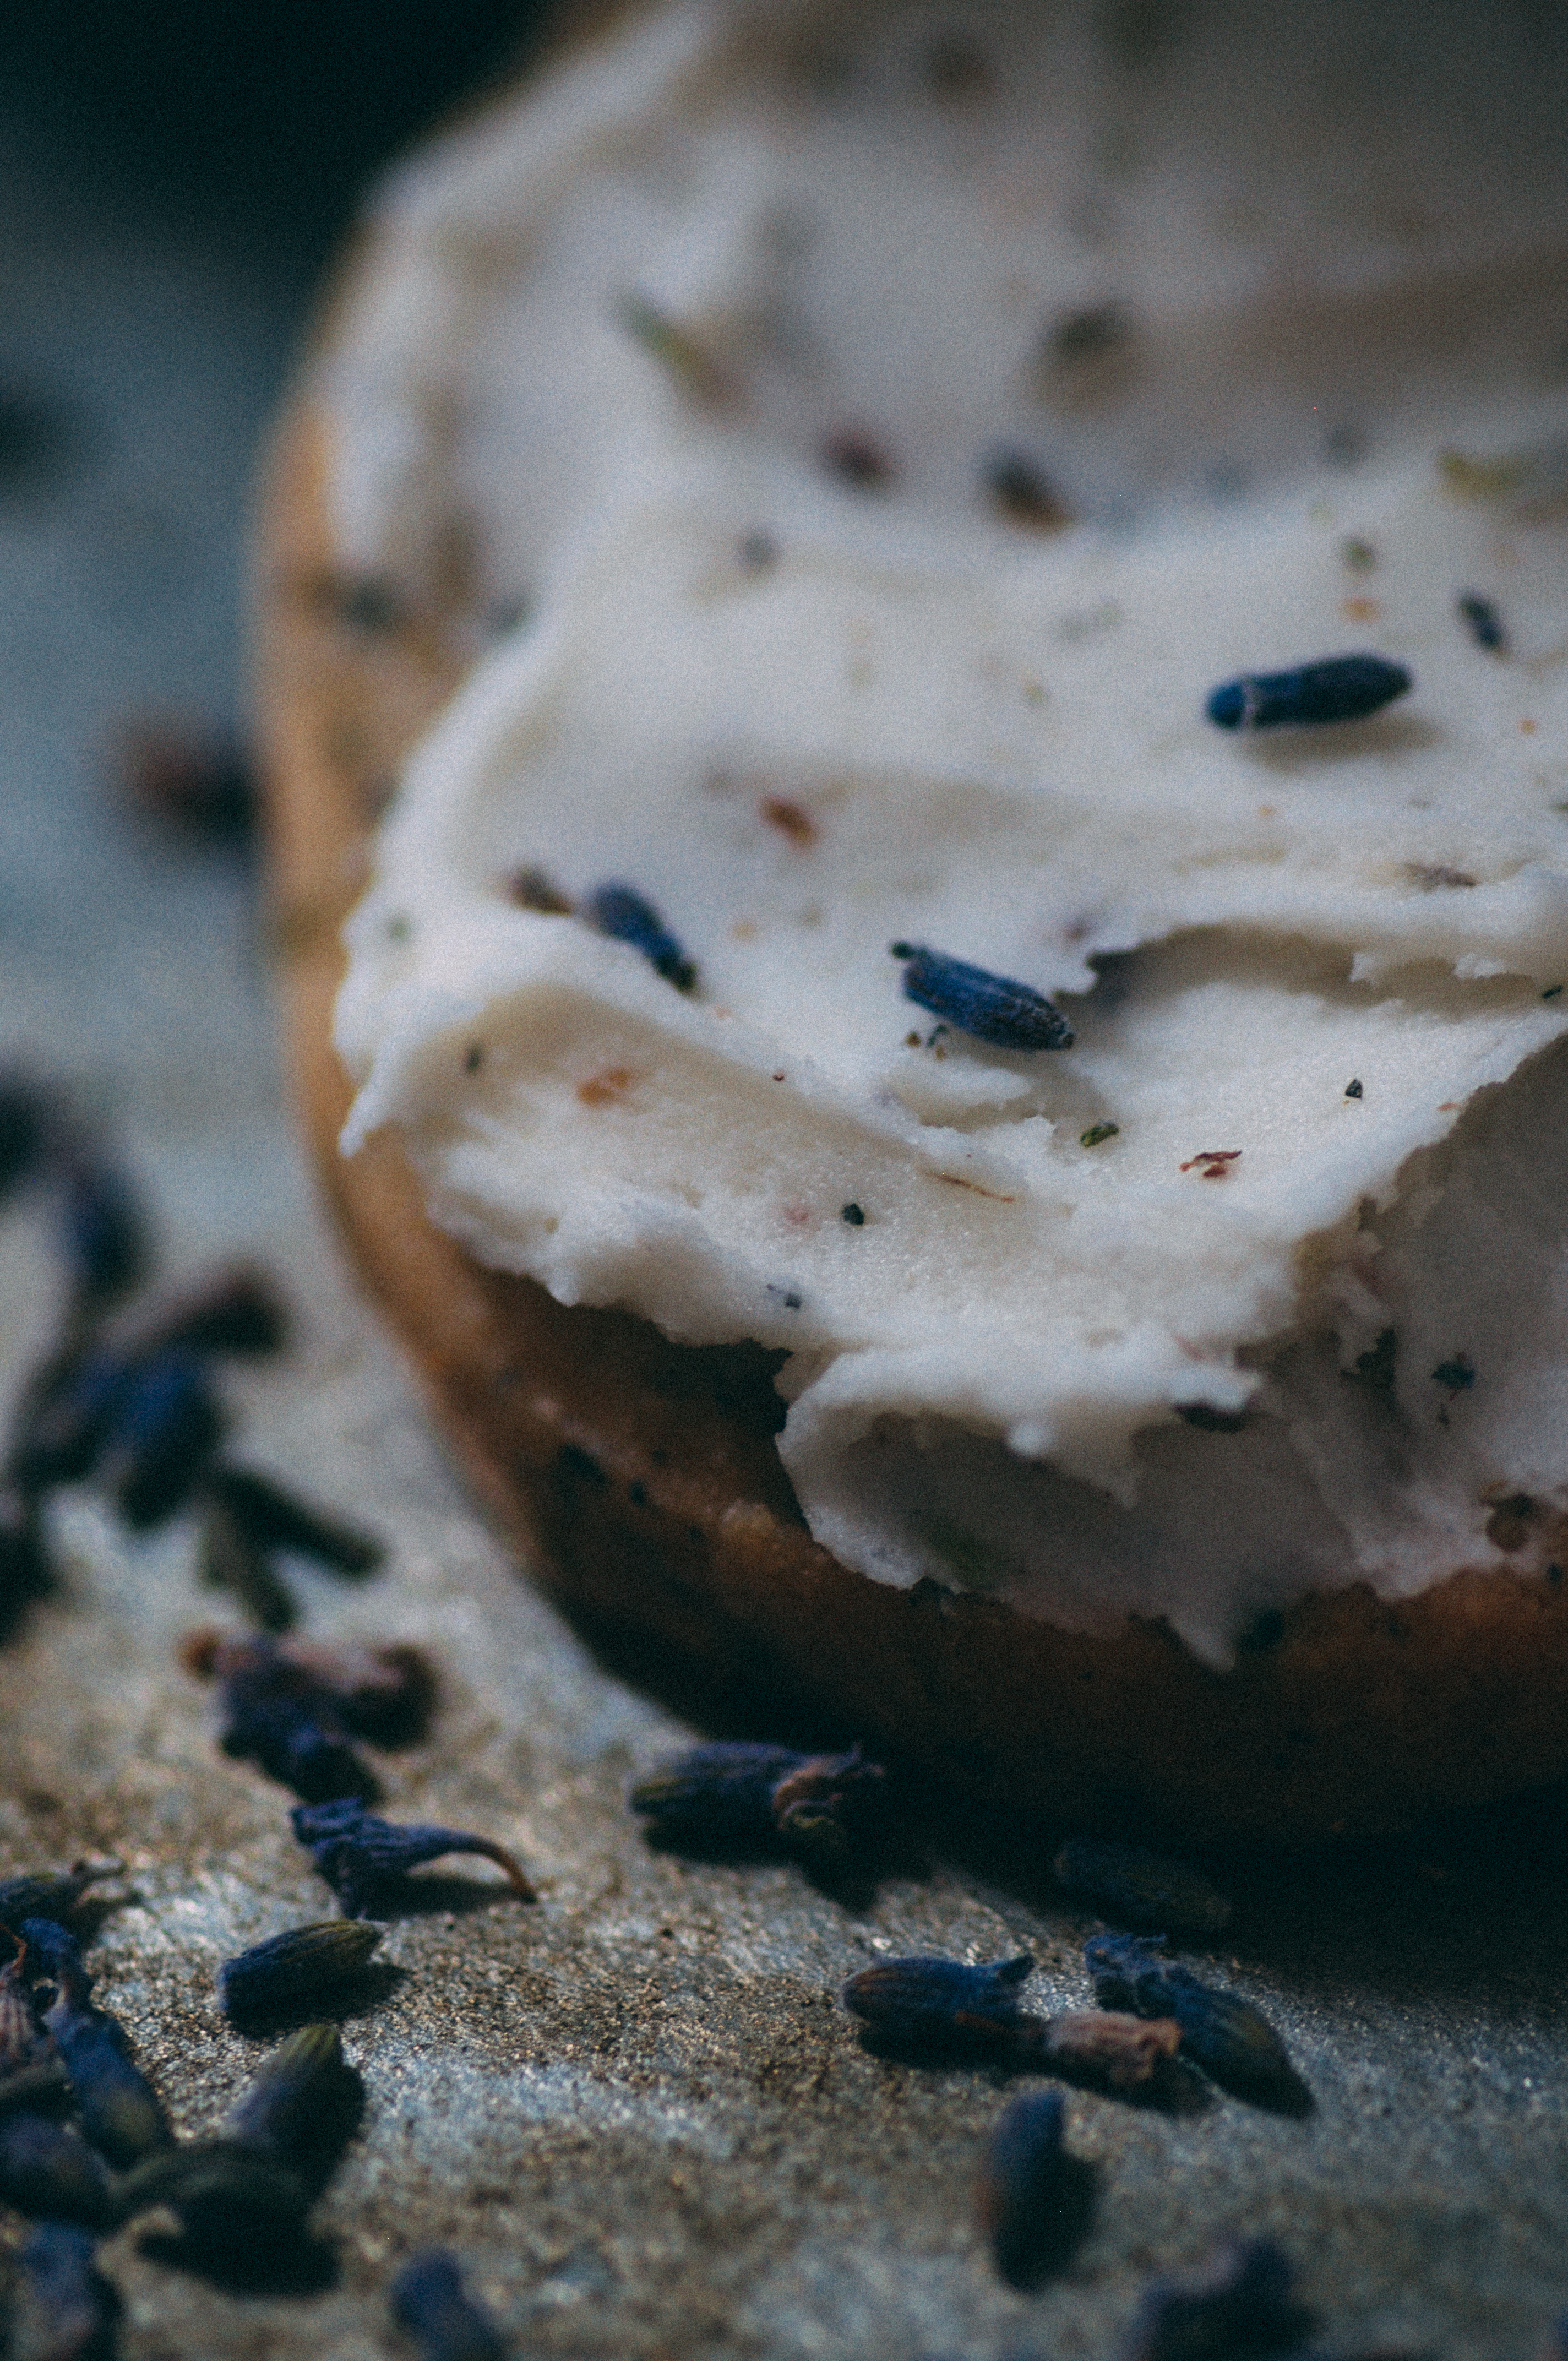
- 1 teaspoon dried culinary lavender, finely chopped
- 1 teaspoon pure vanilla extract
- 1 tablespoon milk or cream, if needed, to thin buttercream
Shortbread
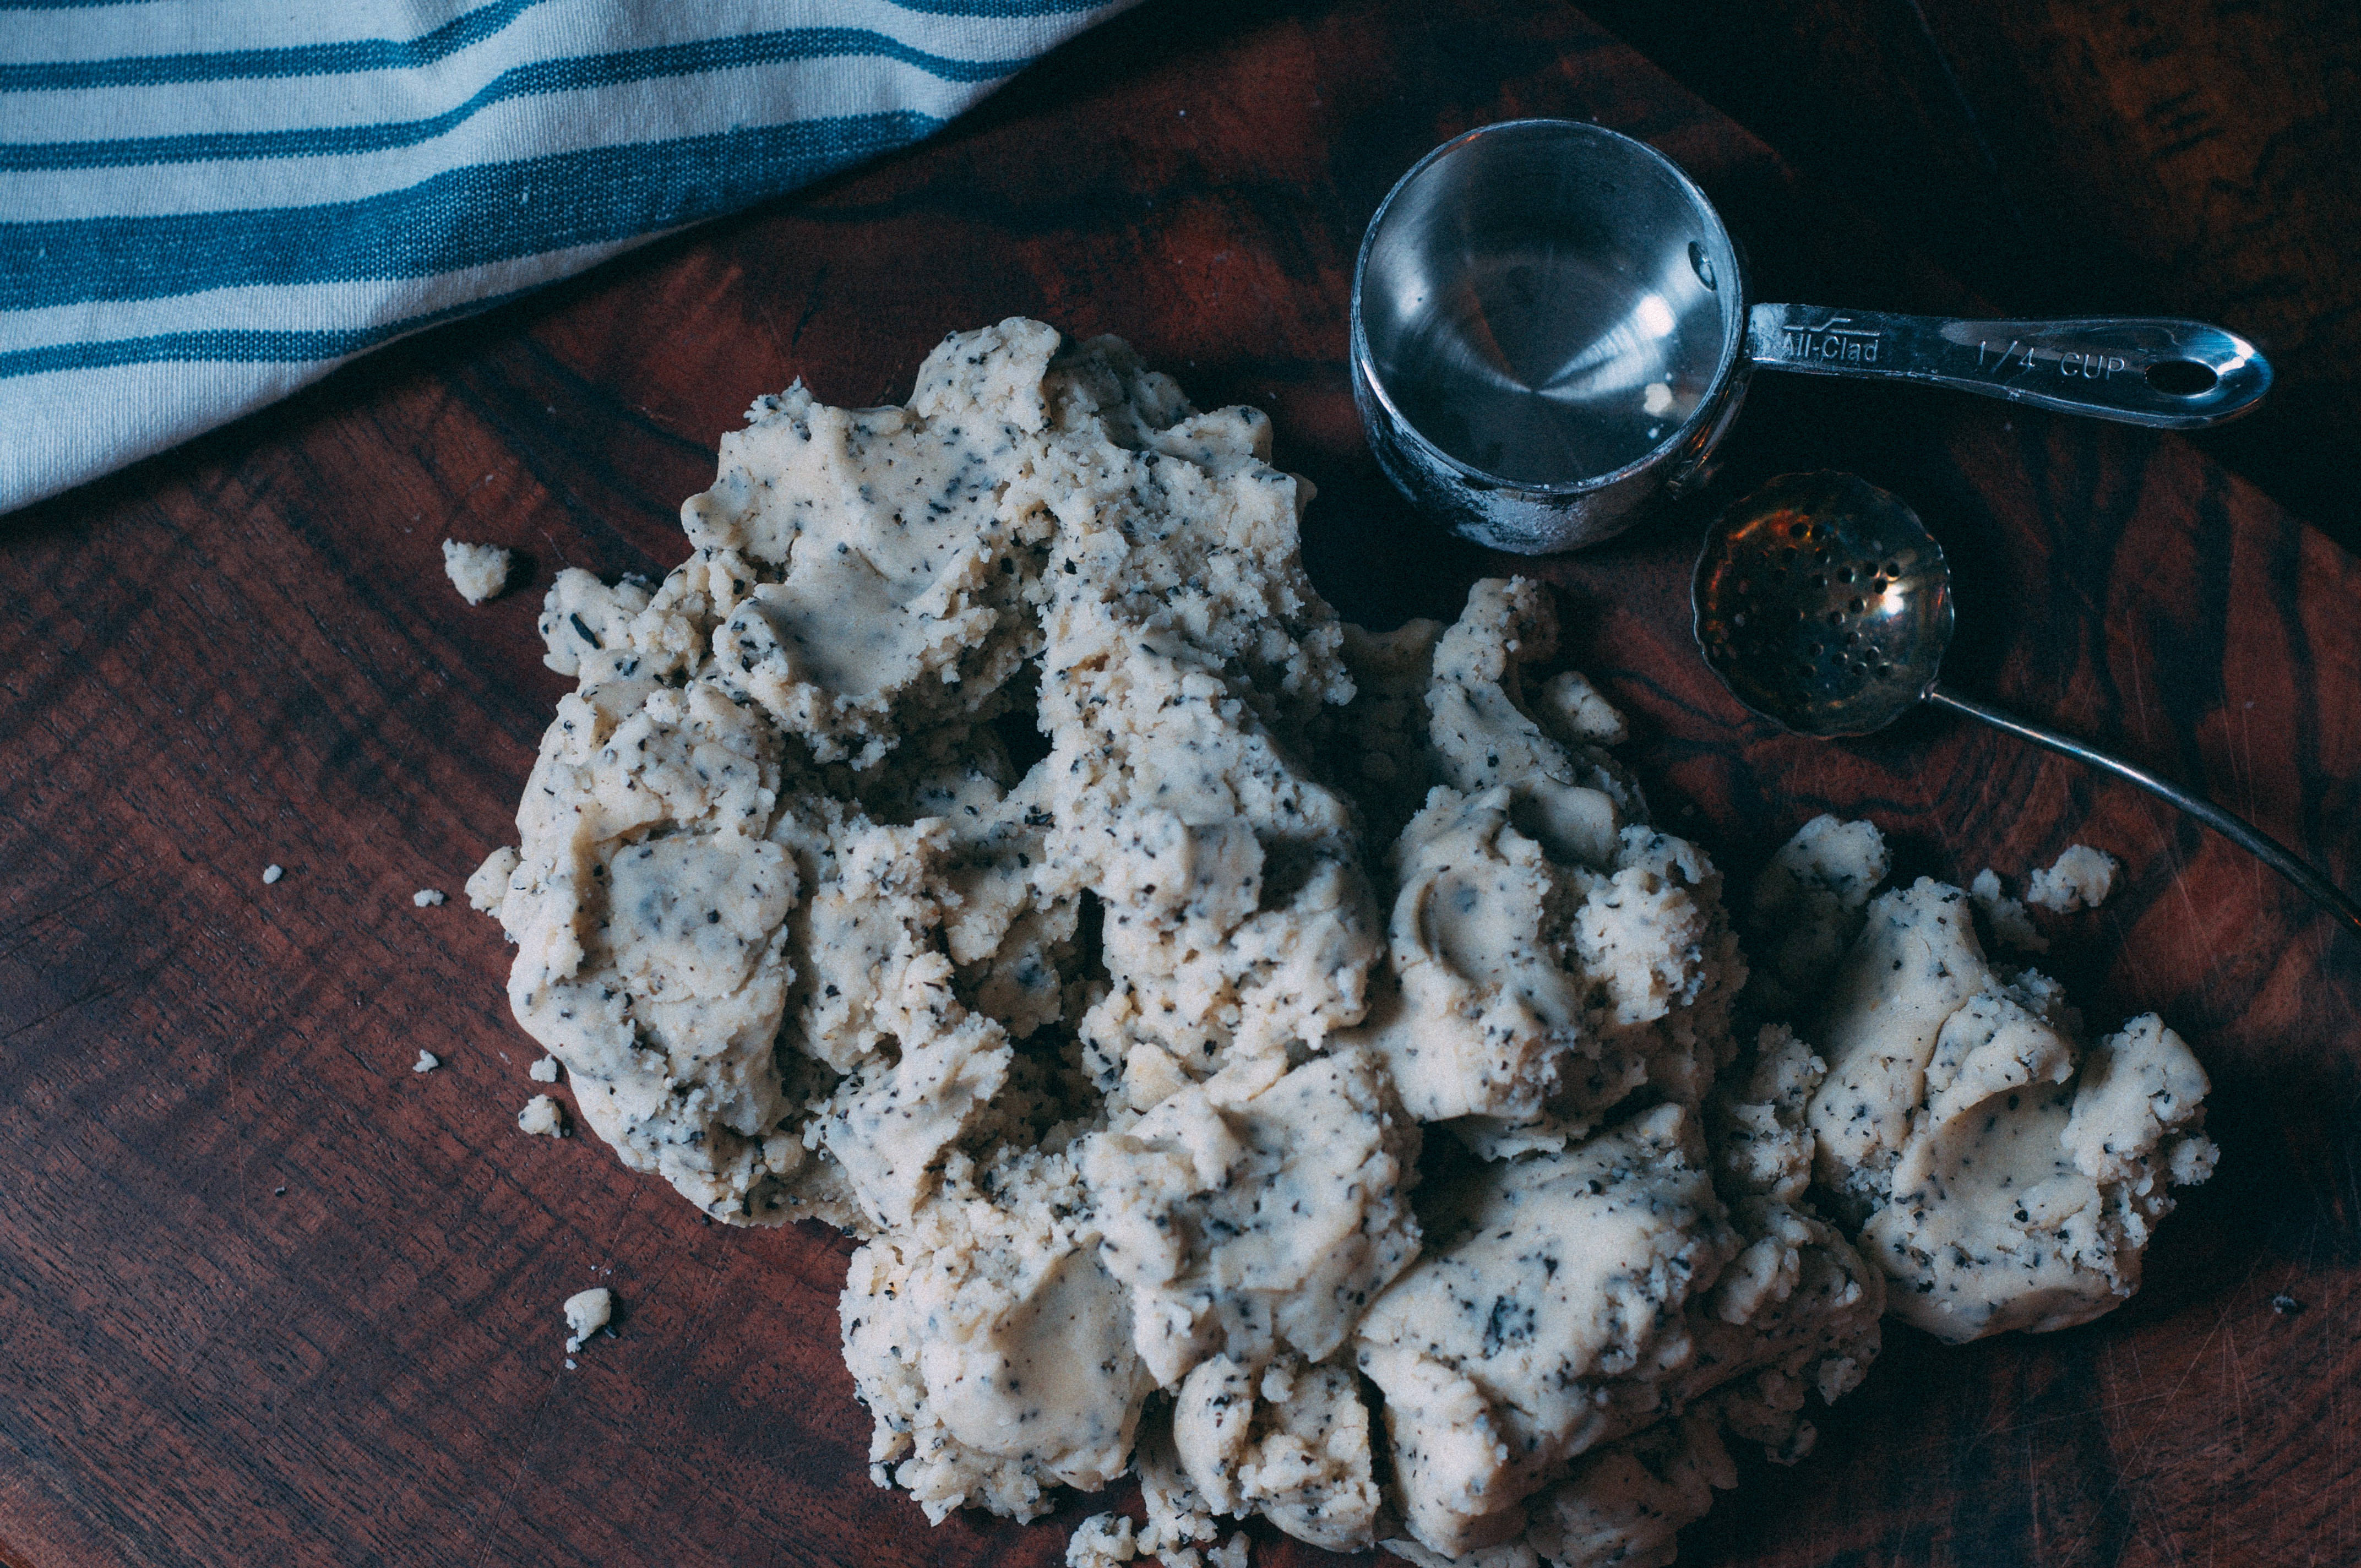
- In a food processor, pulse together the flour, tea, and salt, until the tea is just spotted throughout the flour. Add the powdered sugar, vanilla, and butter. Pulse together just until a dough is formed. Place the dough on a sheet of plastic wrap and roll into a log (about 2 1/2-inches in diameter). Tightly twist each end of the plastic wrap and chill in the refrigerator for 30 minutes.
- Preheat oven to 375 degrees F.
- Slice the log into 1/3-inch thick disks. Place on parchment lined baking sheets, 2 inches apart. Bake until the edges are just lightly brown, about 12 minutes. Watch the time carefully, these cookies are thin and will burn quickly. Let the shortbread cool on the cookie sheets for 5 minutes and then transfer to wire racks and cool to room temperature.
Lavender Buttercream
- Add butter to the bowl of your electric mixer fitted with the paddle attachment and beat until creamy. With the mixer on low speed, gradually add the powdered sugar and finely chopped lavender. Increase the speed of the mixer, scrape down the sides, if needed, and beat the frosting until fluffy and combined. Beat in the vanilla extract.
- If the frosting seems too thick, beat in a tablespoon of milk at a time. If it seems to runny or too thin, you can beat in more powdered sugar. Frost the shortbread when they are completely cool. Top with a few lavender buds, if you wish.
TraveLynn Eats https://www.travelynneats.com/
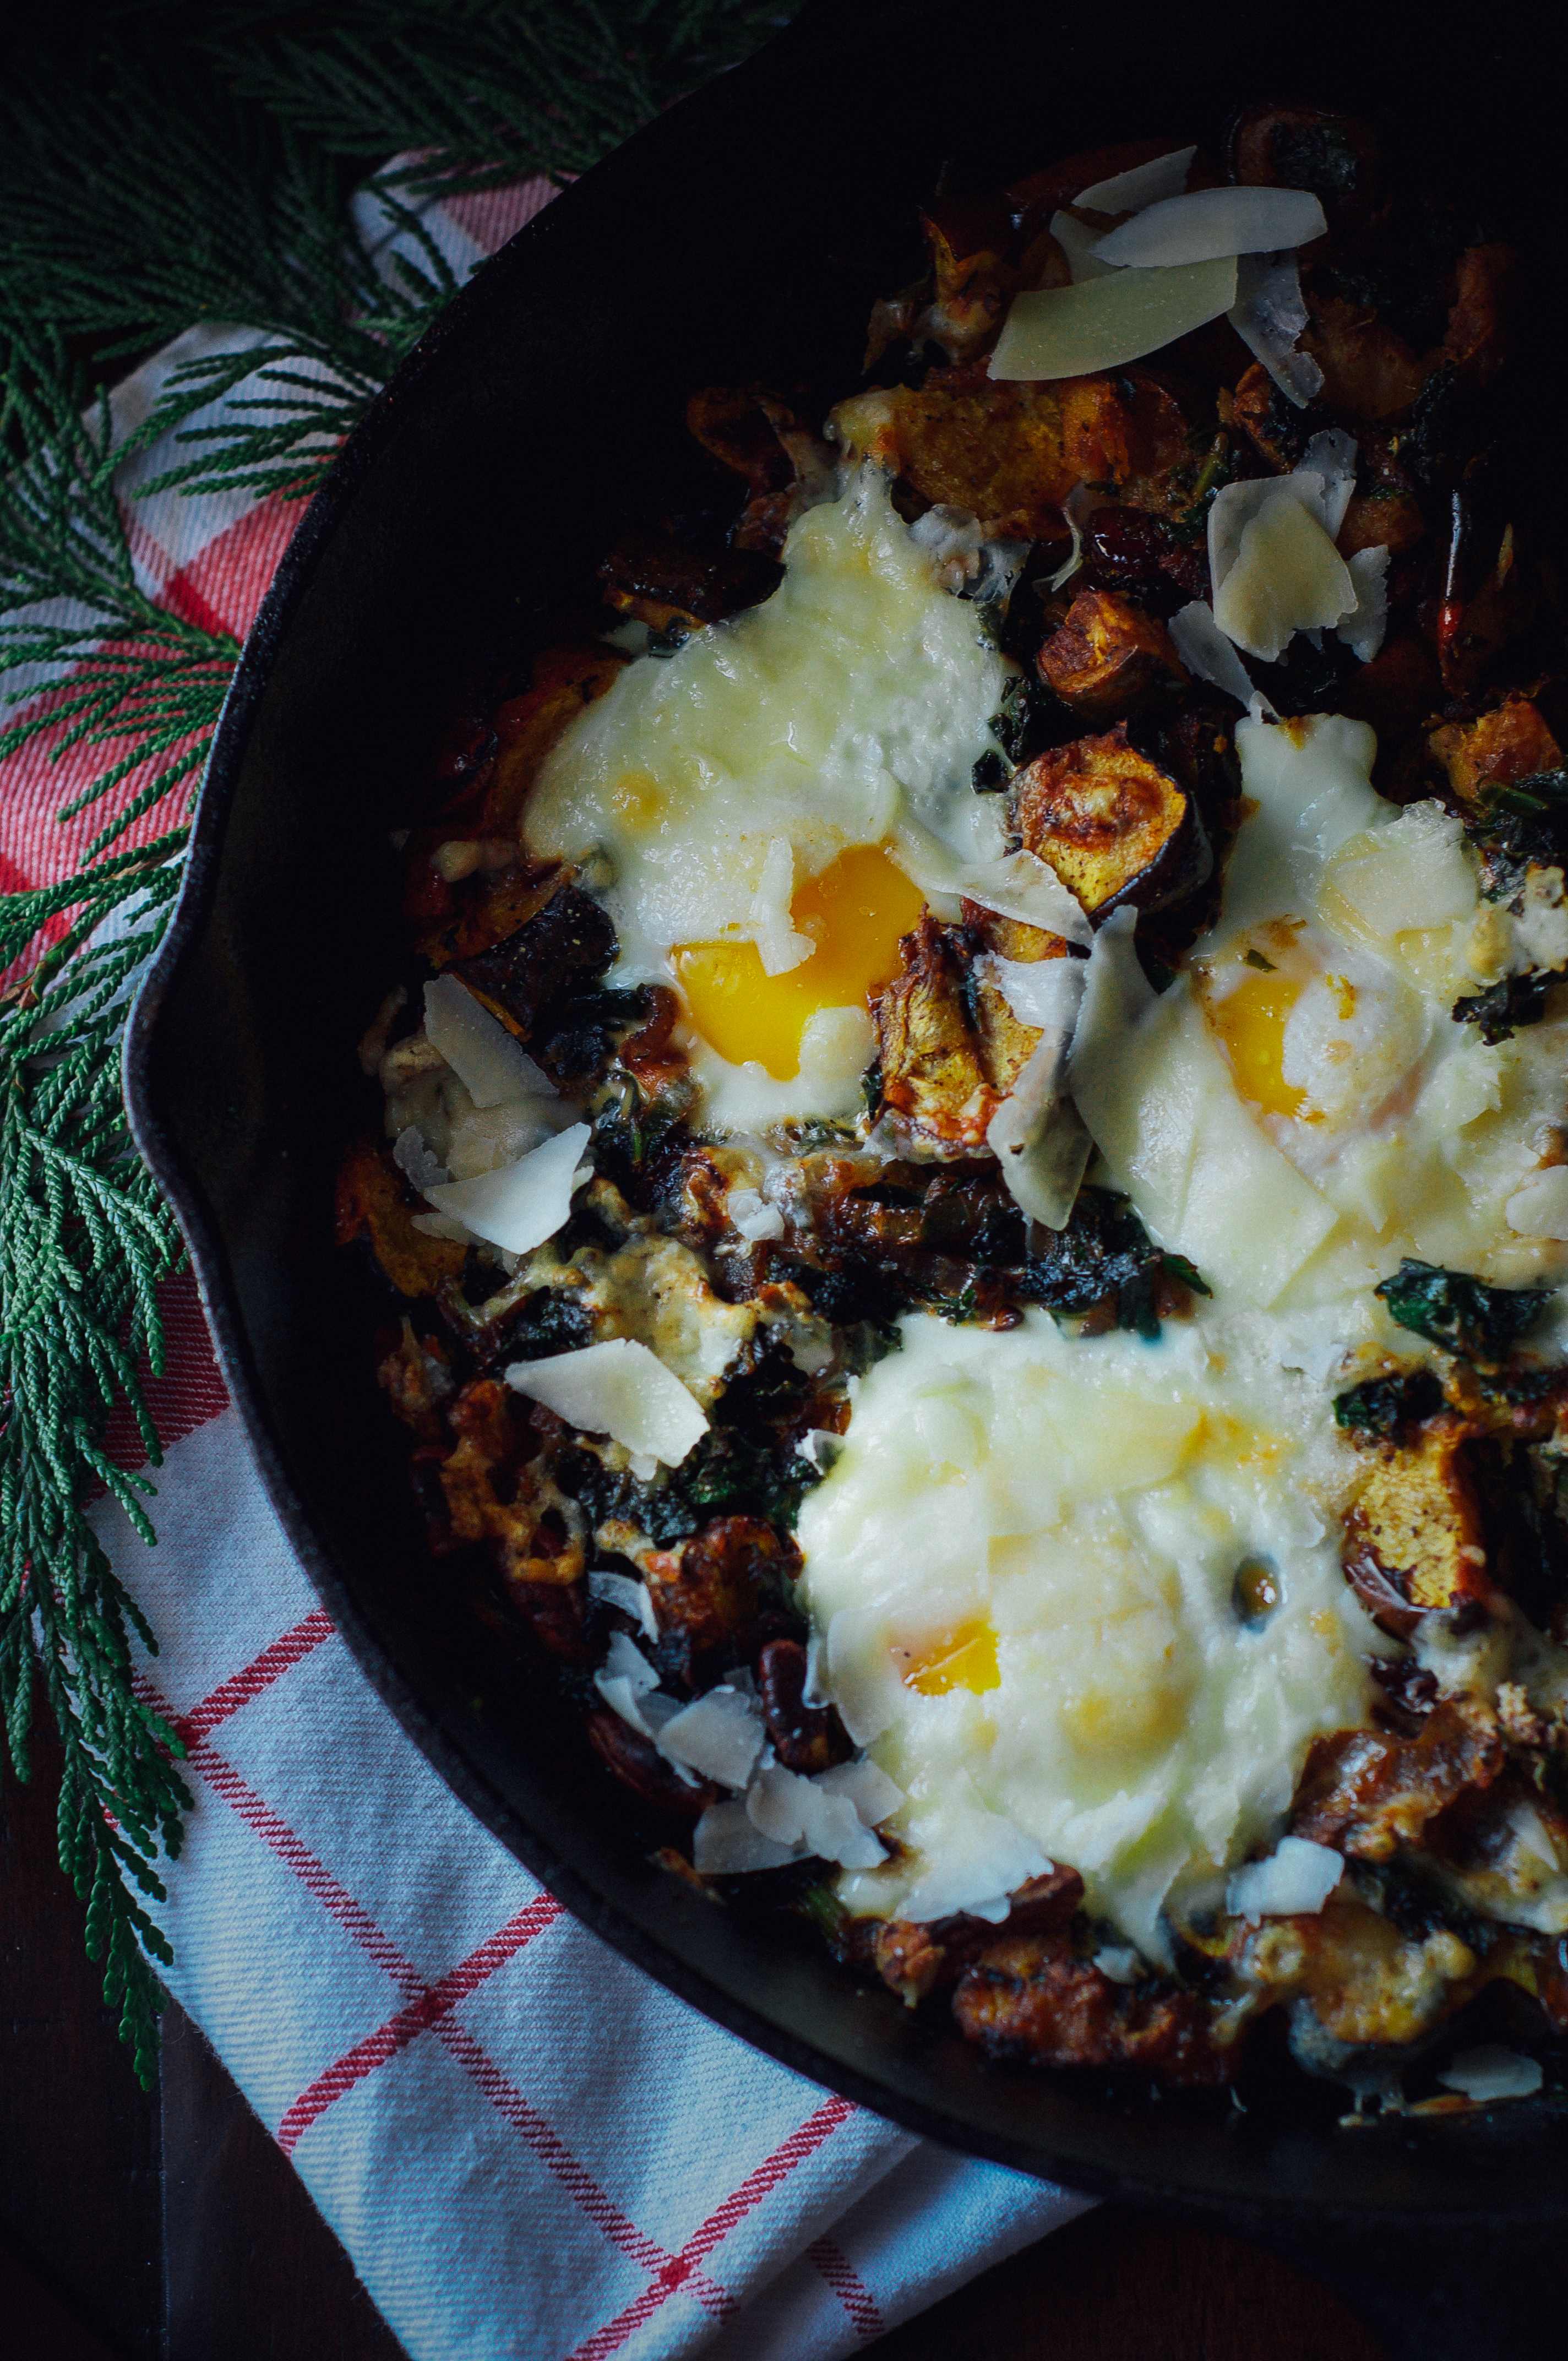
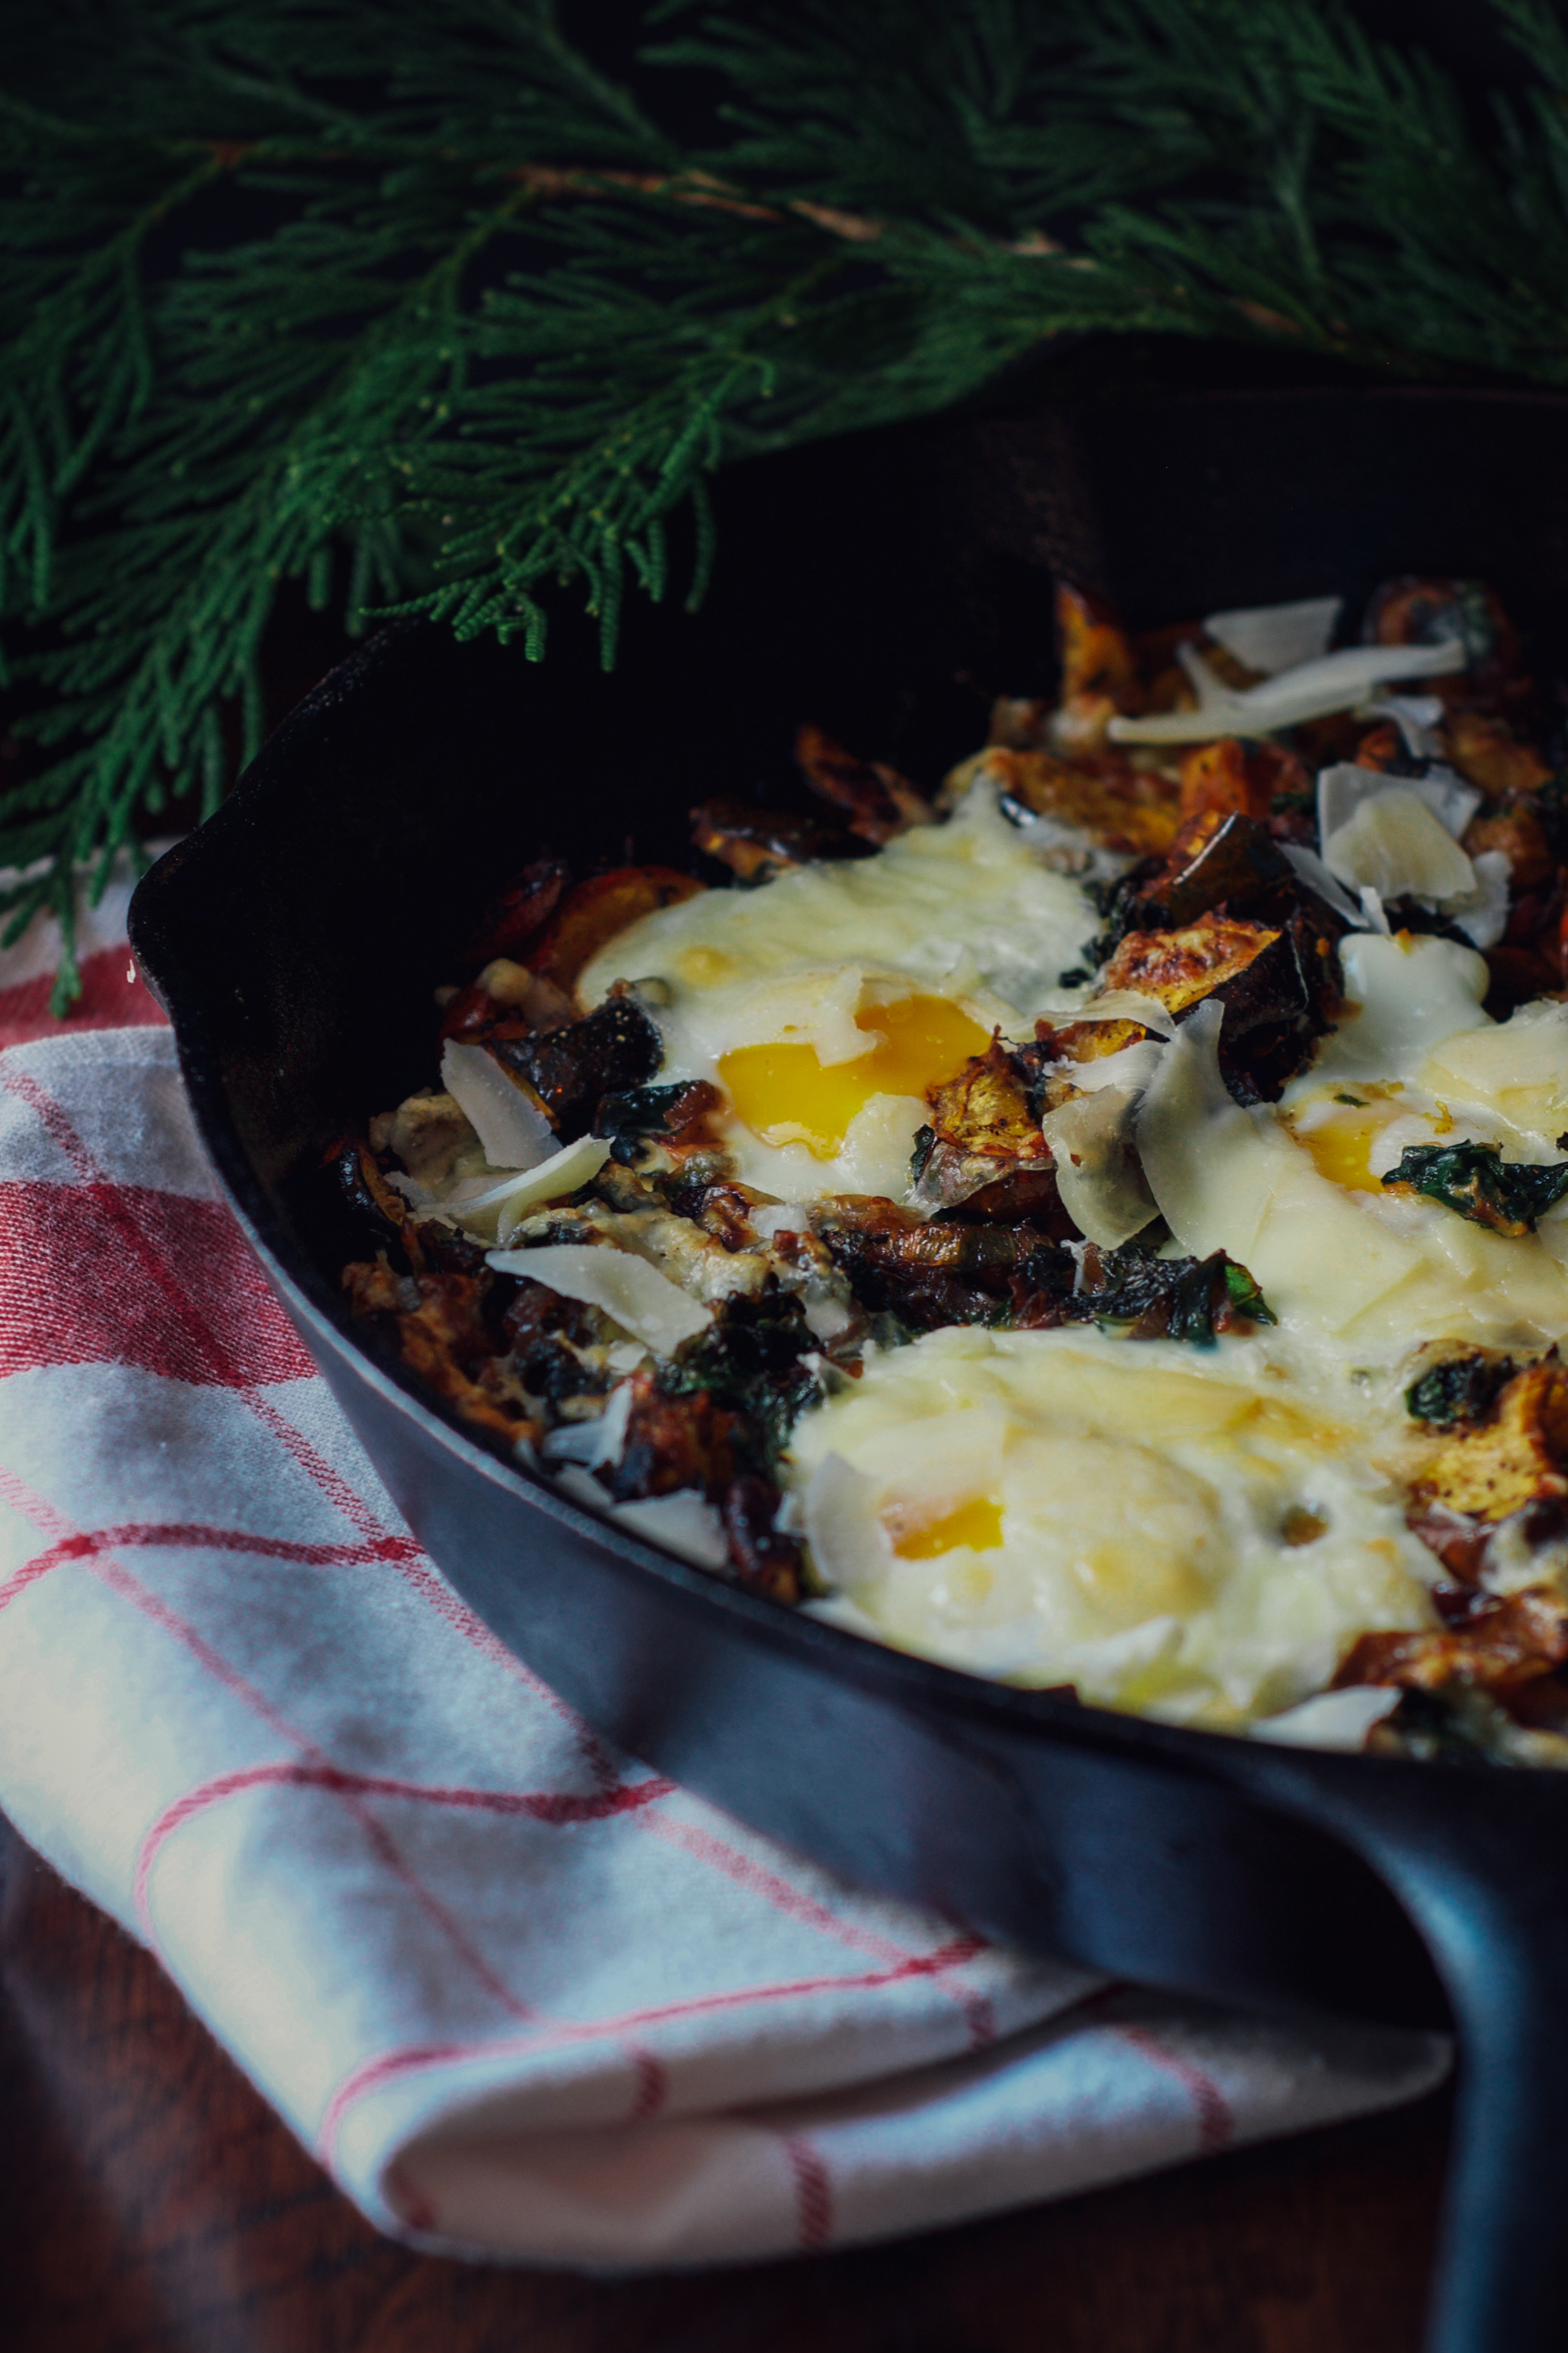
Baked Eggs with Roasted Acorn Squash & Kale
If you know me, like really know me… you know I’m an introvert (that was possibly an understatement). So, even though my California soul longs to be out, flip flops on, frolicking around on the beach with my homies,… this winter thing kinda suits my need to turn inside, go into my gal cave, stay in my jammies all day, sip my coffee slowly, get mesmerized by the twinkling lights on the Christmas tree, savor the sweetness of solitude, and just RECHARGE. So, while I resist winter with every fiber of my being, December is actually a soothing time of year for me. Beyond the obvious that is the holiday season, there is a subtle settling into a transition that transcends the autumnal shift.
Today, I woke up, rolled around in bed for two hours longer than intended, and calmly recognized it was going to be (and needed to be) one of those jammies-all-day kind of days. I threw on my big ‘ole fluffy robe, shuffled downstairs, peeked into the kitchen and knew that baked eggs in a cast iron skillet had to happen on this lingering, lazy morning.

When I discovered I had an acorn squash, one onion, kale, a carton of eggs, dried cranberries, pecans, and vegetable broth already on hand… Well, I had a moment. That sweet feeling when you delightfully discover something you weren’t expecting. Seriously, it was special. Let me mention some other ingredients: the spices. I, like you, have a cupboard stuffed full of every imaginable spice (and, oddly, I never seem to have the spices needed for a new recipe… another life mystery). But, there are two spices I keep right near the stove: Herbes de Provence and a bottle of ground Spiced Chipotle Smoked Red Jalapeños. I found it at Whole Foods. I adore it. It adds a smoky, spicy, unique flavor.
Breakfast, brunch.. this dish is a ‘good morning to you’ all day long…
Baked Eggs with Roasted Acorn Squash & Kale
2016-12-10 12:05:01
Serves 4
Roasted acorn squash, caramelized onion and kale combine to create a comfort food "cradle" for baked eggs.
Prep Time
15 min
Cook Time
35 min
Total Time
50 min
Nutrition Facts
Serving Size
267g
Servings
4
Amount Per Serving
Calories 331
Calories from Fat 187
% Daily Value *
Total Fat 21g
33%
Saturated Fat 6g
29%
Trans Fat 0g
Polyunsaturated Fat 3g
Monounsaturated Fat 11g
Cholesterol 247mg
82%
Sodium 961mg
40%
Total Carbohydrates 23g
8%
Dietary Fiber 3g
13%
Sugars 7g
Protein 14g
Vitamin A
17%
Vitamin C
29%
Calcium
25%
Iron
16%
* Percent Daily Values are based on a 2,000 calorie diet. Your Daily Values may be higher or lower depending on your calorie needs.
Ingredients
- 1 large acorn squash (about 4 cups of squash), cut in 1/2 inch slices
- 1 teaspoon each of Kosher salt & ground black pepper, and 2 tablespoons olive oil (for the squash)
- 2 tablespoons of olive oil (for sautéing the onions)
- 1 medium onion, thinly sliced (about 1/4 inch slices)
- 4 cloves of fresh garlic, chopped
- 1 teaspoon Herbes de Provence
- 1/4 teaspoon ground chipotle powder
- 1 bunch curly kale cut into thin ribbons (about 5 packed cups); try to remove the big stems...
- 1/2 cup low-sodium vegetable broth
- 1/4 cup dried cranberries
- 1/4 cup pecan pieces
- 4 to 6 eggs
- 1/2 cup freshly shaved Pecorino Romano and/or Asiago cheese
Instructions
- Heat the oven to 410 degrees.
- While the oven is pre-heating, thoroughly wash the acorn squash and cut into 1/2 inch slices. I typically start cutting from the end and then when I reach the center with the seeds, I scoop them out. I'll often slice a side off the acorn squash so I can lay it flat and then cut the slices a little easier. You can leave the rind on or cut it away from the "flesh." I opt to leave it on because the roasting makes it tender and it gives a great texture to the dish.
- Lay the acorn squash slices flat on a large sheet pan, drizzle with about 2 tablespoons of olive oil and sprinkle with about 1 teaspoon of Kosher salt and 1 teaspoon of ground pepper. Roast the squash slices for 20-25 minutes in the 410 degree oven. Halfway through the roasting, flip the squash slices over on the pan with a spatula.
- Meanwhile, while the squash is roasting, heat 2 tablespoons of olive oil in a large skillet on medium-high heat (a cast iron skillet works beautifully, since you'll be broiling the eggs at the end--in the oven--in your gorgeous, big skillet). Sauté the onion slices for 20-25 minutes (about the same time the squash is roasting). Season the onions with salt & pepper to taste and 1 teaspoon of Herbes de Provence. Watch the onions so they don't burn; if they start to get too dark, turn the heat down to medium so they can caramelize a bit. After 15 minutes, add the roughly chopped garlic cloves.
- After the onions have caramelized, add the thinly sliced kale to the skillet (about 2 cups at a time). After you add the first 2 cups of kale, pour 1/4 cup of the vegetable broth and let the kale cook until it just softens. Stir a bit and then add 2 more cups of kale, 1/4 cup of broth, 1/4 teaspoon of the chipotle powder, and simmer until the kale softens. Add the cranberries and pecan pieces, simmer and stir for 2 minutes. Add the final cup of kale and stir the onions, kale, cranberries and pecans in the skillet and let it simmer for a few minutes on medium heat.
- Remove the roasted squash from the oven. Cancel the bake setting and turn on the broiler in the oven. Move the rack in the oven (with an oven mitt!) so it is about 6 inches under the broiler. Take the roasted squash slices and place them in the skillet. You can "cut" the slices into smaller chunks with your spatula in the skillet, but be careful not to stir the mixture too aggressively or the squash will break apart and get mushy.
- Take the back of a spoon and press 4 - 6 wells into the squash/kale/onion mixture. Crack an egg into each of the wells and lightly sprinkle with salt and pepper. Sprinkle half the shaved cheese on top of the eggs and squash mixture. Carefully, place the skillet in the oven and broil for 4-5 minutes until the egg whites have set, but the yolks are still runny. Keep an eye on the eggs, they will go from 'just set' to cooked yolks very quickly. When you remove the skillet from the oven, sprinkle the other half of the shaved cheese on top of the dish.
- Serve immediately with buttered toast or toasted pita bread.
TraveLynn Eats https://www.travelynneats.com/
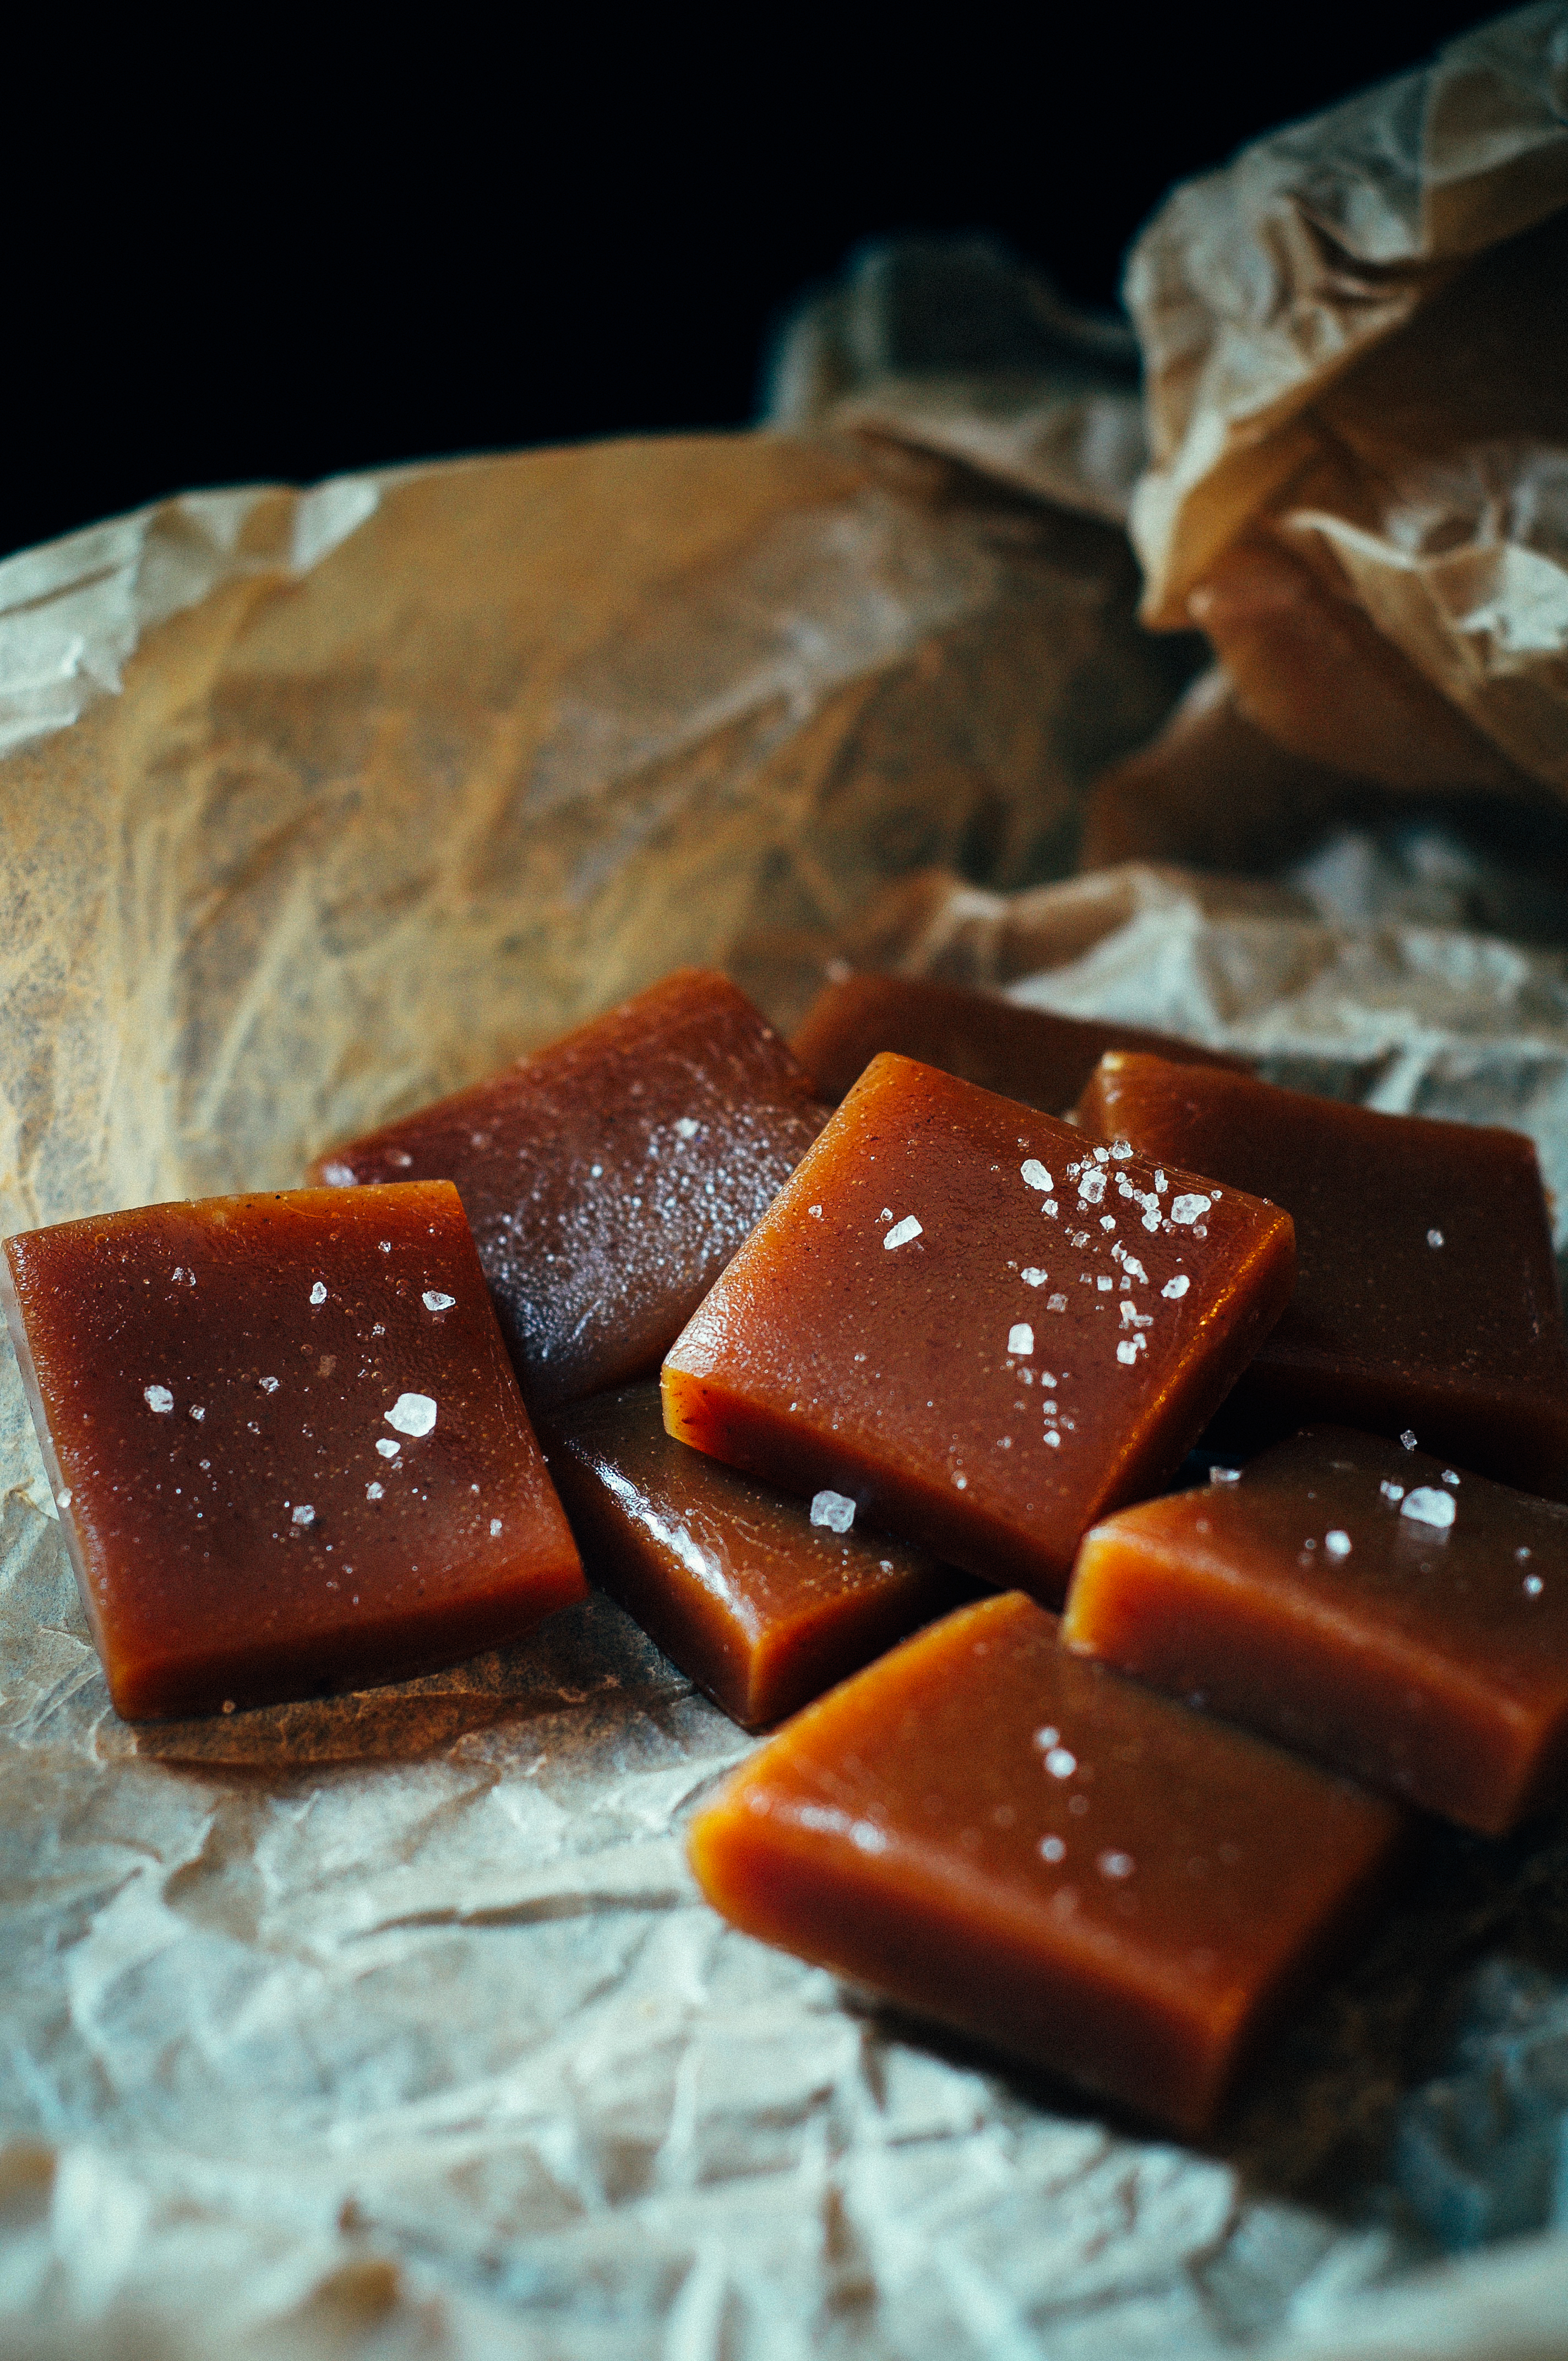
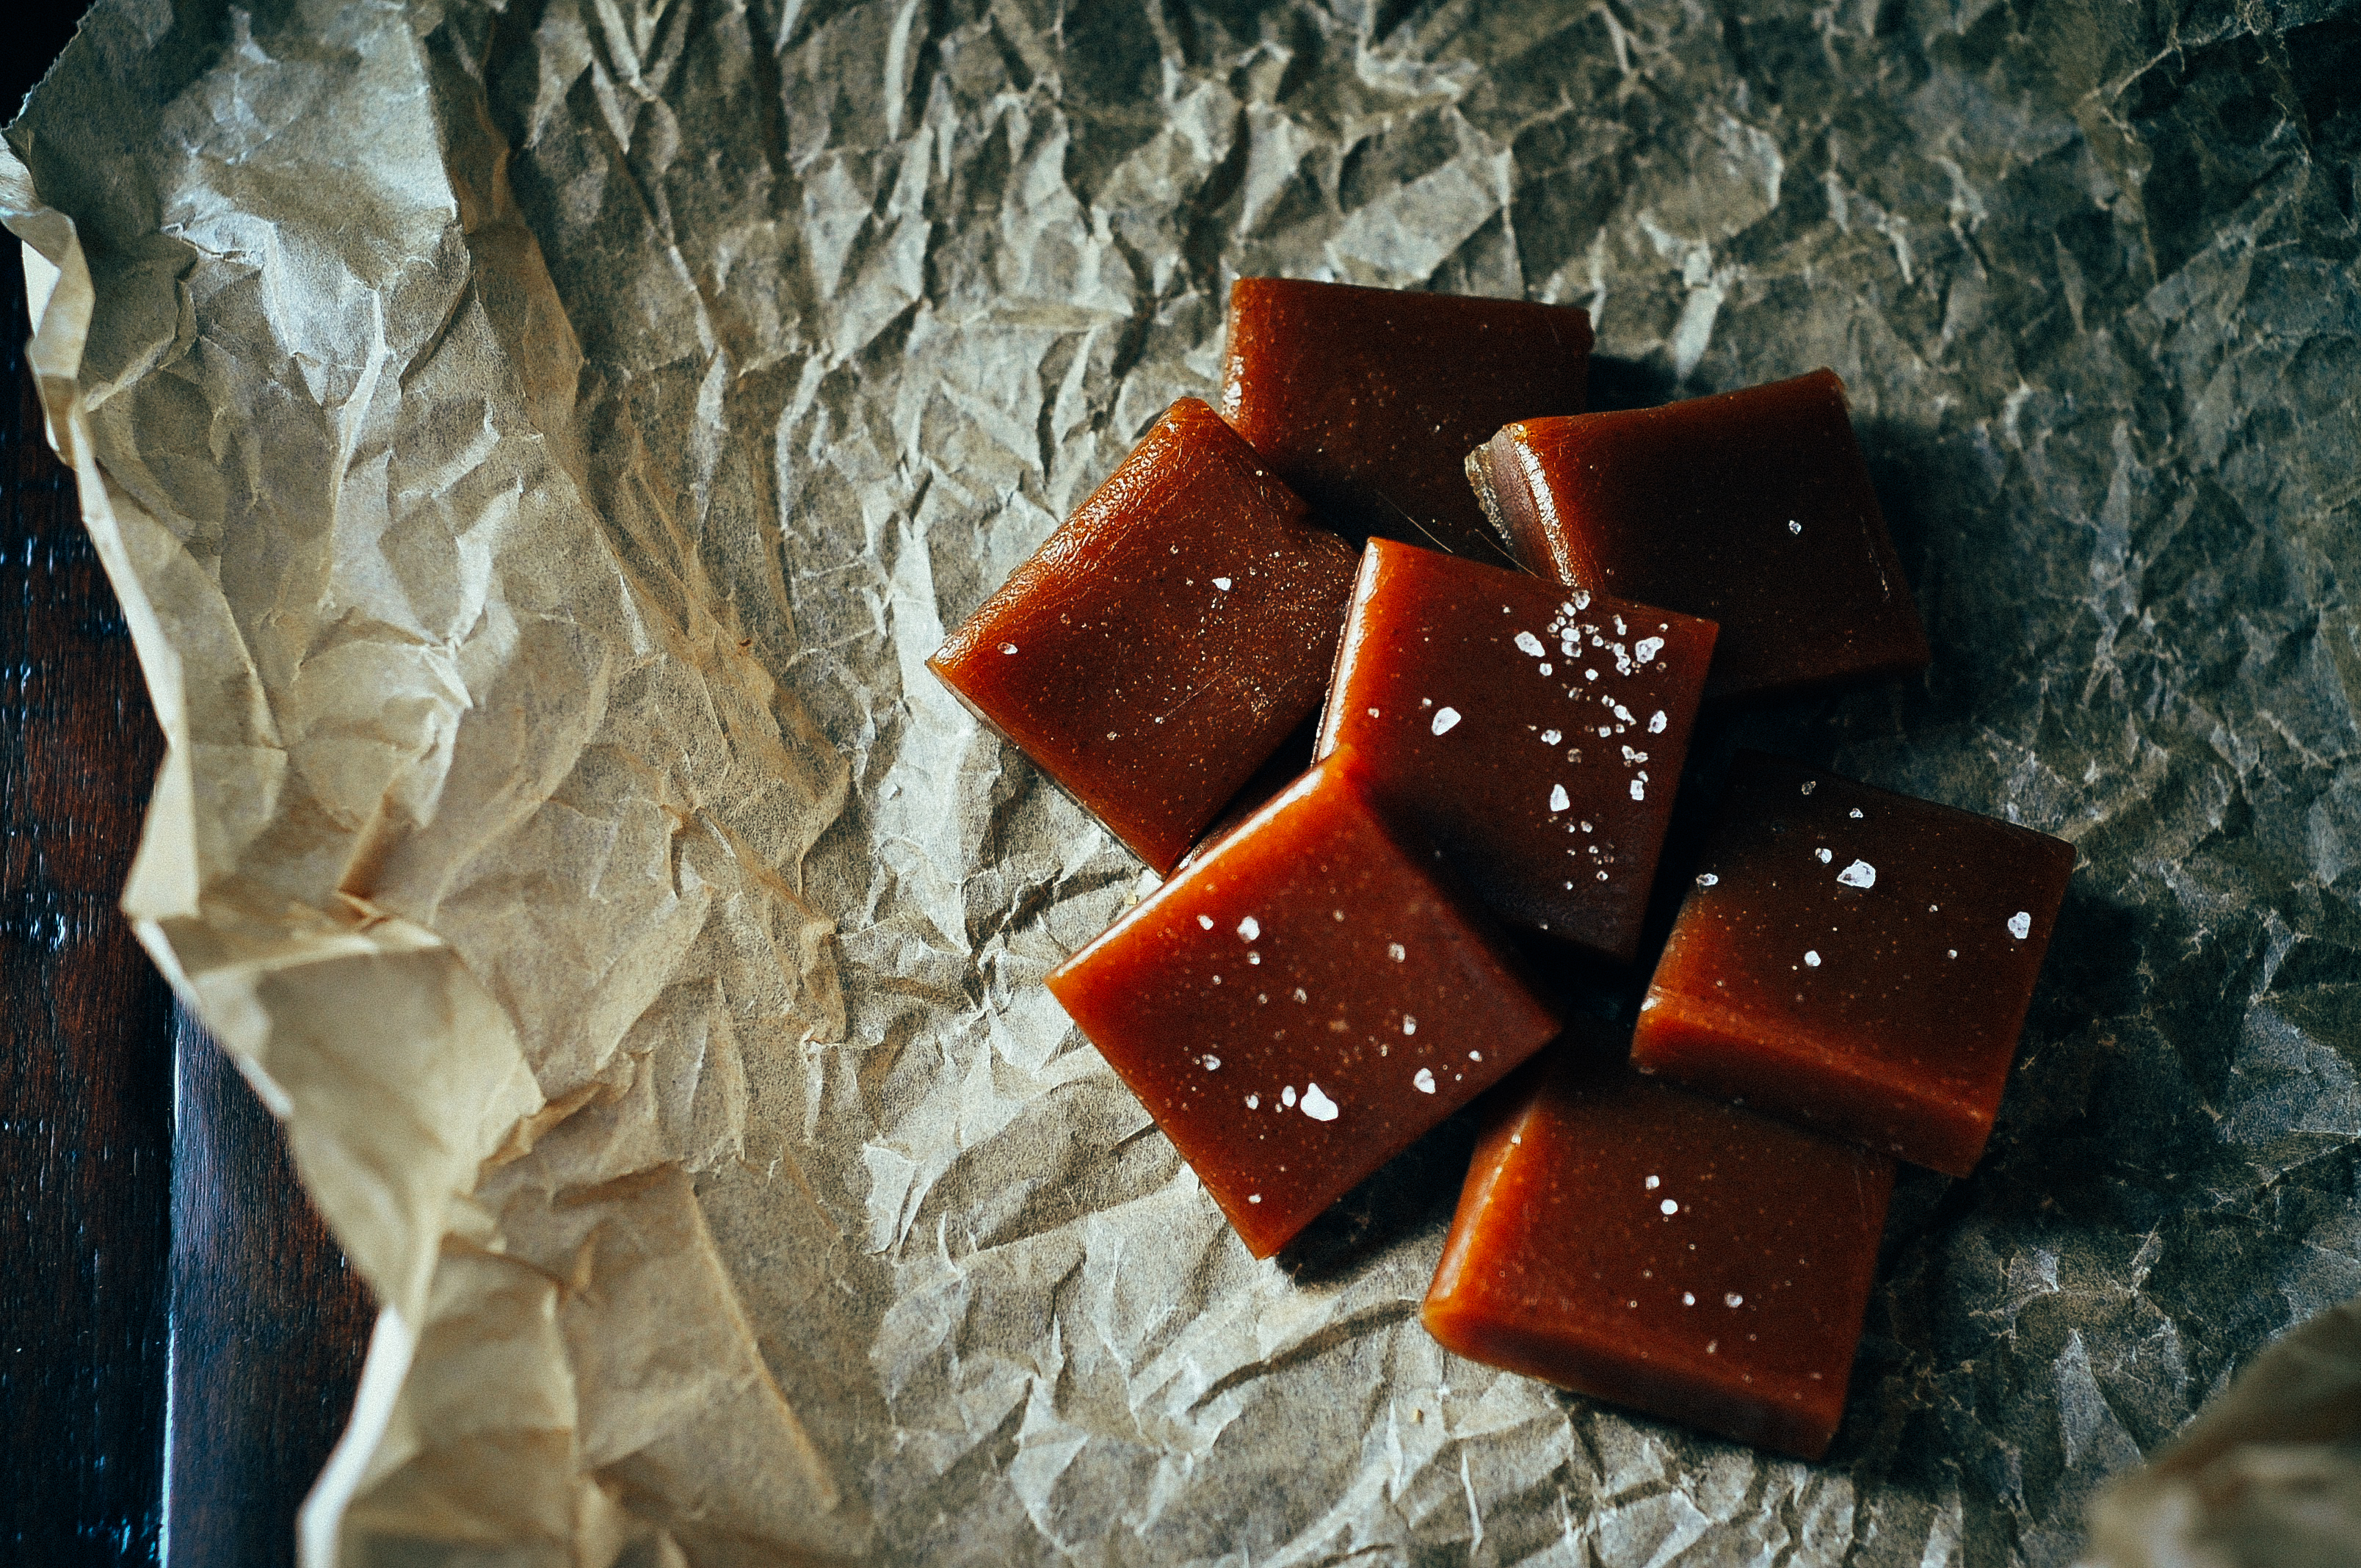
Apple Cider Caramels
I feel like November just cruised by, top-down-with-the-heater on, leaves floating by, beep-beep, get outta the way… Now, the tree is up, lights twinkling, foggy mornings, forecast snow, humming baby it’s cold outside, peeking over my shoulder and wondering how Autumn just zipped on by. It didn’t even ease it’s foot off the accelerator.
Autumn in Virginia was lovely and it was short-lived. I gave it my all; I really did. Pumpkin Spice Lattes (they taste different when you drink them with a big, chunky home-made yarn scarf hugging your neck…they do…); fall leaf peeping; apple picking in the orchards; the Hunt Races at Montpelier; sneaking gorgeous chunks of squash into unsuspecting dishes; getting nostalgic watching It’s the Great Pumpkin, Charlie Brown; and just, well, you know… soaking in the seasonal slow down.
Somewhere, on a country road, at a stand filled with apples and gourds, at a location I’ll never remember, I picked up some apple cider. This isn’t the clear jug of apple cider on Aisle 9 that looks curiously like the apple juice snuggled up next to it. This is the cloudy, thick, spicy, rich, country stand apple cider. I’ve also found some great, seasonal apple ciders in the refrigerator section at the grocery store. Both Trader Joe’s and Whole Food’s apple ciders are deelishussss.
So, farewell Autumn. Just before I get into the Christmas cookie swing of things, I’m saying au revoir to your color-filled days with these: Apple Cider Caramels.
“Autumn is as joyful and sweet as an untimely end.”
― Rémy de Gourmont
Apple Cider Caramels
2016-12-06 18:54:18
Gorgeous, chewy, spicy, buttery, apple cider caramels. The perfect mix of sweet and salty. So good, so easy, so make right now.
Prep Time
10 min
Cook Time
50 min
Total Time
1 hr
Nutrition Facts
Serving Size
1508g
Amount Per Serving
Calories 2739
Calories from Fat 1078
% Daily Value *
Total Fat 123g
189%
Saturated Fat 77g
384%
Trans Fat 4g
Polyunsaturated Fat 5g
Monounsaturated Fat 32g
Cholesterol 353mg
118%
Sodium 4831mg
201%
Total Carbohydrates 423g
141%
Dietary Fiber 3g
11%
Sugars 402g
Protein 4g
Vitamin A
80%
Vitamin C
16%
Calcium
27%
Iron
13%
* Percent Daily Values are based on a 2,000 calorie diet. Your Daily Values may be higher or lower depending on your calorie needs.
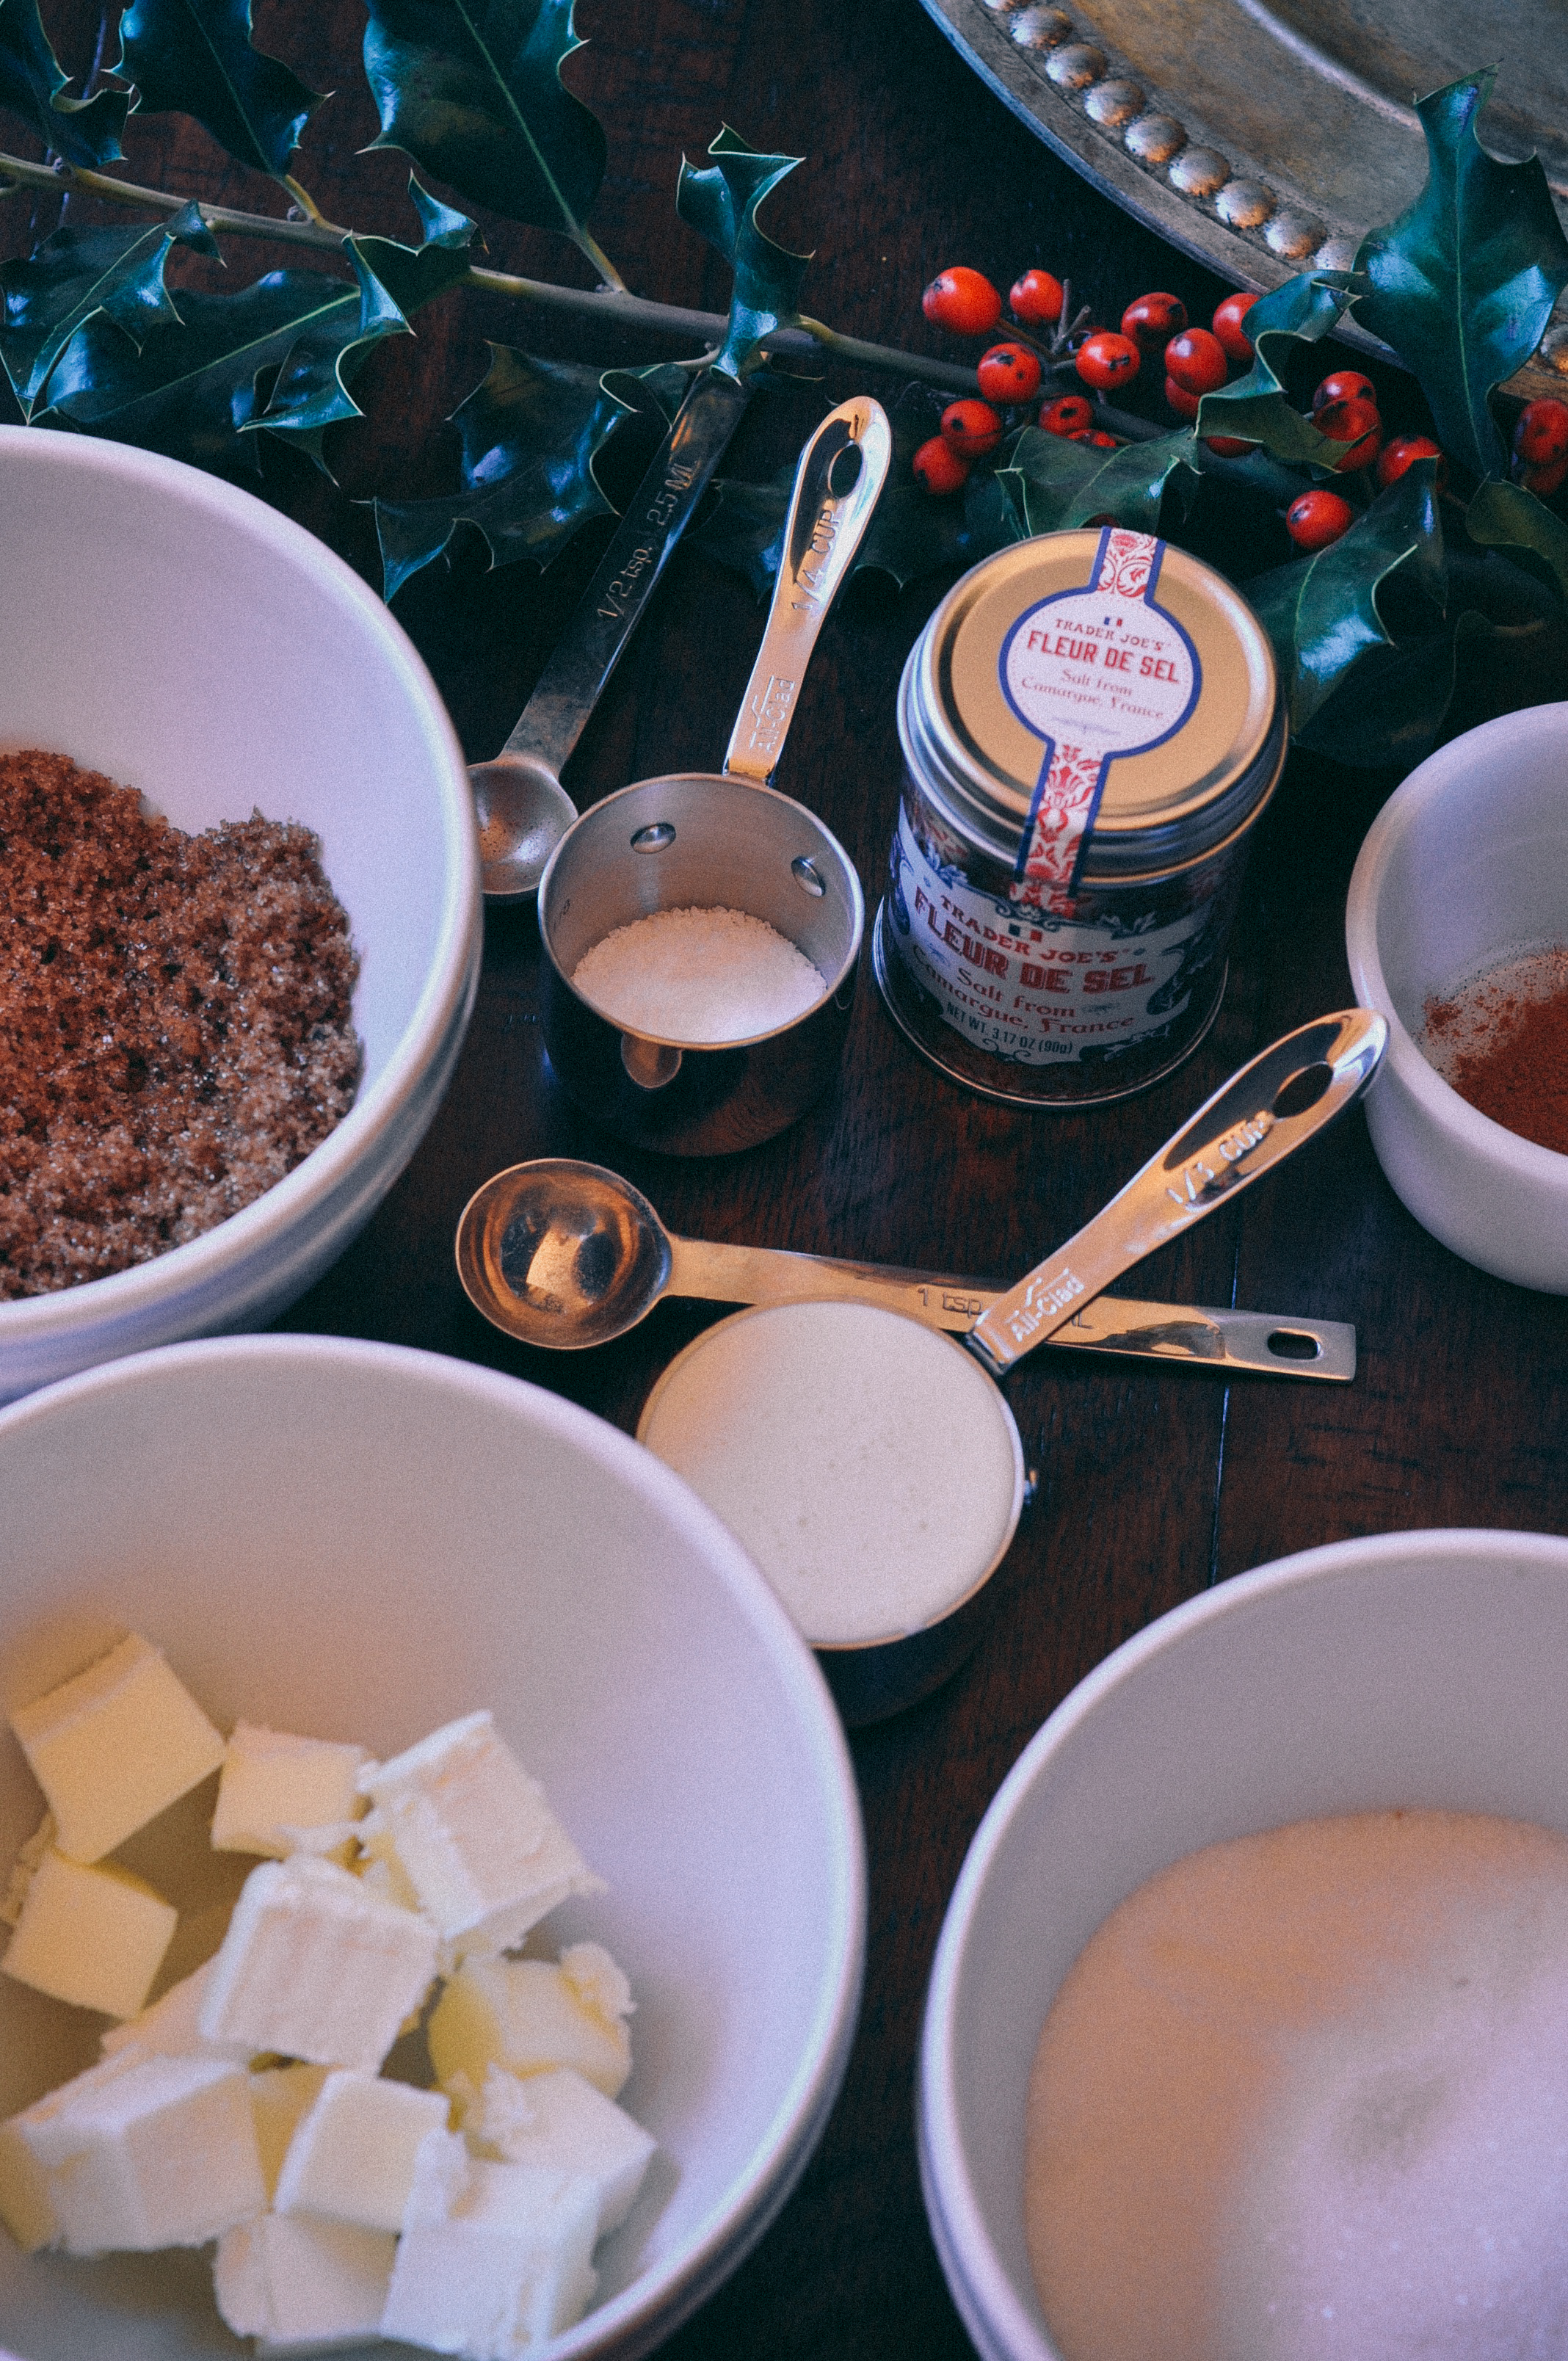
Ingredients
- 4 cups apple cider
- 1 cup granulated white sugar
- 1/2 cup light brown sugar, packed
- 8 tablespoons (1 stick) unsalted butter, cut into chunks
- 1/3 cup heavy cream
- 1/2 teaspoon ground cinnamon
- 2 teaspoons Fleur de Sel or flaky salt
- Grape seed oil for the knife
Instructions
- On high heat, boil the apple cider in a saucepan until it is reduced to a thick syrup (about 1/2 cup in volume) and stir occasionally. This takes about 35 - 40 minutes.
- While the cider is boiling, get your other ingredients ready because you'll need to move quickly after the cider is reduced to syrup. Measure the sugars and place in a bowl. Cut the butter into small chunks. Measure the heavy cream. Stir together the cinnamon and salt and place in a separate, small bowl.
- Line the bottom and sides of an 8-inch straight-sided square metal baking pan with 2 long sheets of parchment paper (in a crisscross layout). Set it aside.
- Once you are finished reducing the apple cider, remove it from the heat and immediately stir in the sugars, butter, and heavy cream. Stir until the mixture is smooth and the butter has melted. Return the pot to medium-high heat for about 5 minutes. Have a bowl of very cold water ready, and cook the caramel (for 5 minutes) until a very small spoonful dropped into the water becomes firm, chewy, and able to be formed into a little ball. If you want to be precise, use a candy thermometer and let it boil until the thermometer reads 252 degrees. Either way, watch the caramel closely; you don't want to under or over cook it.
- Immediately remove the caramel from the heat, add the cinnamon and salt mixture, and give it several stirs to distribute the cinnamon/salt evenly.
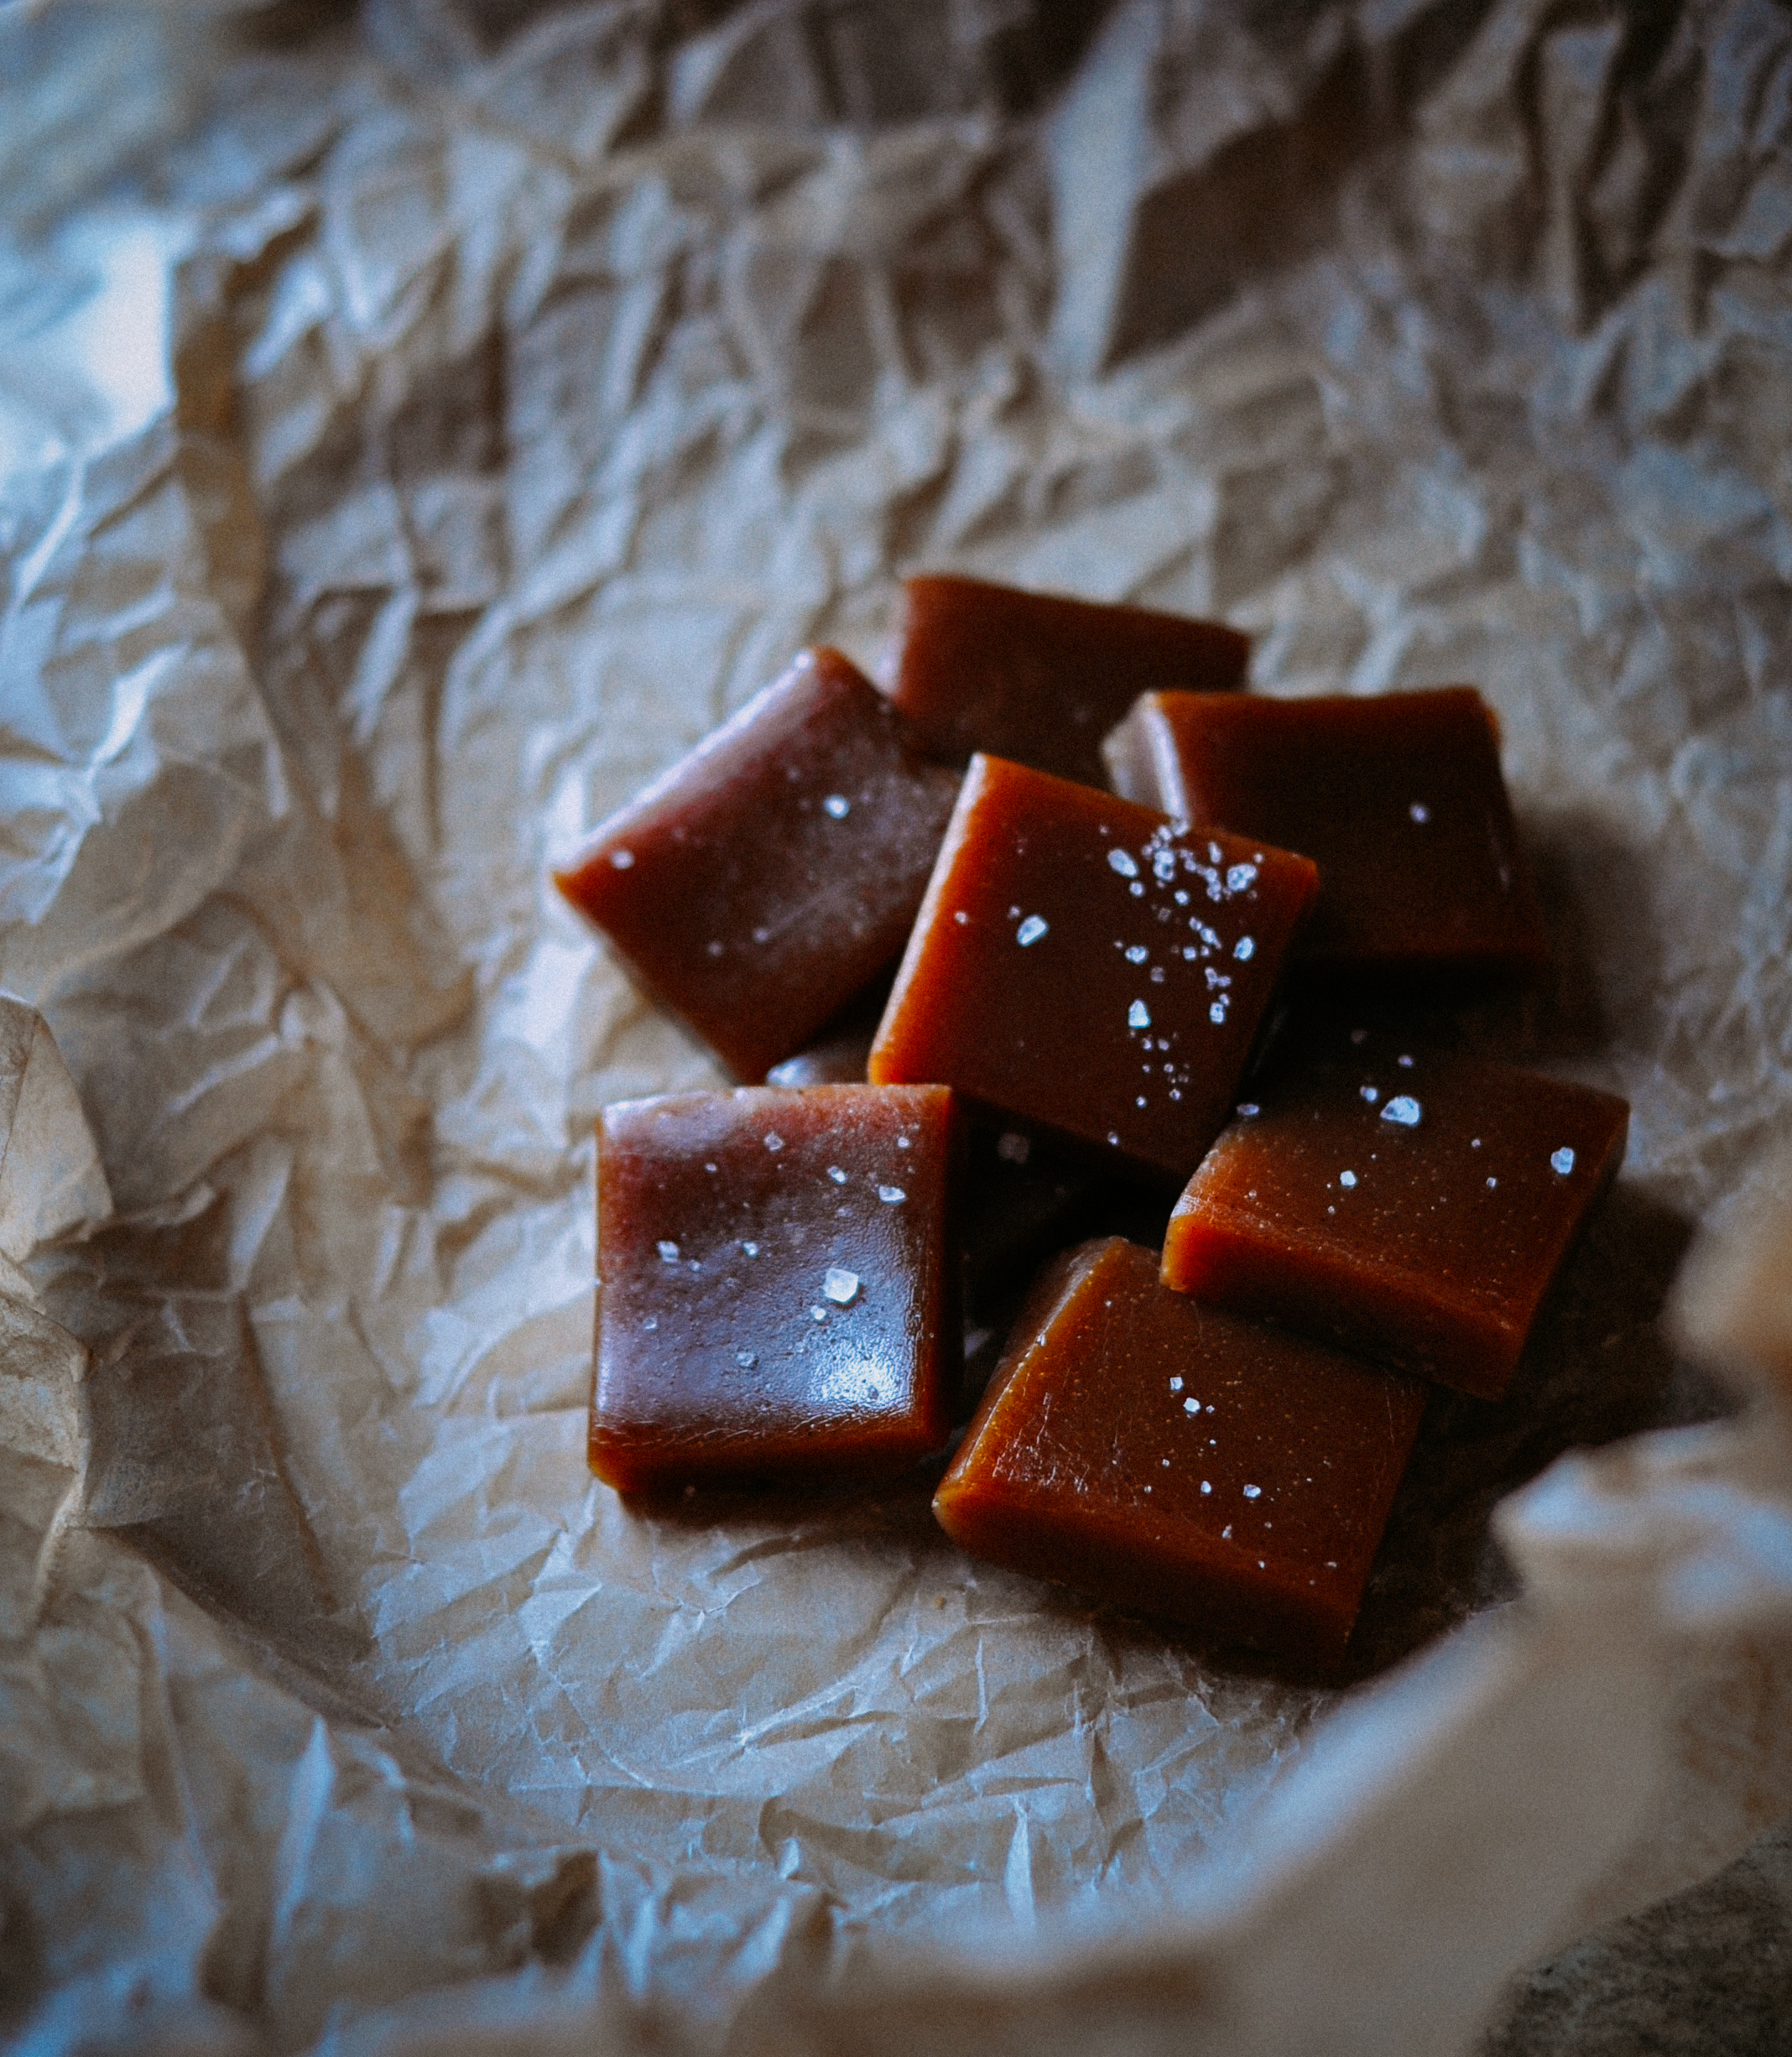
- Pour the caramel into the prepared pan. Let it sit until cool and firm—about 2 hours (only about an hour in the refrigerator). Once the caramel is firm, lift the caramel from the pan by the parchment paper and transfer it to a cutting board. Let the caramel sit out for a little bit before you start cutting it. If it is too cold, it will crack when you try to cut it. Use a well-oiled knife to cut the caramel into 1-by-1-inch squares. Lightly sprinkle the caramels with flaky salt.
- Wrap each one in a 4-inch square of waxed paper or parchment, twisting the sides to close. Caramels will be somewhat on the soft side at room temperature and hard and chewy if left in the refrigerator. These caramels keep for about 2 weeks in an airtight container if left outside the refrigerator.
- Perfect holiday gift. Unless you eat them all first...
Adapted from The Smitten Kitchen
Adapted from The Smitten Kitchen
TraveLynn Eats https://www.travelynneats.com/
Virginia Ham Biscuits & The Hunt Races

Two hours southwest of Washington DC, and tucked into the eastern edge of Shenandoah National Park, are the gorgeous, rolling Orange County hills that surround James Madison’s Montpelier. I first visited the area this summer on a mom & daughter trip to learn about our Founding Fathers. I am by no means a history buff. I will begrudgingly read a bit of history now and then as if some civic duty, with frequent stops to scan Instagram, daydream, twirl my hair, stare at the ceiling… But, put me IN history…let me touch, smell and see it…and I’m there. So, there I was, via my ever-energetic momma, at a 3-day crash course on Jefferson, Madison & Monroe. We visited Monticello, Montpelier and Monroe’s Highland. Their homes were grand and thoughtful and serene. I was fascinated by the connection between these men. Most impressive to me, though, was how much these men were able to accomplish without the modern day conveniences of travel and communication. Jefferson, Madison & Monroe: statesmen, counterparts, mentors and friends.
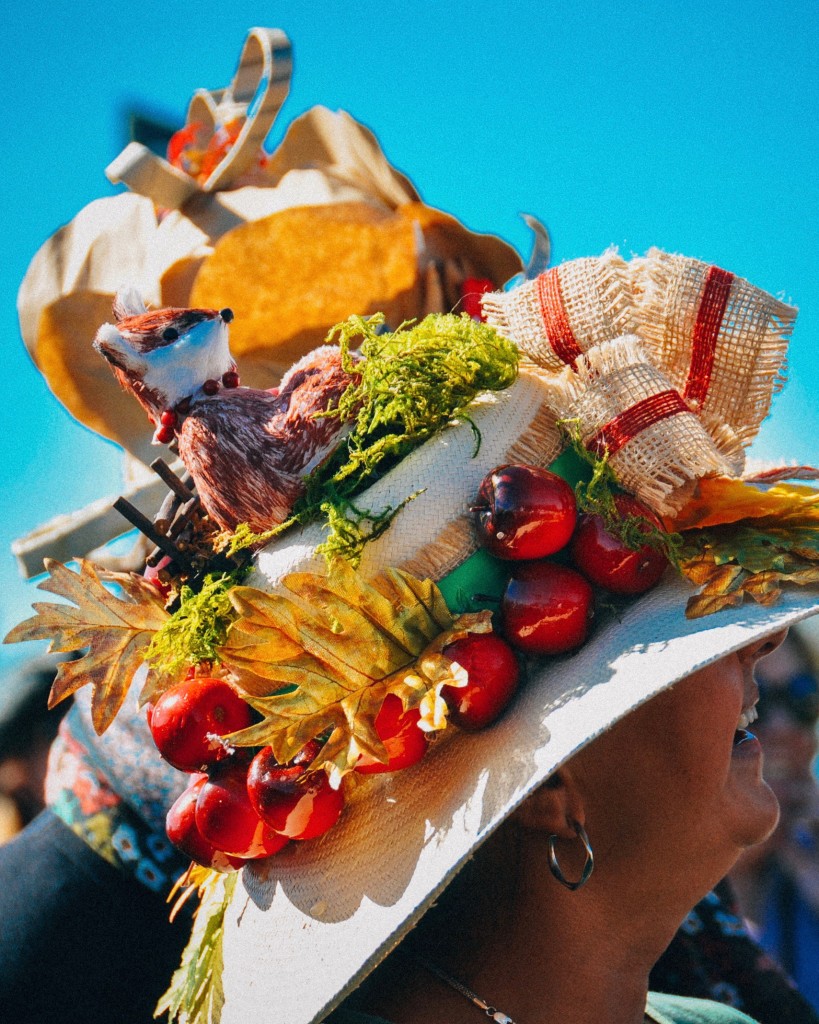
I was particularly intrigued with Madison’s Montpelier. After James Madison passed and Dolley moved to Washington DC, the home changed hands several times until William duPont, the famed American businessman, banker and horse racing connoisseur, bought it in 1901. When William passed on to the great beyond, his daughter, Marion, inherited the home. While her father massively renovated the home, Marion’s major renovation would be to the landscape, including the addition of a steeplechase track. In 1934, Marion duPont started The Montpelier Hunt Races on the front lawn of James Madison’s old digs. Today, it is the only live brush hurdle course in the Commonwealth of Virginia. Each November, horse-racing-big-frilly-hatted-tailgate-loving Virginians gather on the fields of James Madison’s Montpelier for The Hunt Races. It is a stunning sight to behold, and it just feels so Virginia…


…and what would a horse race be without those stunning hats? Ladies, dig in to your inner Southern Belle. Gorgeous, colorful, elegant, eccentric, fun.


Just as seriously as the ladies take their hats, Virginians pour every bit the amount of passion into their race day tailgates. From college football style tailgates to sophisticated spreads, it’s quite clear: the fans are committed. It was hard to tell what the main attraction was at times: the culinary creations or the beautiful animals powering across the steeplechase track. I lovingly admired both.
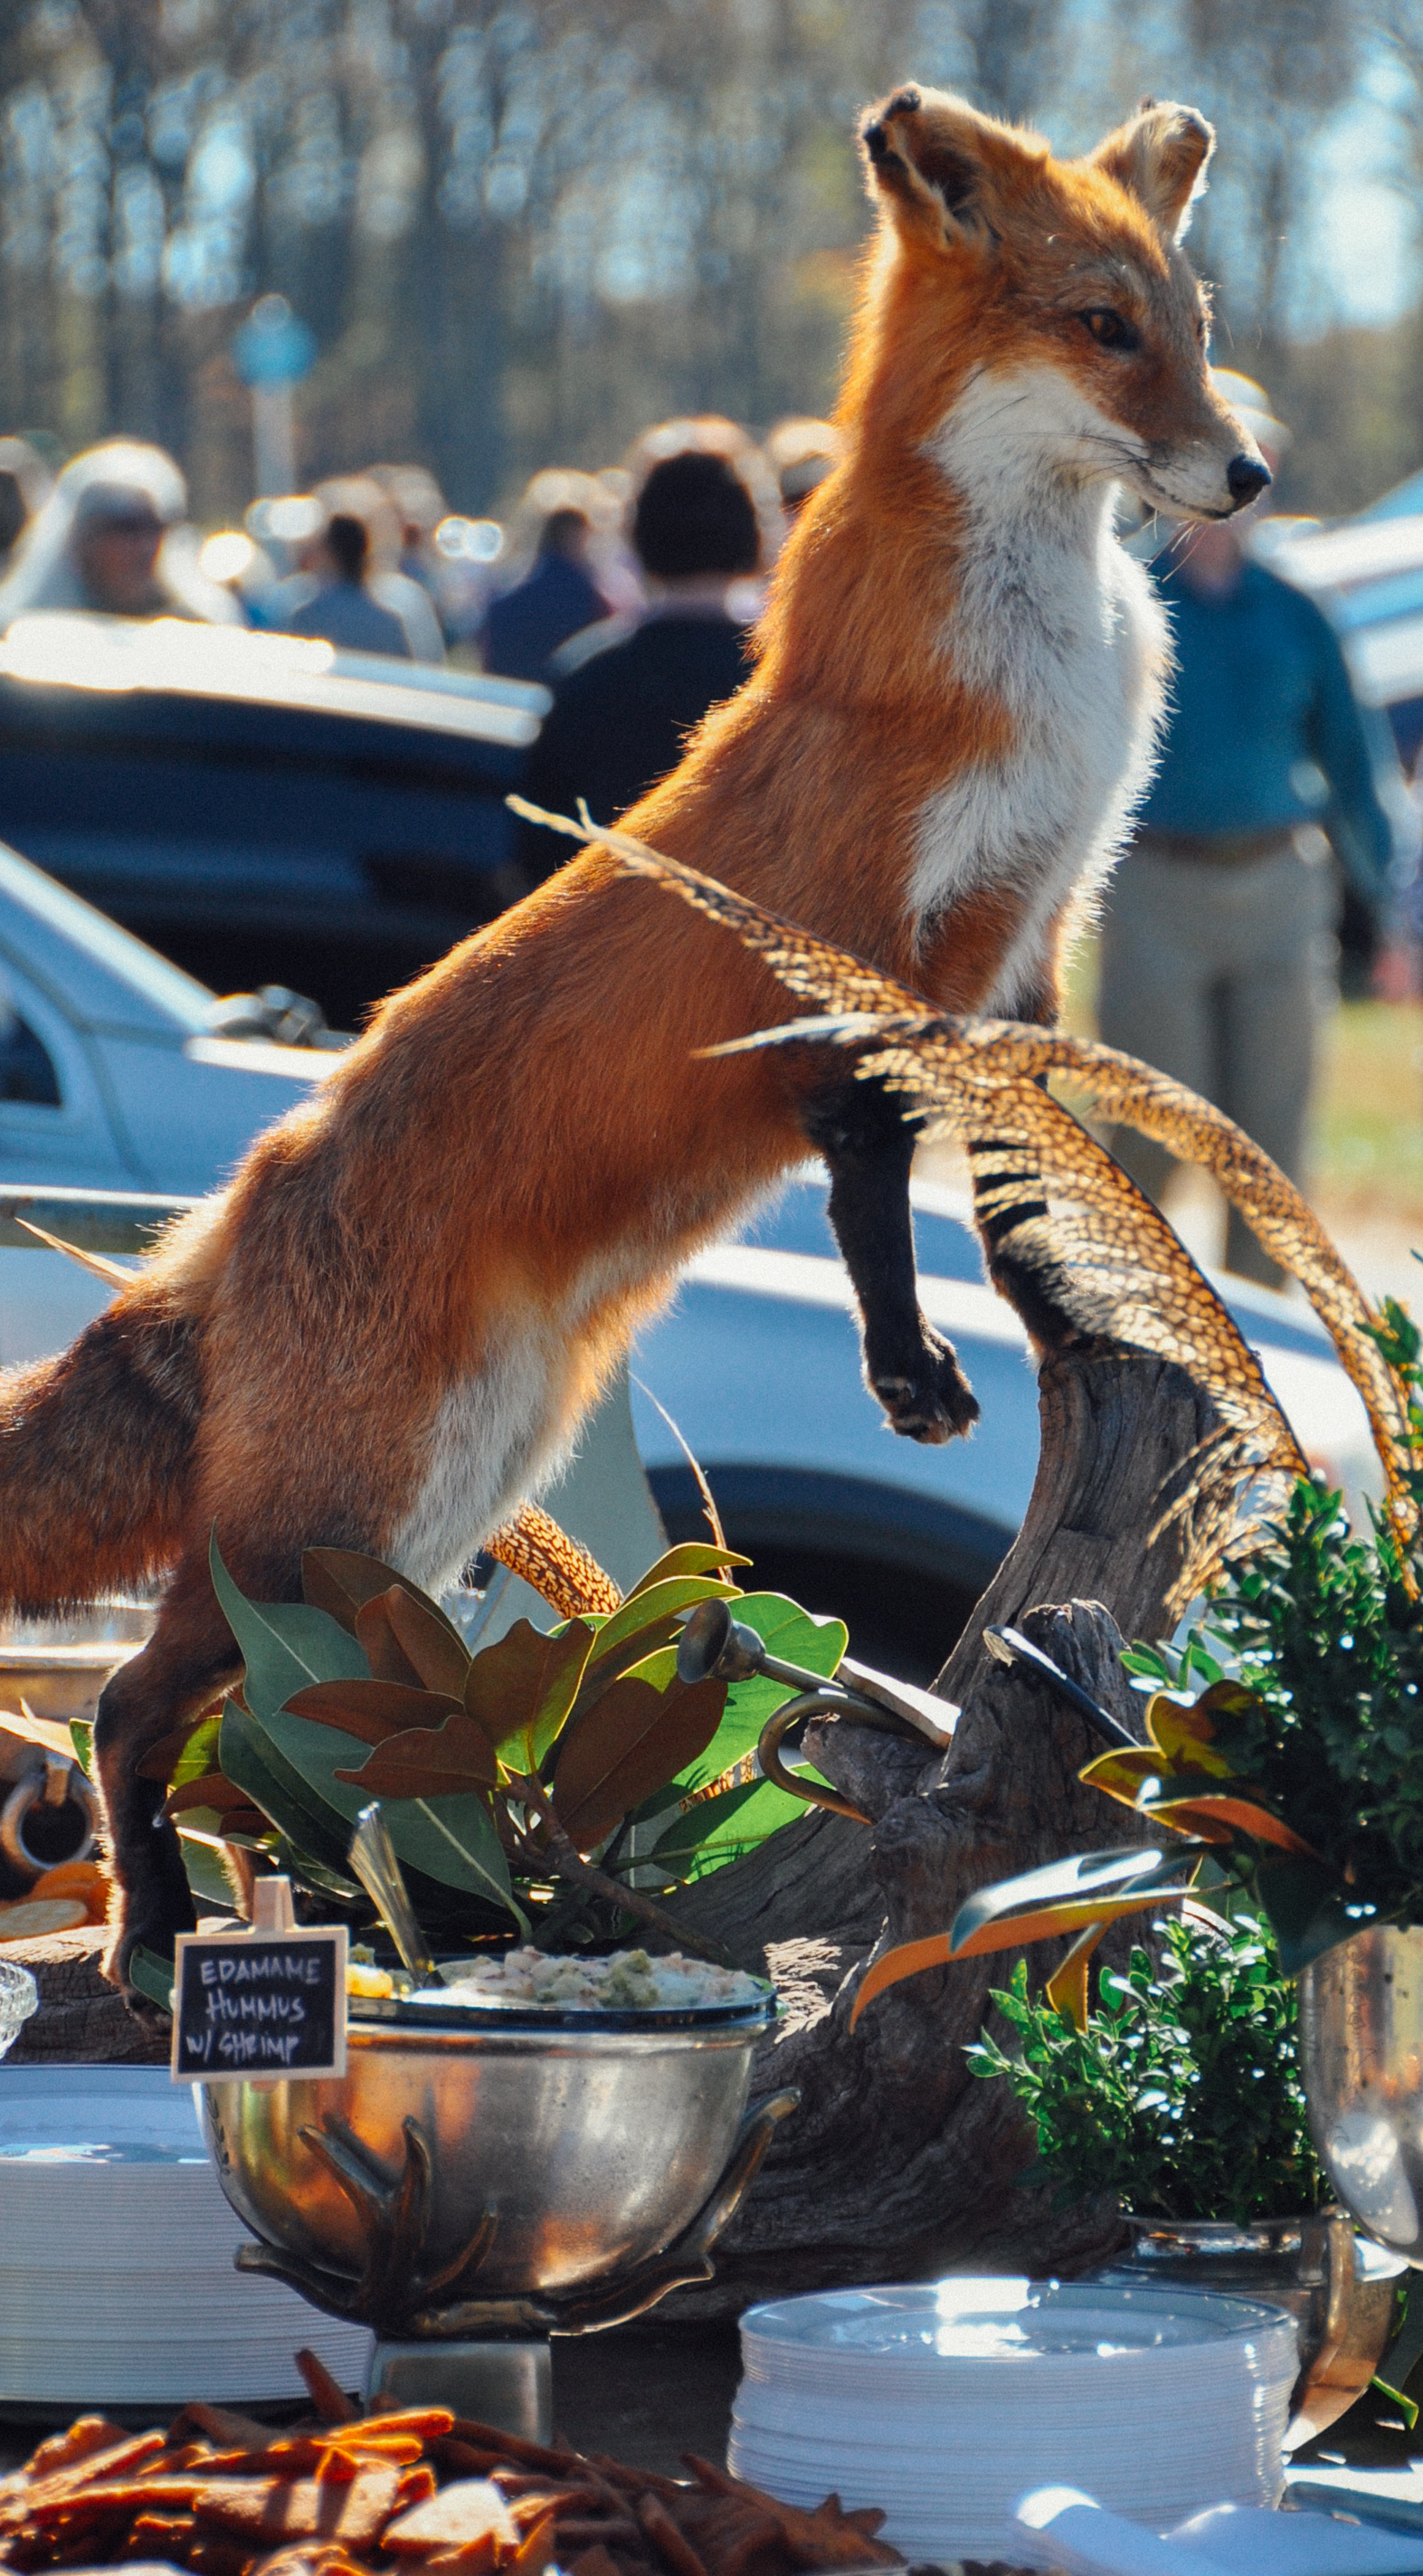
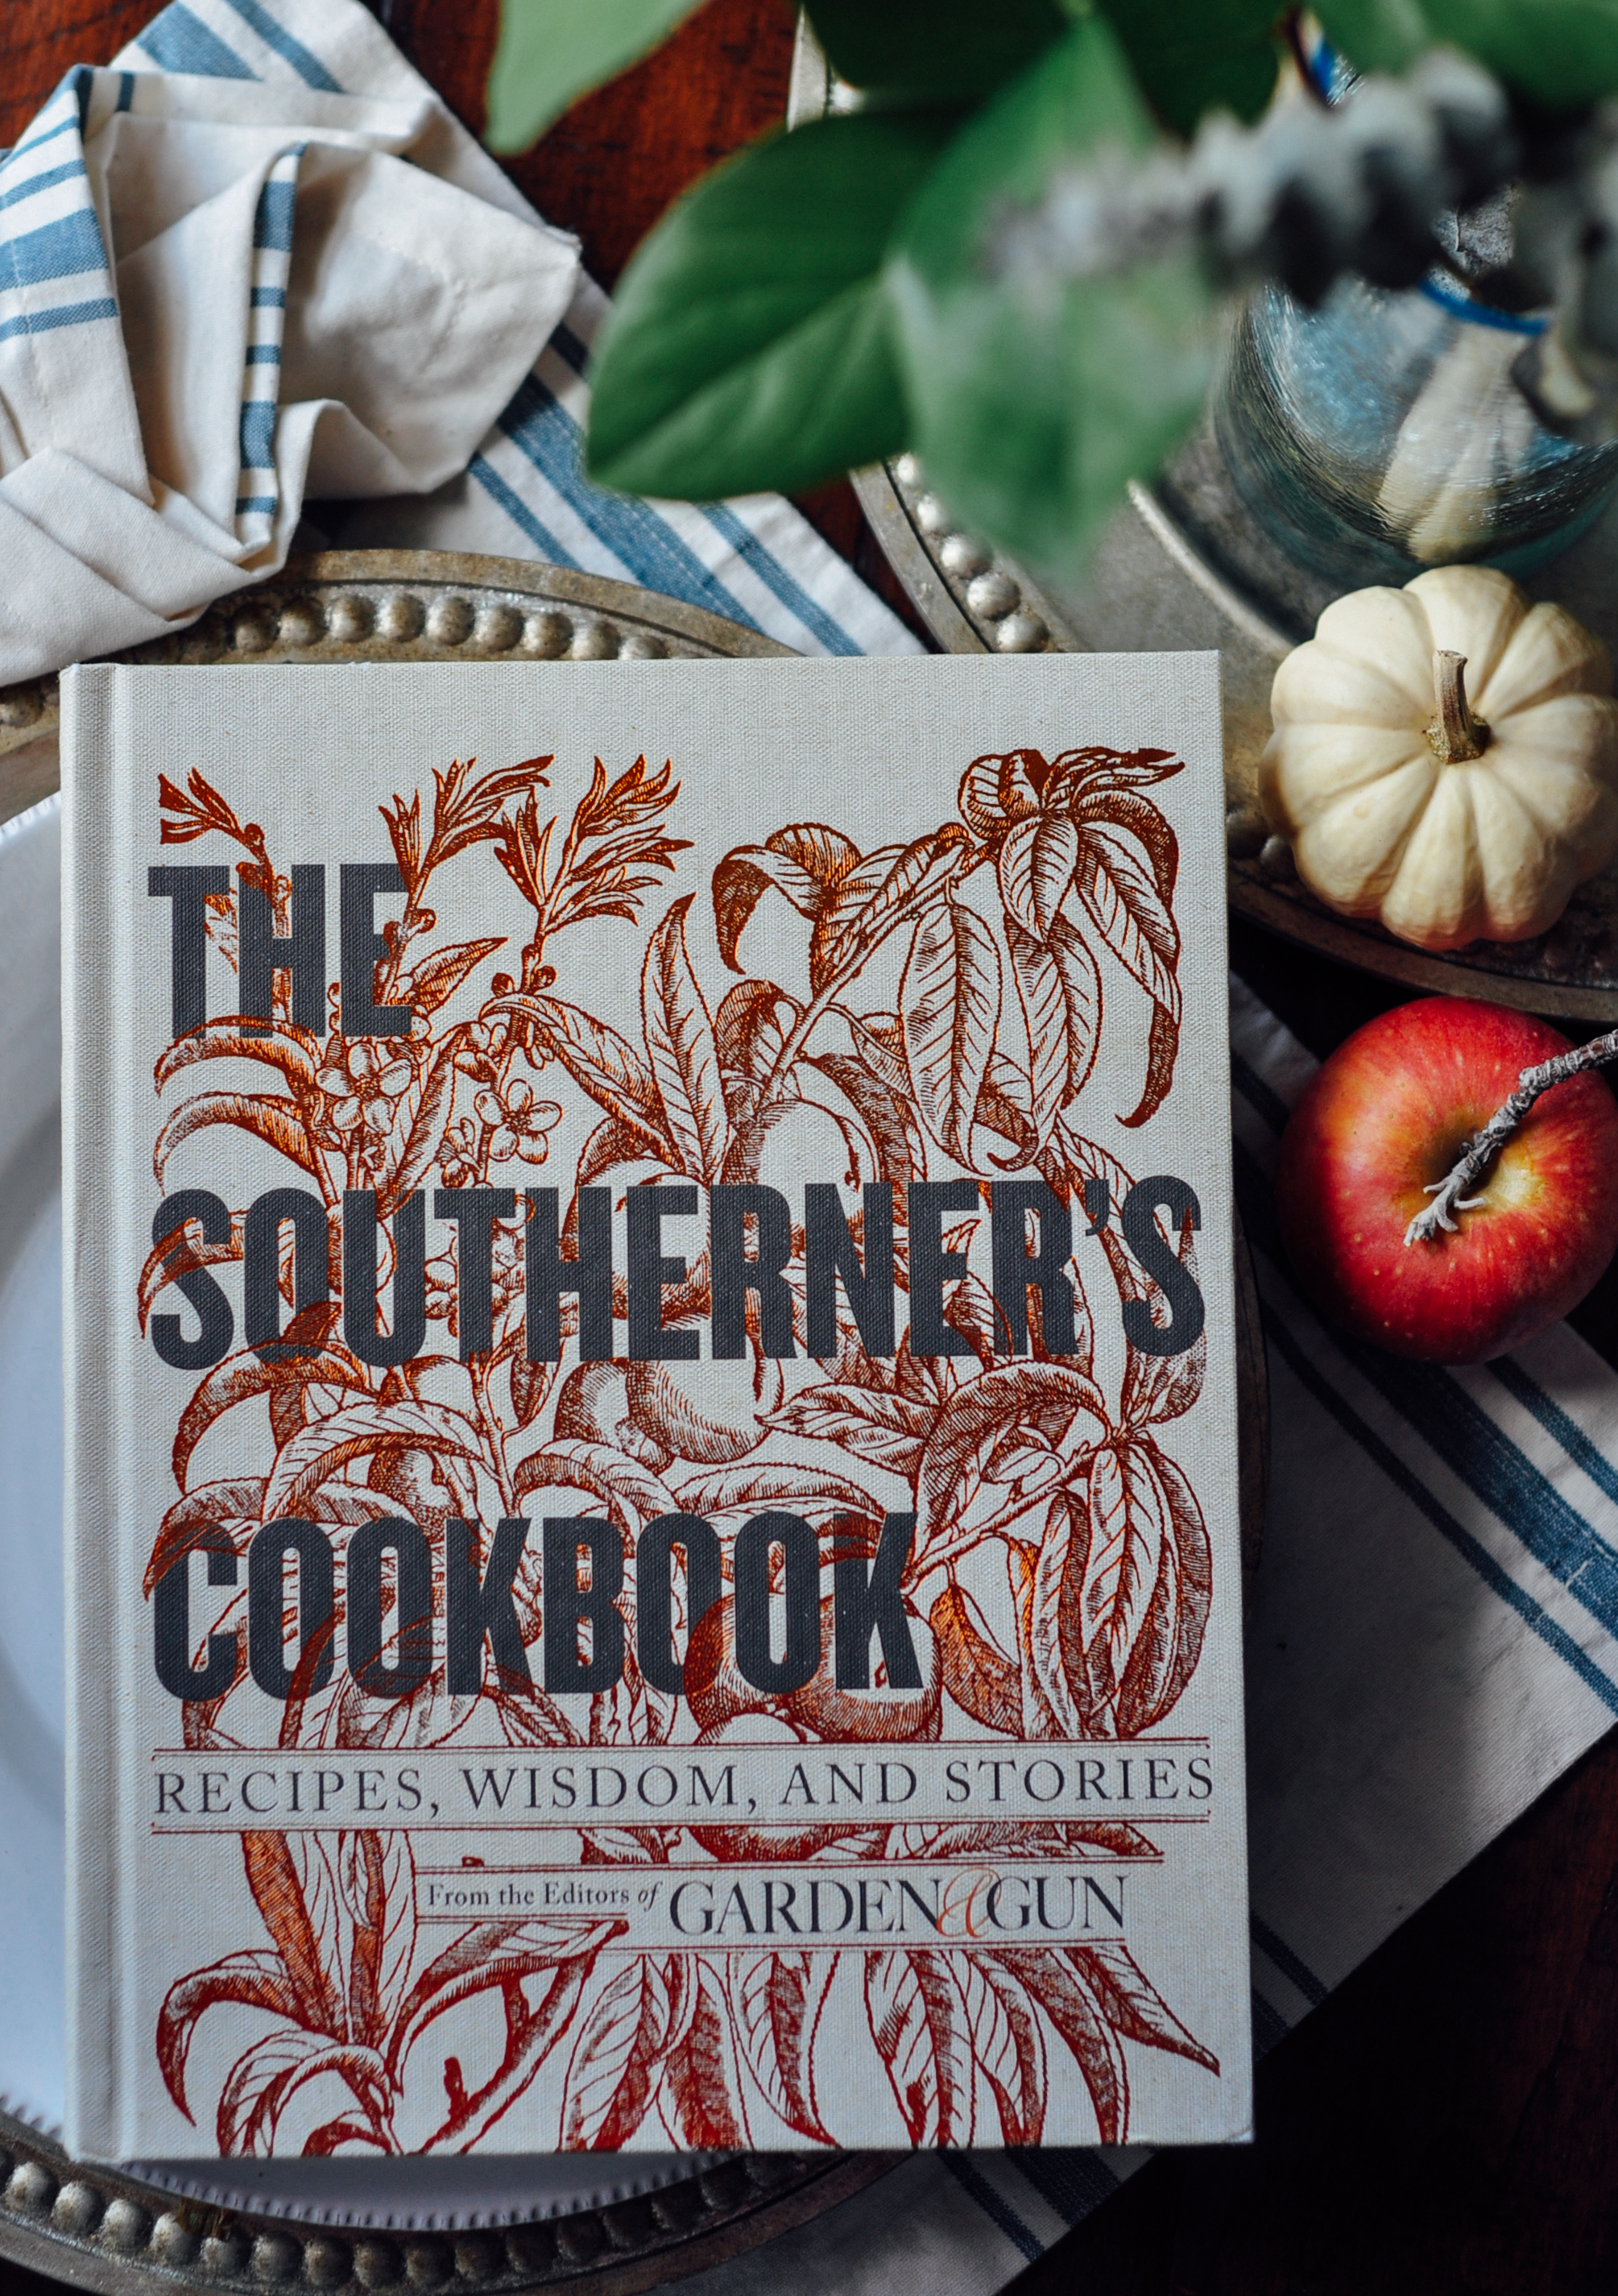
Virginia hams, mounds of fried chicken, shrimp cocktail, biscuits piled high, pies and cookies, sweet tea. It was overflowing. I stared and surveyed and ogled my way past the tailgates, making note of what I saw in the displays. I tucked the Virginia Ham Biscuit away into my mental recipe book. It’s a southern staple. Flaky biscuits, piled high with thinly sliced Virginia ham, accentuated by sweet and tangy mustard. It’s a race day classic. P.S…. I left the races with a new cookbook. I’m not sure how that happened, but it did. The Southerner’s Cookbook, from the editors of Garden & Gun, added to the collection…
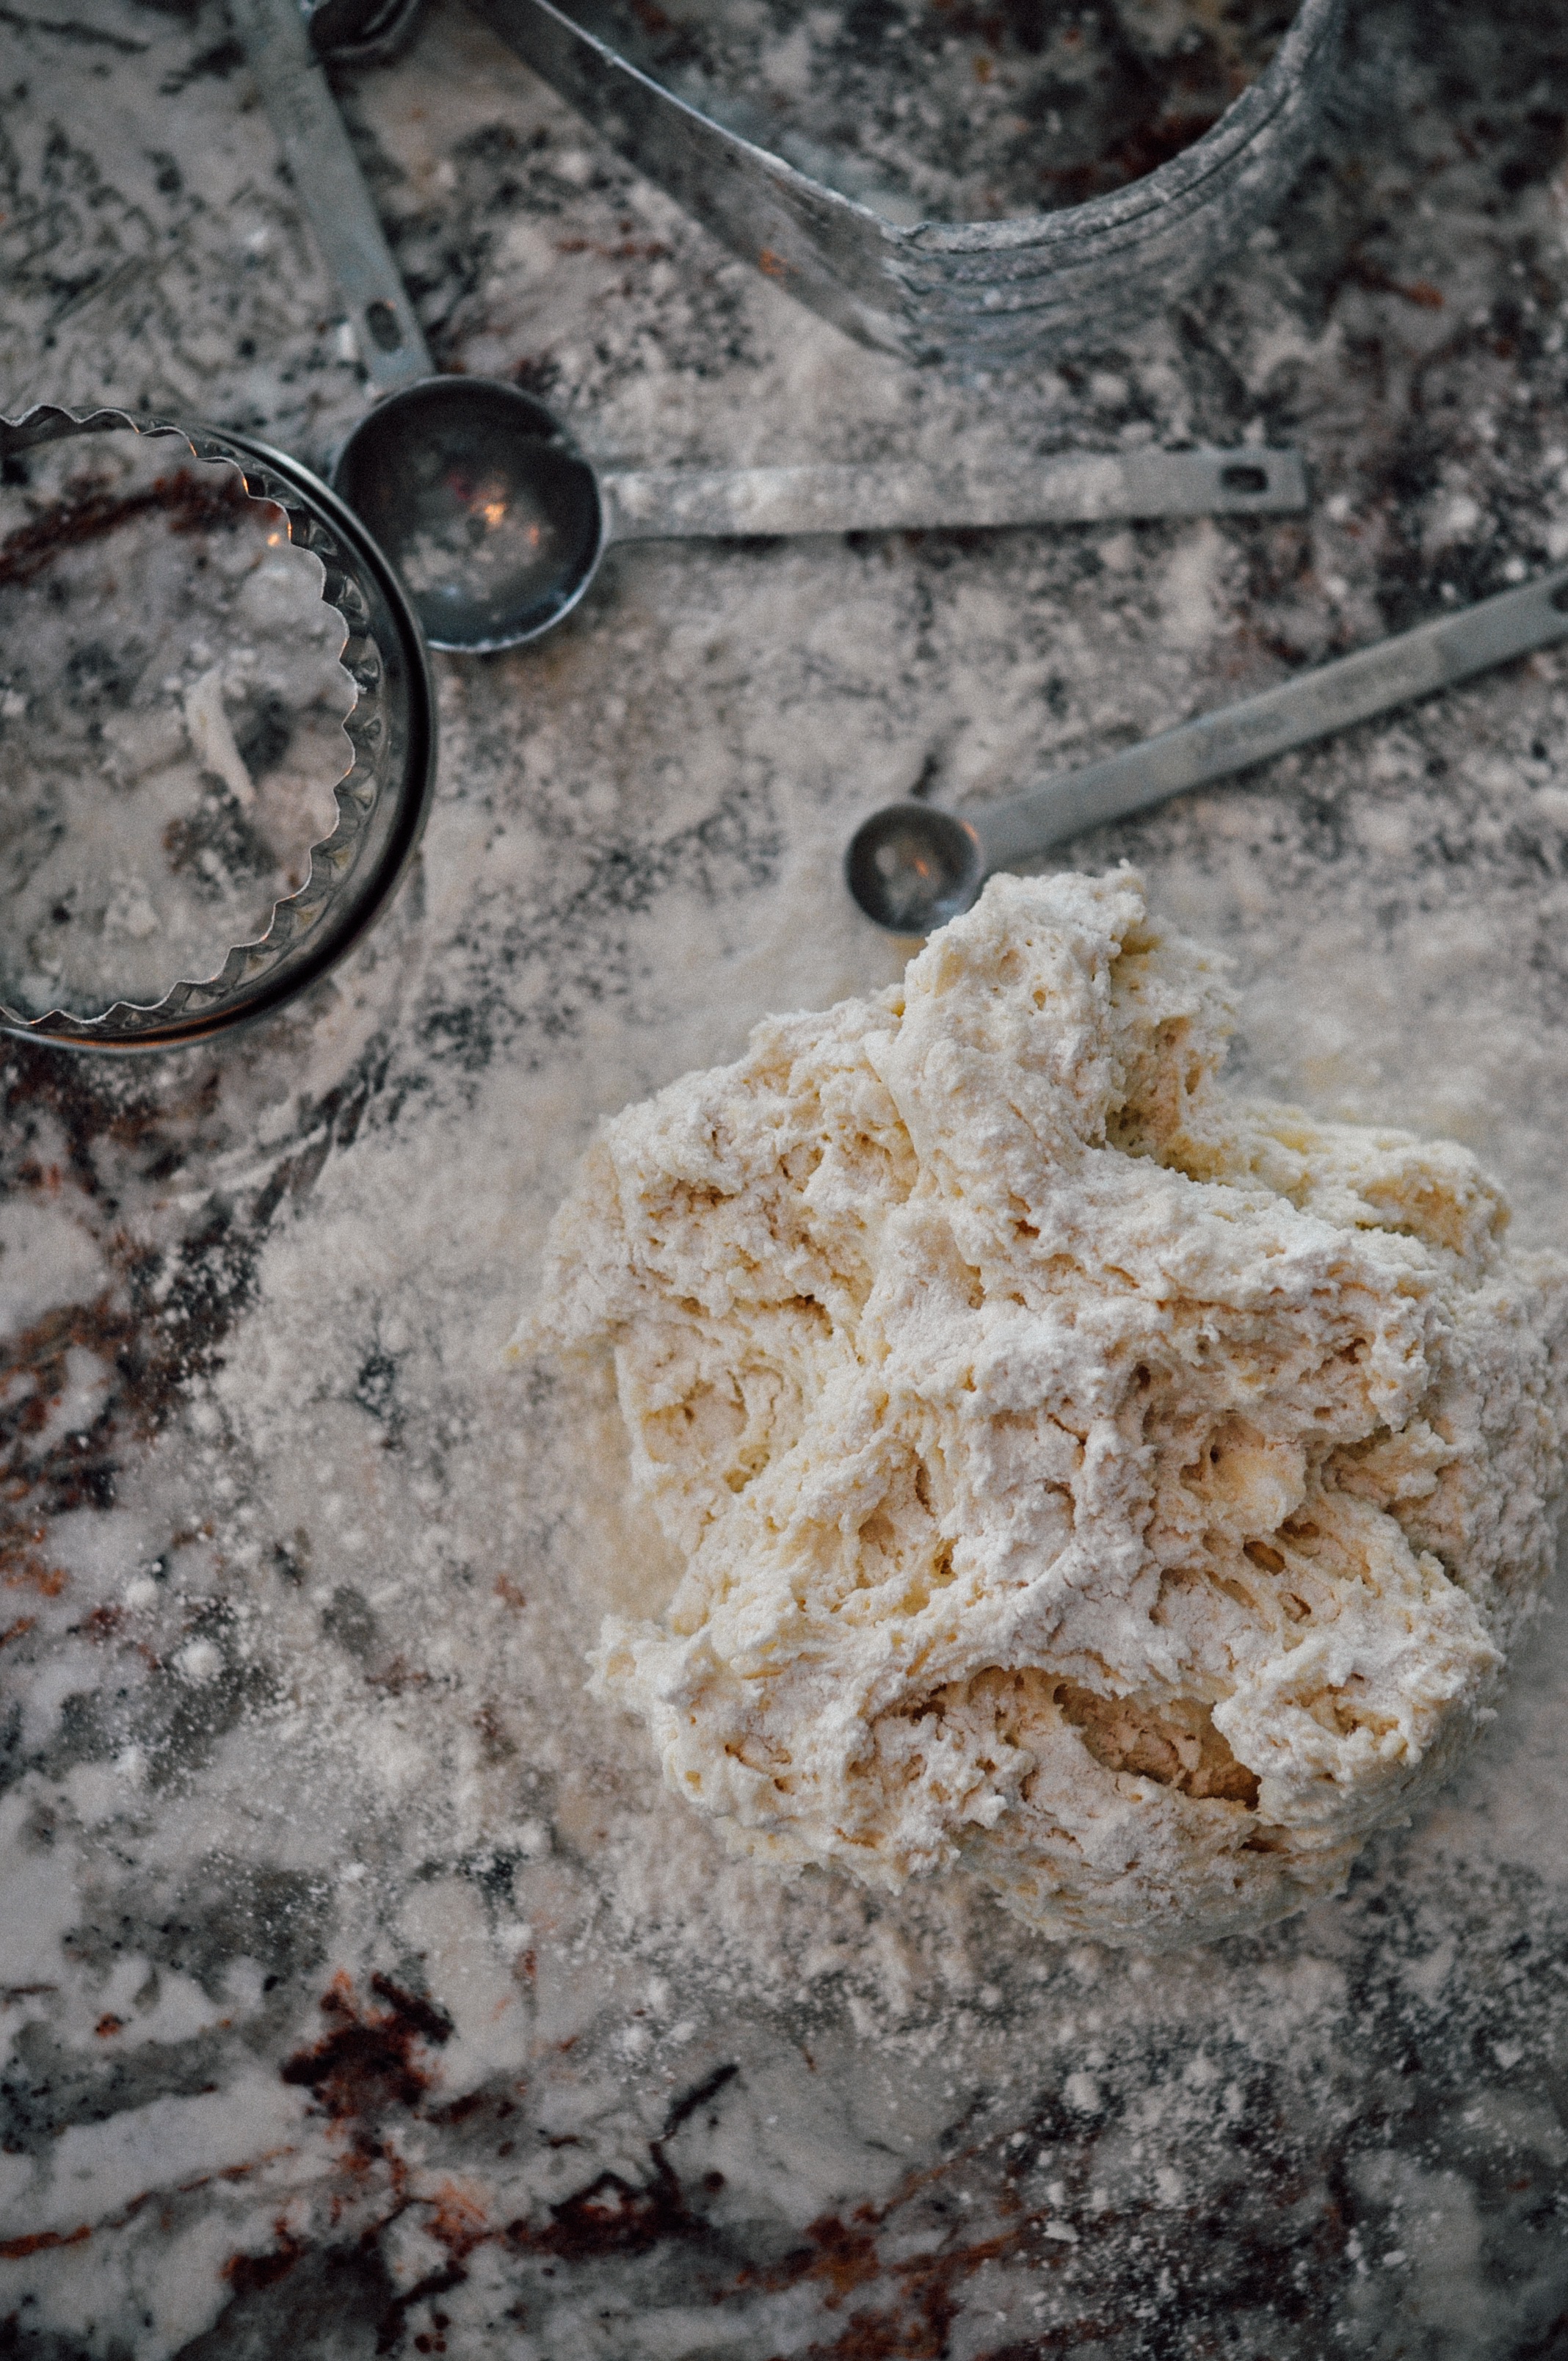
Back home after the races and it was time to play around with some Virginia Ham Biscuits! Buttermilk biscuits you can melt into. Secret ingredient, oh… it’s the duck fat… and why stop there with the artistic “license”…? While I dressed some of the biscuits with a homemade honey mustard (recipe follows), I heaped caramelized onion jam on top of the shaved ham of the next little sandwich I devoured. It was lovely.

Virginia Ham Biscuits
2016-11-20 21:28:56
Yields 8
Virginia ham biscuits. A southern staple. Brunch, lunch, dinner, tailgate party, reception...whatever the occasion, you'll find these simple, tasty sandwiches on the menu.
Prep Time
15 min
Cook Time
12 min
Total Time
30 min
Nutrition Facts
Serving Size
142g
Yields
8
Amount Per Serving
Calories 317
Calories from Fat 99
% Daily Value *
Total Fat 11g
17%
Saturated Fat 5g
23%
Trans Fat 0g
Polyunsaturated Fat 2g
Monounsaturated Fat 4g
Cholesterol 54mg
18%
Sodium 933mg
39%
Total Carbohydrates 35g
12%
Dietary Fiber 1g
5%
Sugars 5g
Protein 20g
Vitamin A
3%
Vitamin C
0%
Calcium
18%
Iron
11%
* Percent Daily Values are based on a 2,000 calorie diet. Your Daily Values may be higher or lower depending on your calorie needs.
Ingredients
- Classic Buttermilk Biscuits
- 2 cups all-purpose flour
- 4 teaspoons baking powder
- 1/4 teaspoon baking soda
- 1 teaspoon salt
- 1 teaspoon sugar
- 2 tablespoons, cold, unsalted butter (cut in small pieces)
- 2 tablespoons duck fat (or lard)
- 3/4 to 1 cup cold, whole buttermilk
- 1 pound Virginia Ham, thinly sliced
Condiment of your choice
- Honey mustard (1/4 cup whole-grain mustard, 1 tablespoon honey, 1 teaspoon dijon)
- Plain mustard (whole-grain or dijon recommended)
- or...get creative...
- Caramelized onion jam
- Your favorite chutney (fruit chutneys pair nicely)
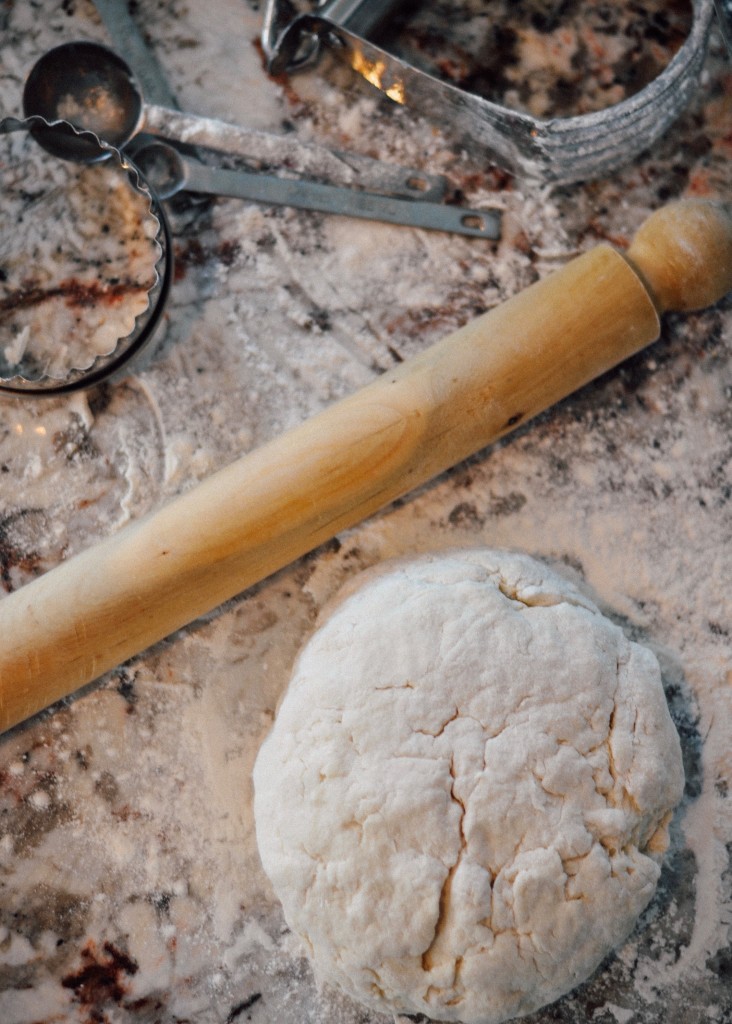
Instructions
- Preheat the oven to 450 degrees.
- Sift the flour, baking powder, baking soda, salt and sugar together into a large bowl. Blend the butter pieces and duck fat (or lard) into the dry mixture with a pastry blender (or two knives) until you achieve a course meal with flakes of butter/fat throughout.
- Make a well in the center of the flour mixture, then slowly pour the buttermilk in the center while stirring the flour into the "pool" of buttermilk. Depending on the humidity levels, it may only take 3/4 cup buttermilk (rainy or very humid day) to 1 cup buttermilk (clear, dry day). Stir in the buttermilk until a dough forms and no dry pieces are left, but it should not be overly wet either.
- Turn the dough out onto a floured work surface. Roll out the dough until it is 1/2 inch thick. Use a biscuit cutter (between 2-3 inches...I use a 3 inch cutter for bigger biscuits) to cut out rounds and place on a cookie sheet. Gather dough, form, rollout, and cut out biscuits until you're out of dough. Don't over handle the dough as the butter starts to melt. You can dust a little flour over the dough if it gets too sticky.
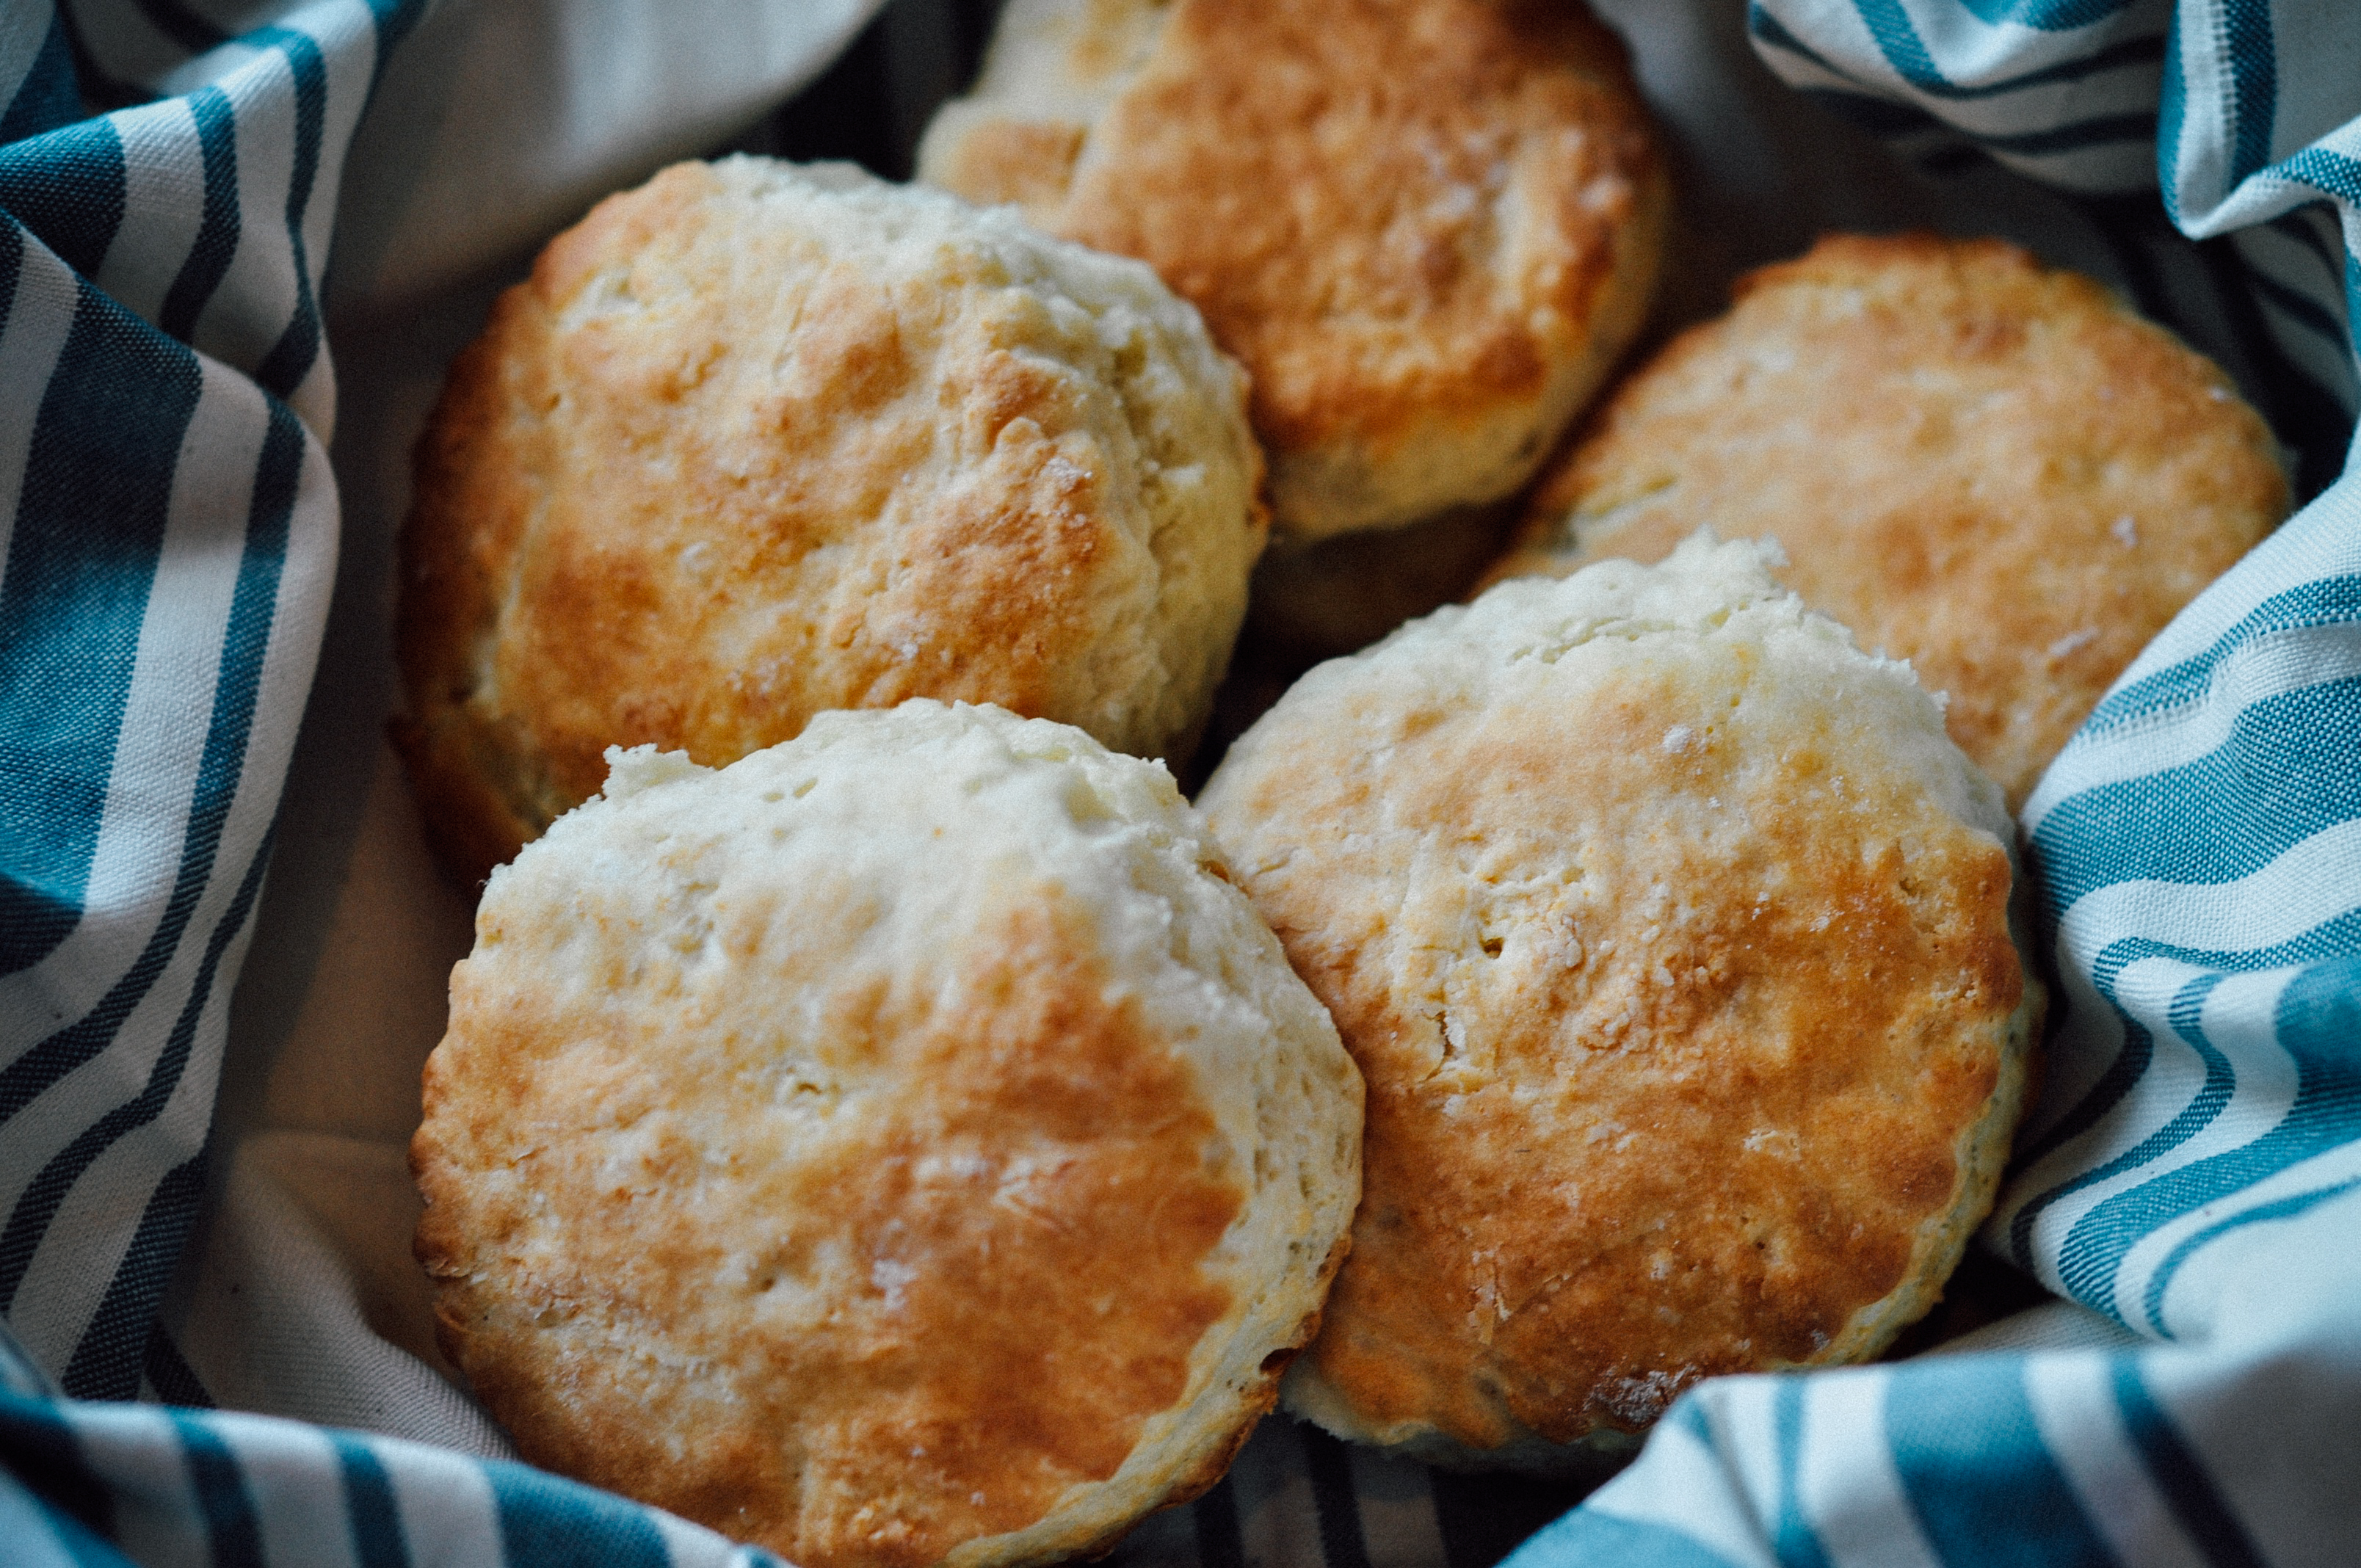
- Place the biscuit rounds on the cookie sheet so they are lightly touching one another. They'll help each other "climb" as they bake. Friendly biscuits...
- Bake for 10-12 minutes until the biscuits have risen and the tops have started to brown. Remove from the oven, brush with melted butter (if desired).
- When slightly cooled from the oven, slice the biscuits open, pile high with thinly sliced Virginia ham, spread honey mustard (or condiment of your choice) on the top biscuit half, and enjoy! Serve warm or at room temperature.
Adapted from The Southerner's Cookbook
Adapted from The Southerner's Cookbook
TraveLynn Eats https://www.travelynneats.com/